Everything you need to
close and submit a clean deal.
The central hub for every Mayer dealer and sales rep.
Perfect Packet Guide
All required docs and steps for a complete deal package.
Aurora Walkthroughs
Login, design, change orders, proposals — everything you do inside Aurora.
Lender Cheat Sheet
Loan options, credit score needs, and lender guidelines.
Product Offerings
Details on panels, inverters, storage, and financing types.
Build Within Tolerance
Guide to Aurora design vs. install variance thresholds.
Site Survey Submission
Steps to submit site survey data through Mayer's portal.
Main Panel Upgrades
When and why electrical panel upgrades may be required.
Product Spec Sheets
Manufacturer product data for modules, inverters, storage.
Perfect Packet Guide
Every doc required to push a project cleanly into design, permitting, and install.
A Perfect Packet means every part of your customer's project is complete, accurate, and ready to move smoothly through the next stages. Each step below prevents delays and follow-ups from the Mayer team.
Signed Lender Document
All financing paperwork fully completed and signed by both homeowner and lender. Every page finalized, loan terms confirmed.
Signed Install Agreement (IA)
Signed by homeowner and sales org. Name, address, system size, and price must match the lender docs exactly.
Lender Welcome Call
Homeowner must complete the lender's welcome call before the project moves forward. Prep them to expect it early.
Mayer Welcome Call
After the lender call, the homeowner completes Mayer's welcome call to confirm contact info and project expectations.
Completed Site Survey Form
Fully filled out with all required photos and site-specific answers. Use the Mayer site survey link provided for each project.
Utility Bill (All Pages)
Clear image or PDF of the full utility bill, all pages. Must show homeowner name, address, account number, within 12 months.
Recommended Additions
- Photo of Homeowner ID — confirms identity and streamlines financing verification.
- Additional Notes — anything that affects design, access, or scheduling (roof updates, preferred contact times, health considerations).
Aurora Solar
Platform-specific walkthroughs. Everything you do inside Aurora — from login to proposal.
Login To Aurora Solar
Setup instructions for using the Aurora Solar platform after onboarding.
Design a System
Step-by-step walkthrough of designing in Aurora, within Mayer's tolerance.
Send Documents
Generate and send project agreements through Aurora's Sales Mode.
Submit a Change Order
Formally submit design or financial updates after a project is created.
Login To Aurora Solar
Setup instructions for using the Aurora Solar platform after onboarding.
Once your organization has been onboarded, you'll receive an invitation email from Aurora Solar to set up your account. Follow these steps to activate access and start creating projects.
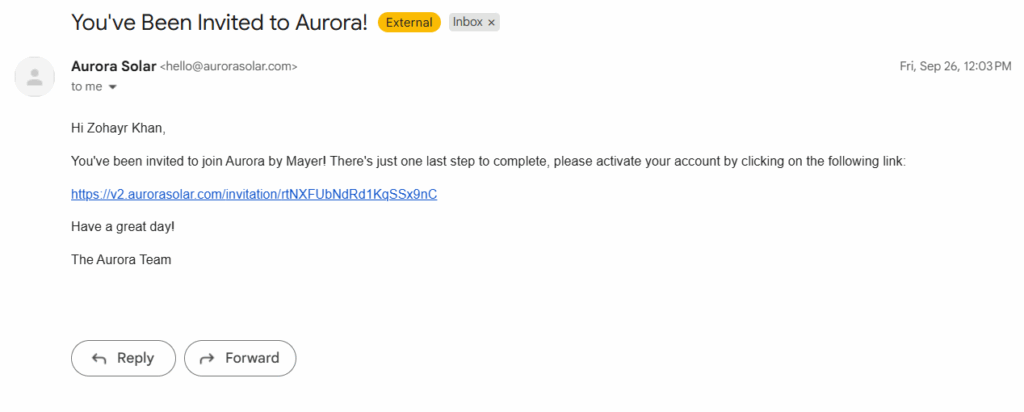
1 Check your email for the Aurora invite
Look for an email from Aurora Solar with your invitation link. Check spam/promotions if missing. Invite links may expire — request a new one from your Mayer contact if needed.
2 Activate your account
Click the activation link in the email. You'll set a password and confirm your details.

3 Log in to Aurora
Once activated, log in with your new credentials.

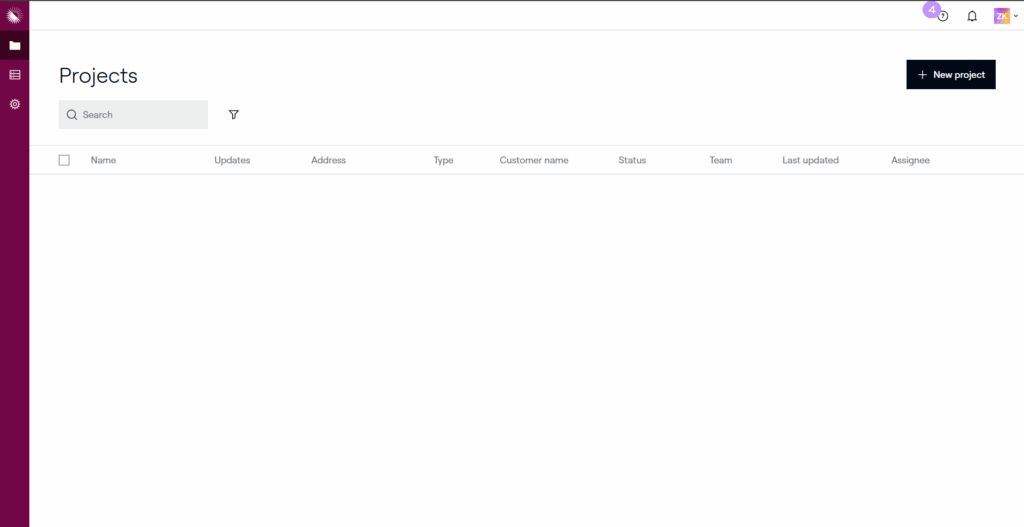
4 Access your organization's workspace
You now have access to your organization's Aurora dashboard. Create new projects, edit existing ones, and collaborate with your team.
Design a System in Aurora
Step-by-step walkthrough of designing a system within Mayer's tolerance thresholds.
Sending Documents Through Sales Mode
Generate and send project agreements directly from Aurora once a design is finalized.
Once your design is finalized and ready for client approval, you can generate and send project agreements directly through Aurora.
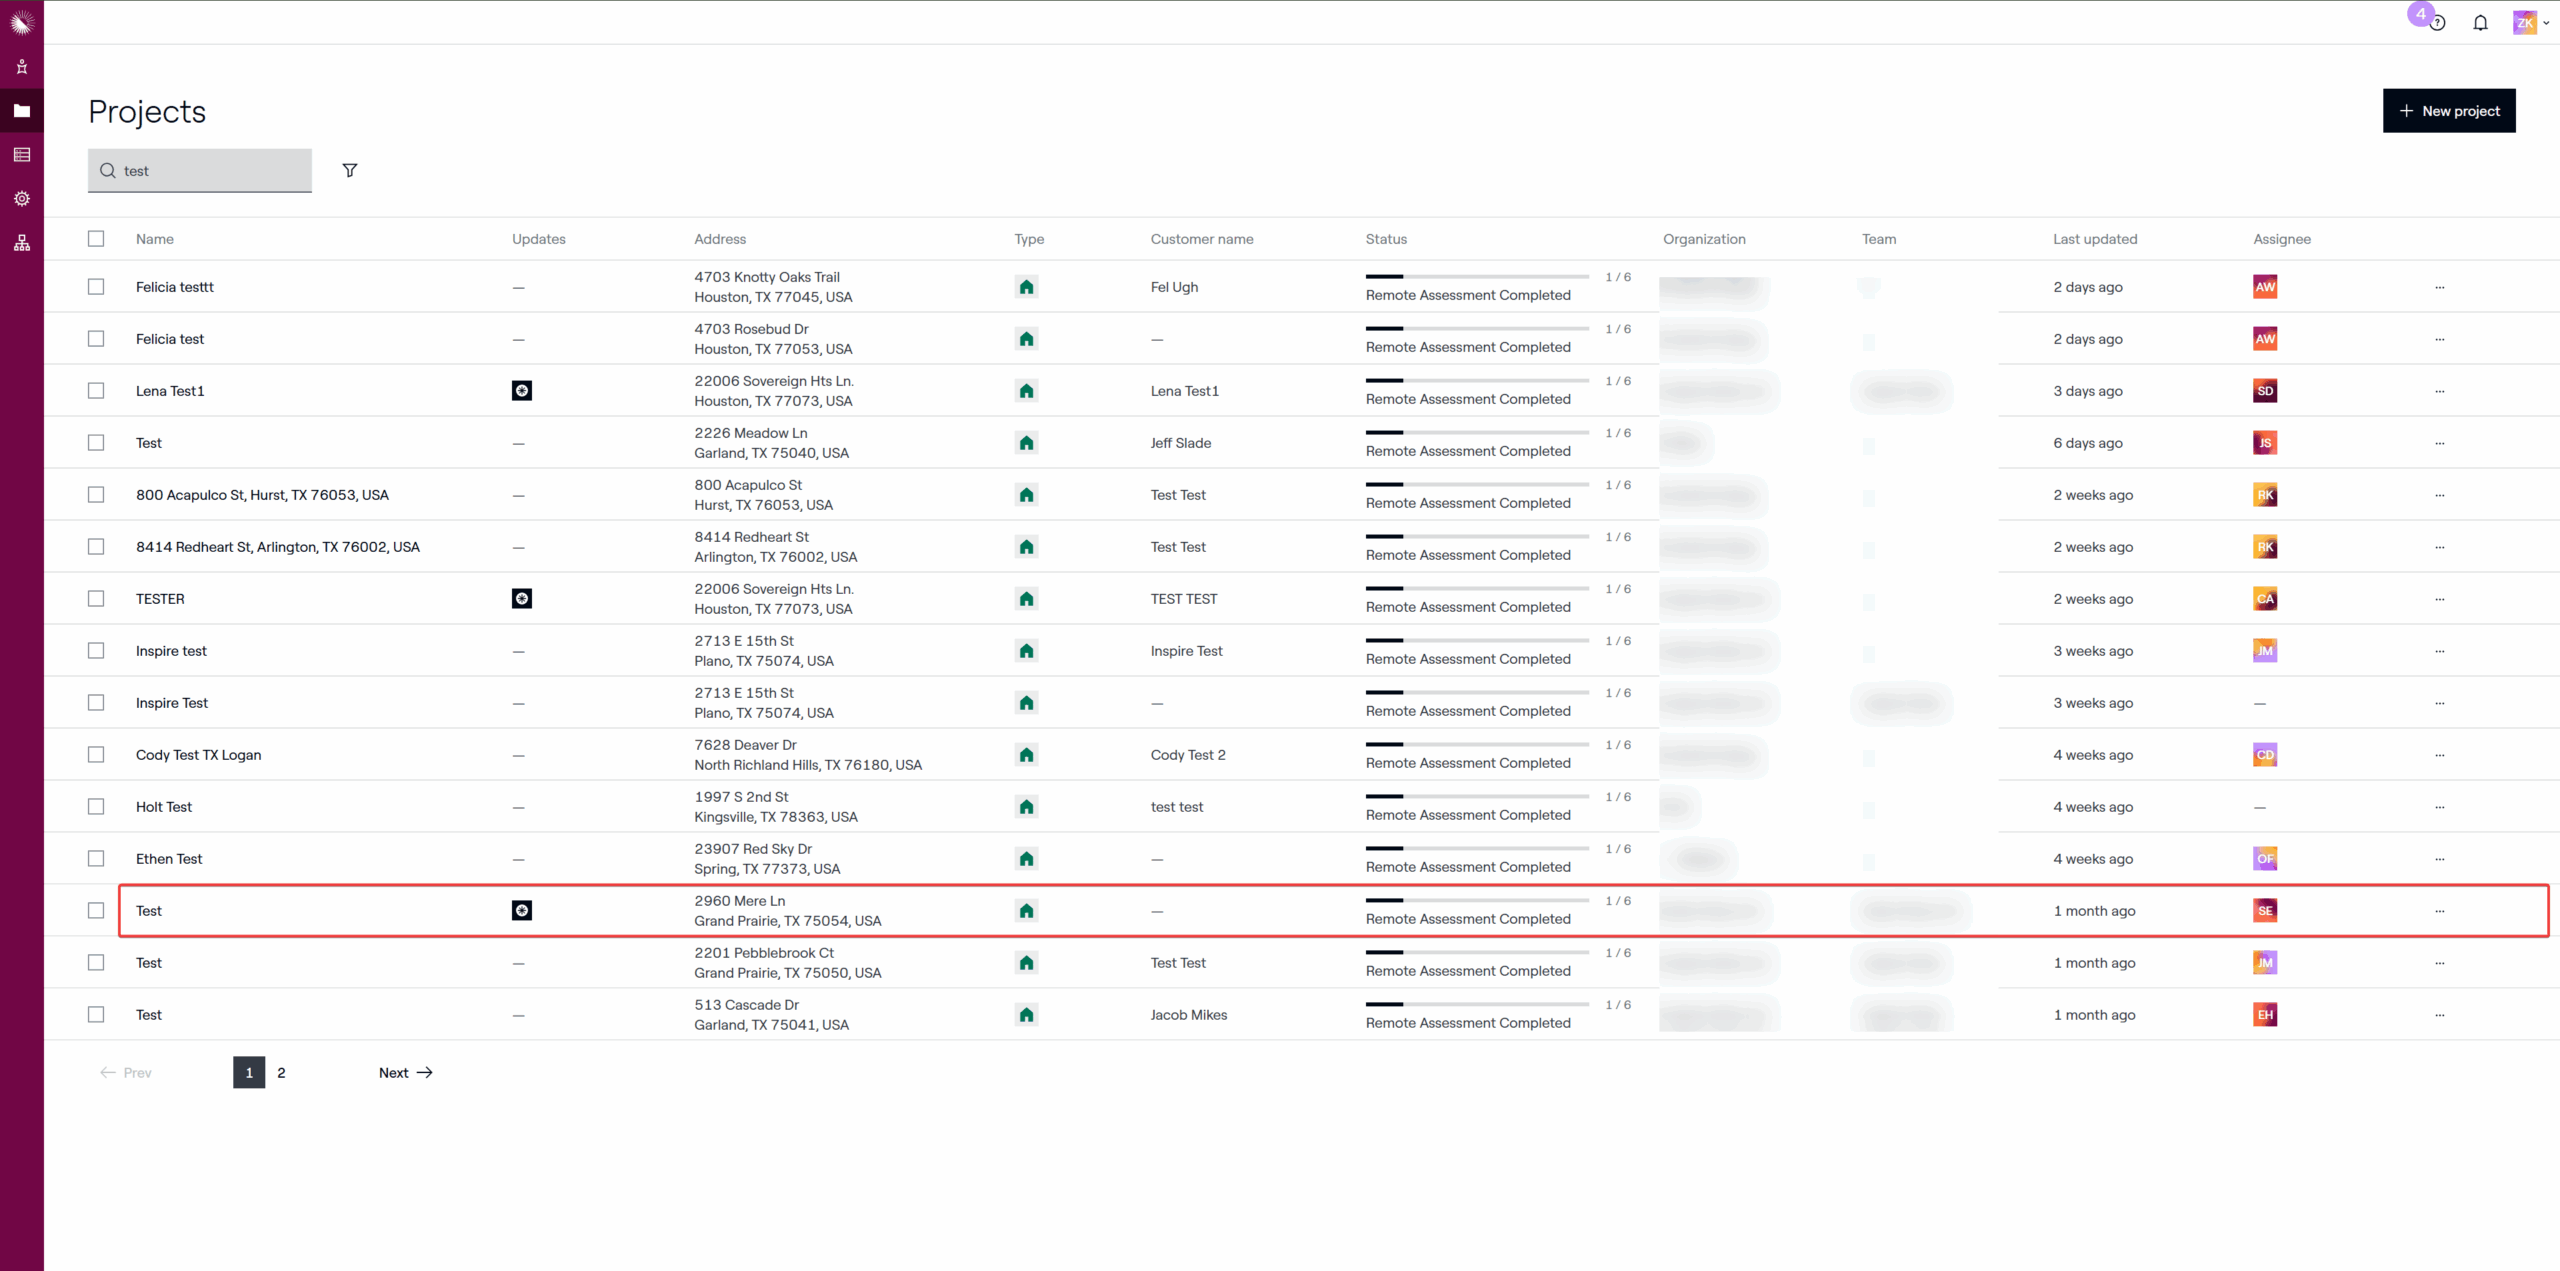
1 Open the Deal Dashboard
From your Projects dashboard, locate the project or homeowner deal you want to send documents for.
Click to open the deal and view the full project record.
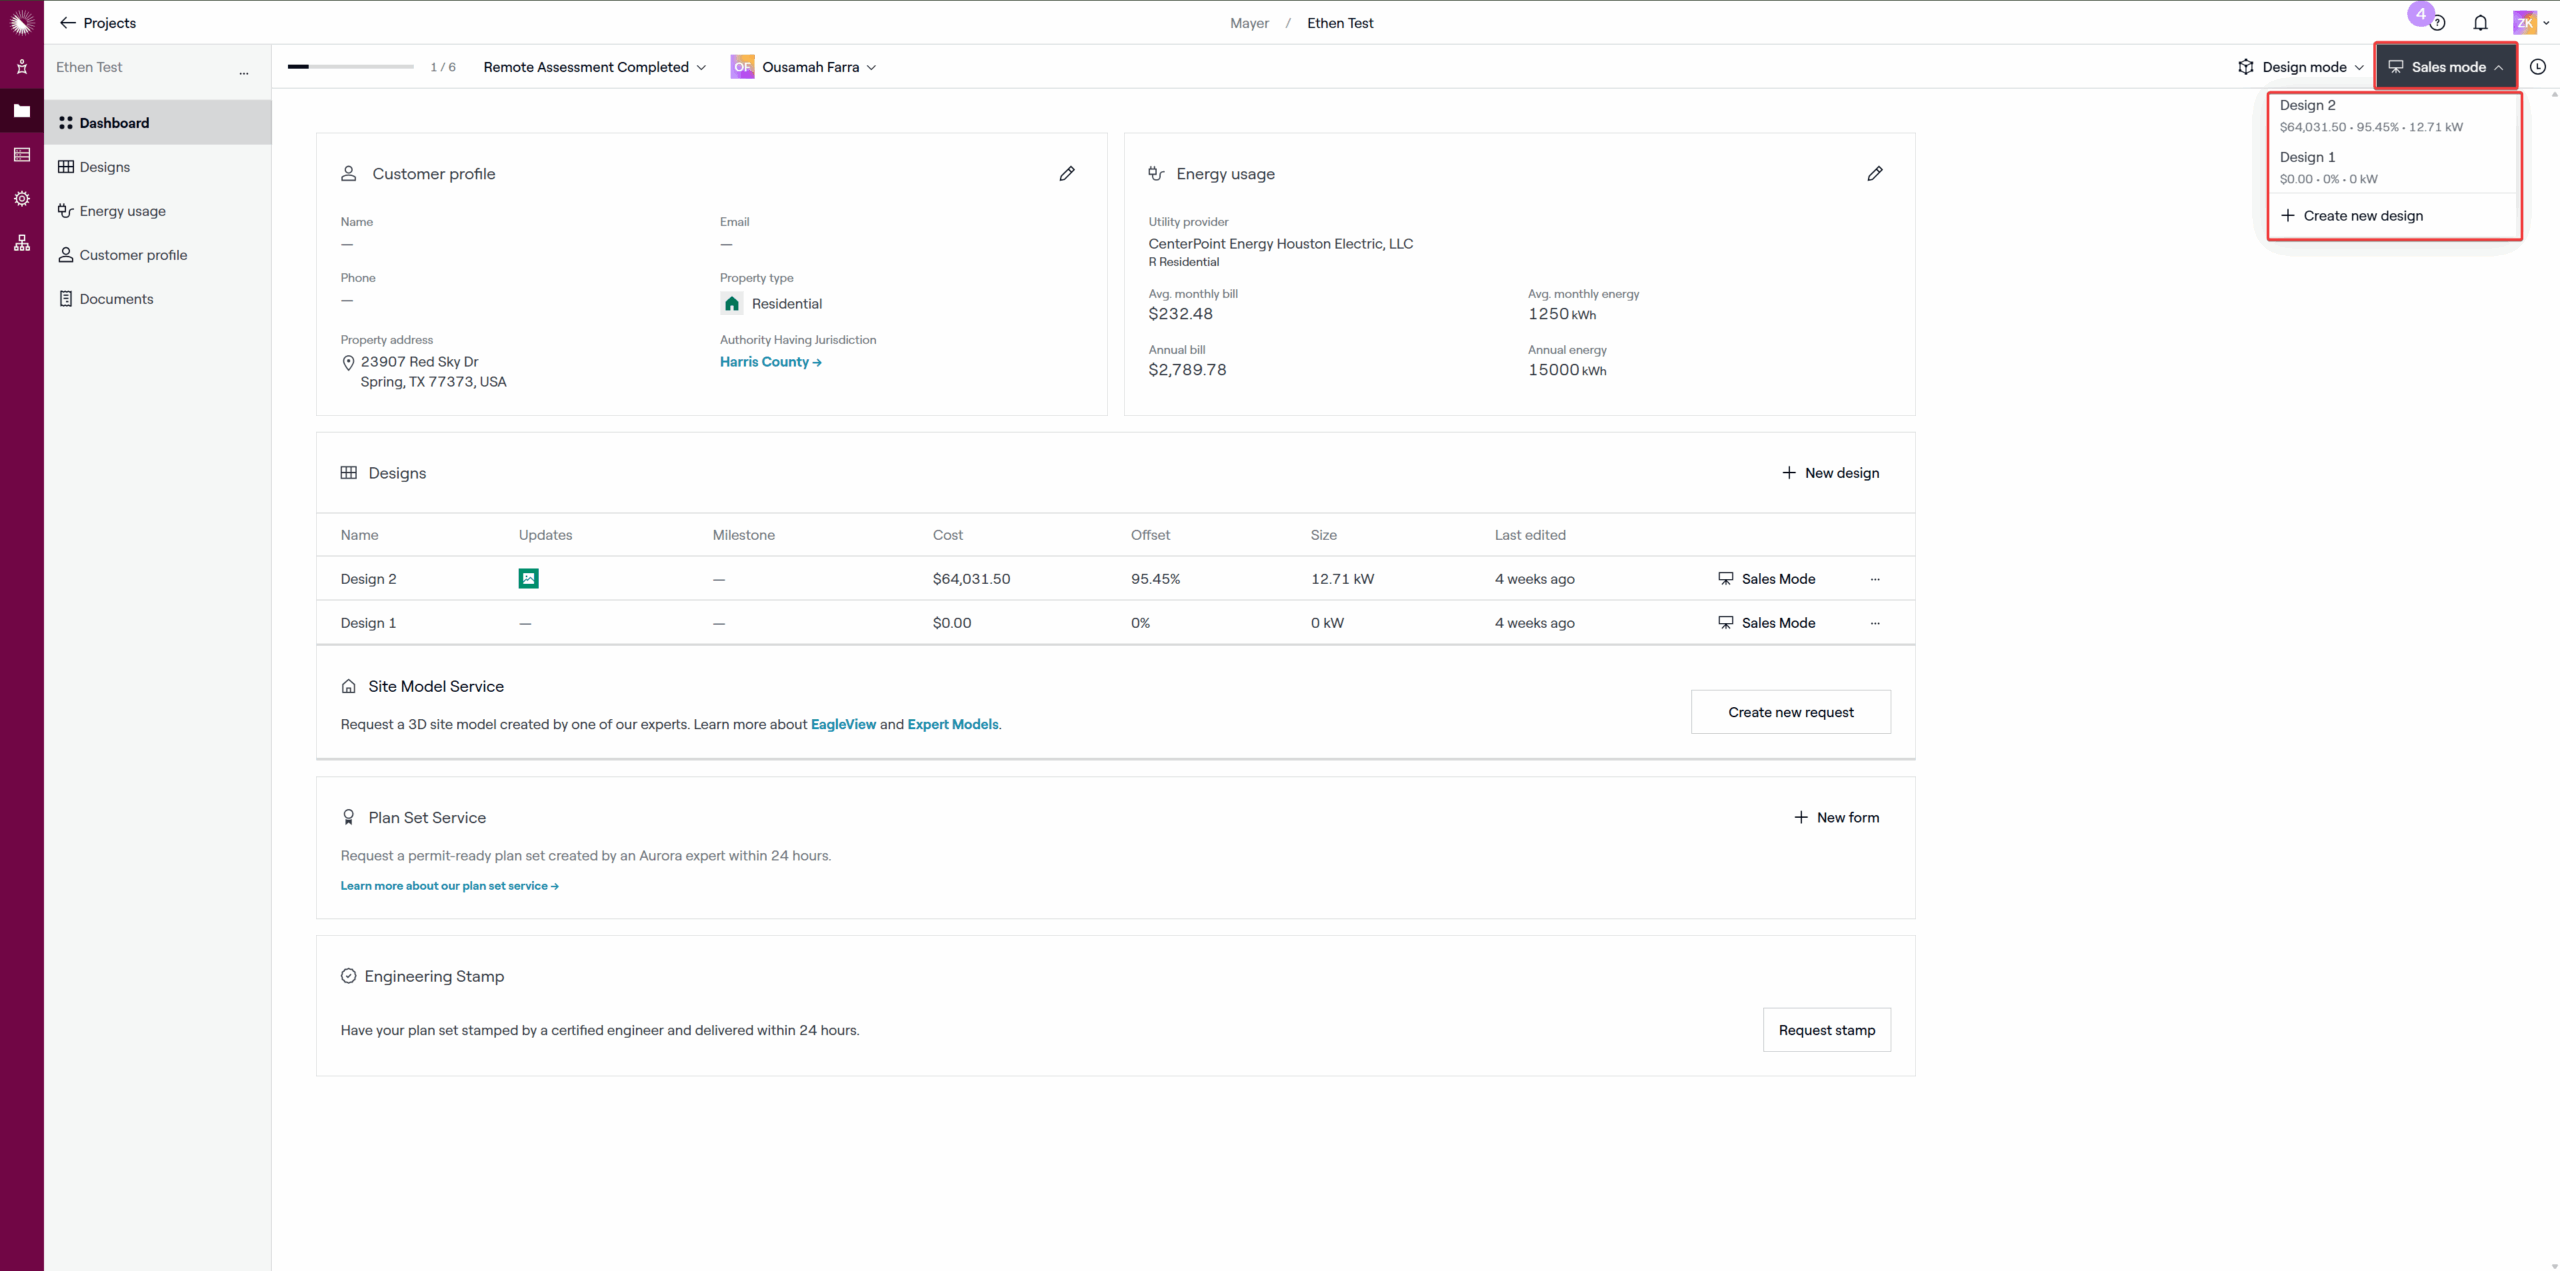
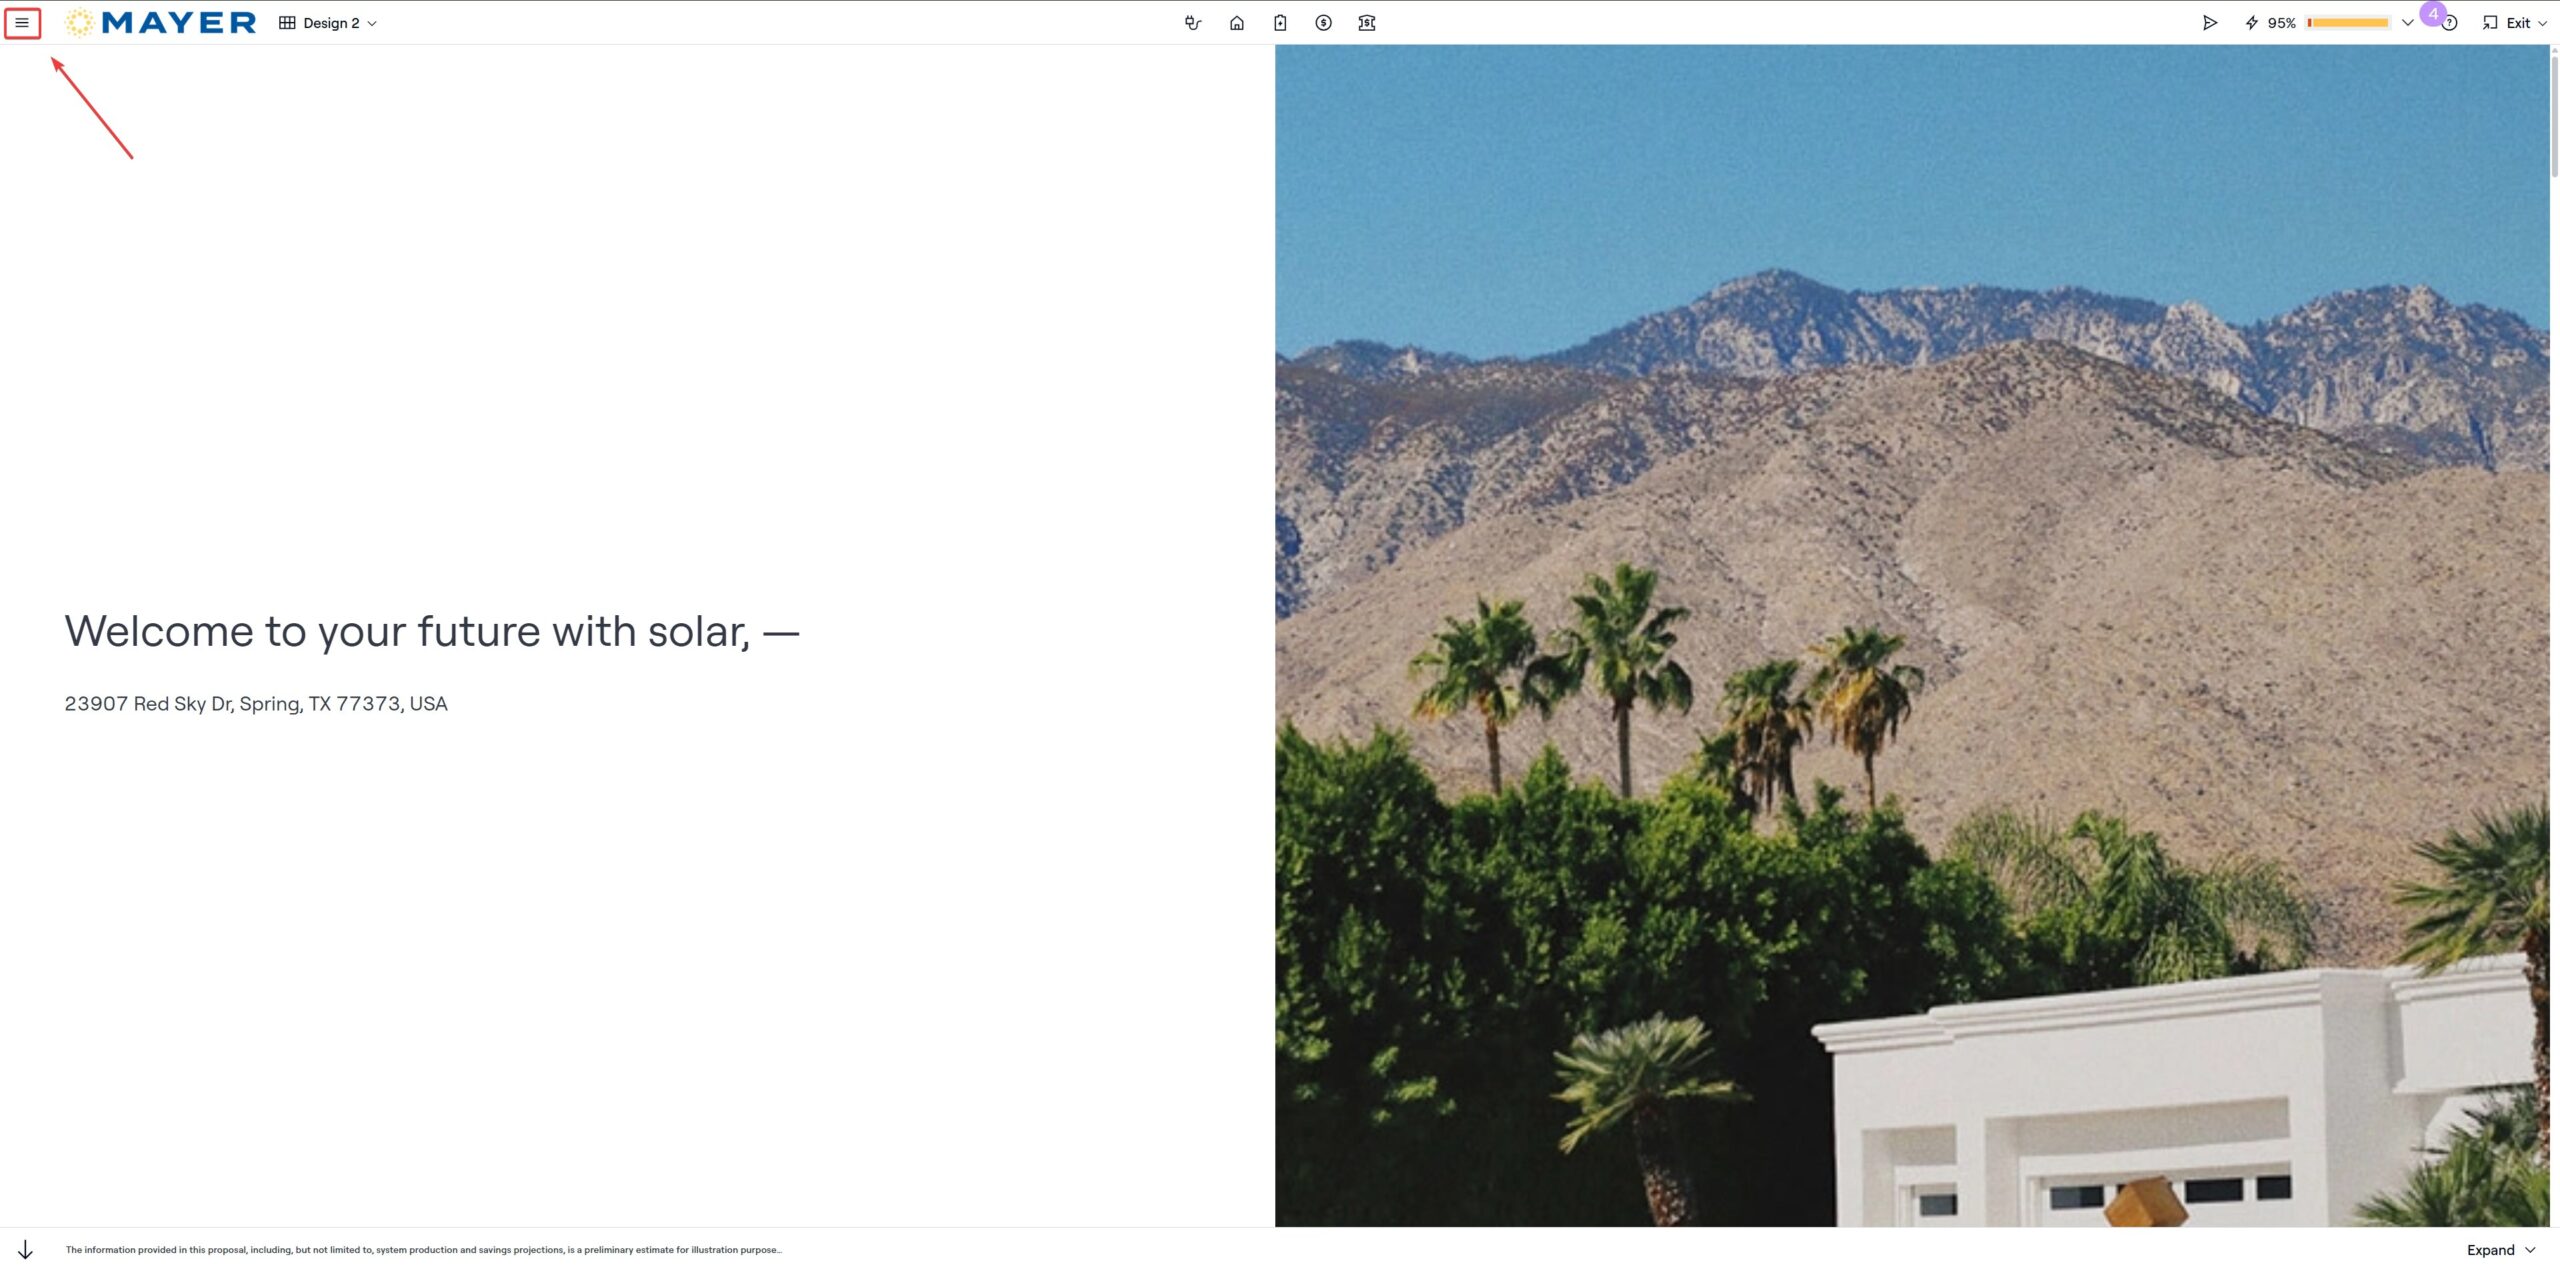
2 Launch Sales Mode
In the top right corner, click Sales Mode, then select Your Design to open the interactive proposal view.
This opens a full-screen version of the proposal that you can present to the homeowner.
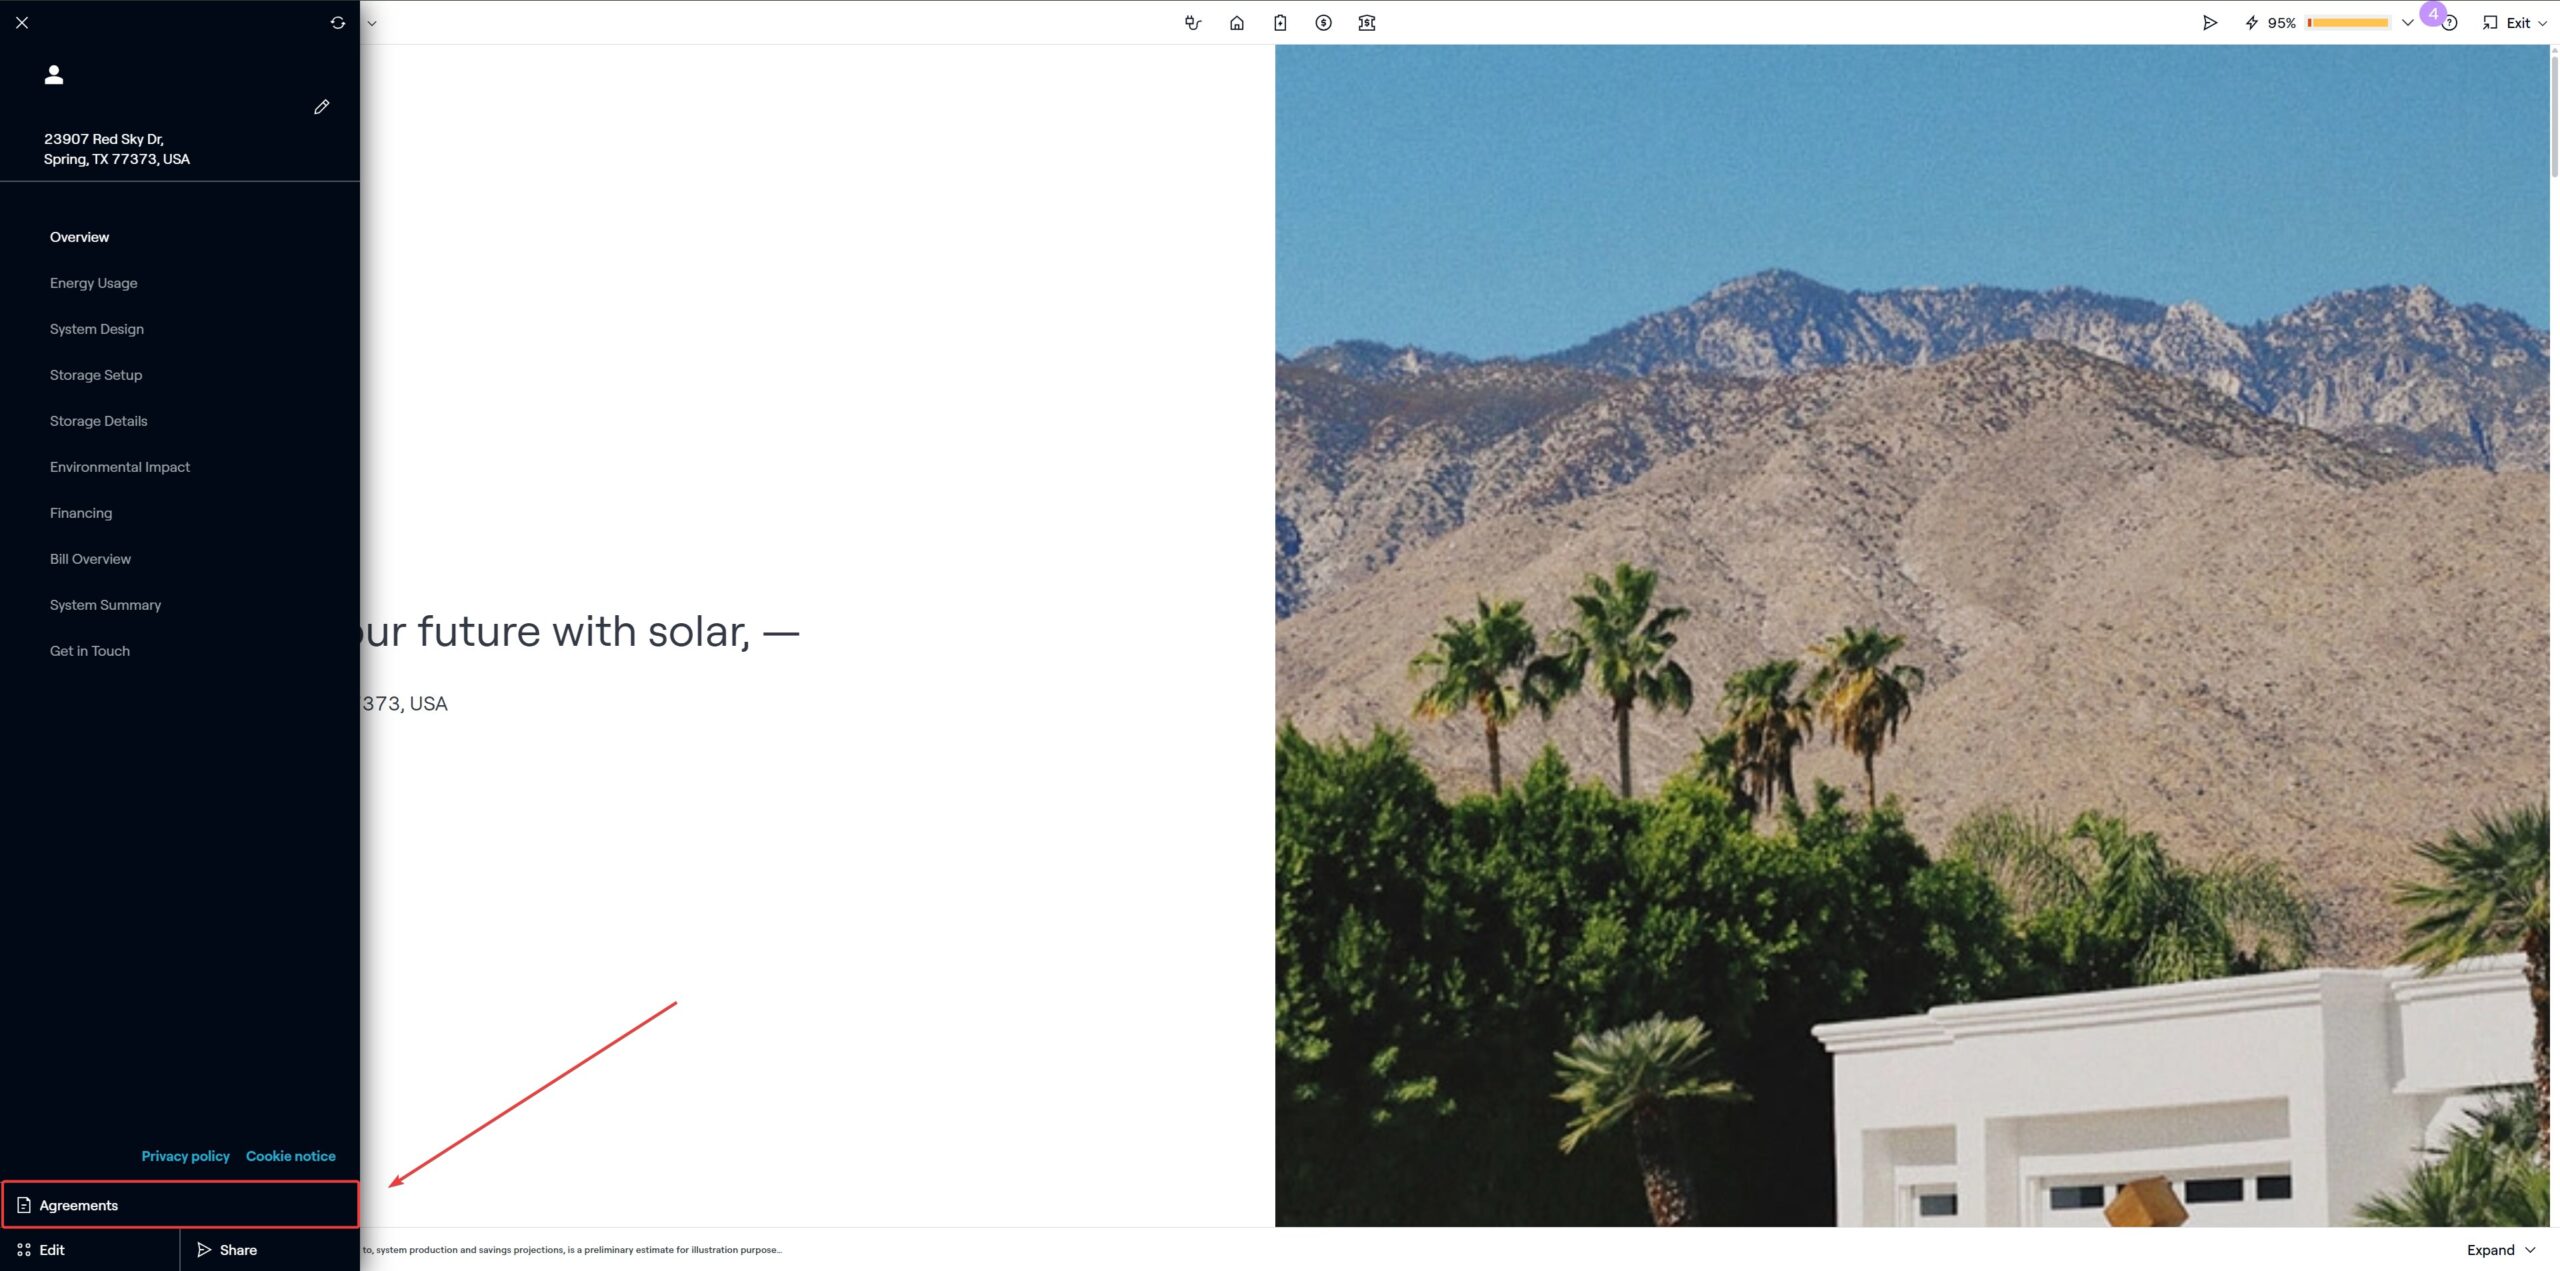
3 Open the Agreements Menu
In the top left corner, click the Menu icon (☰) to expand additional options. Select Agreements towards the bottom of the list.
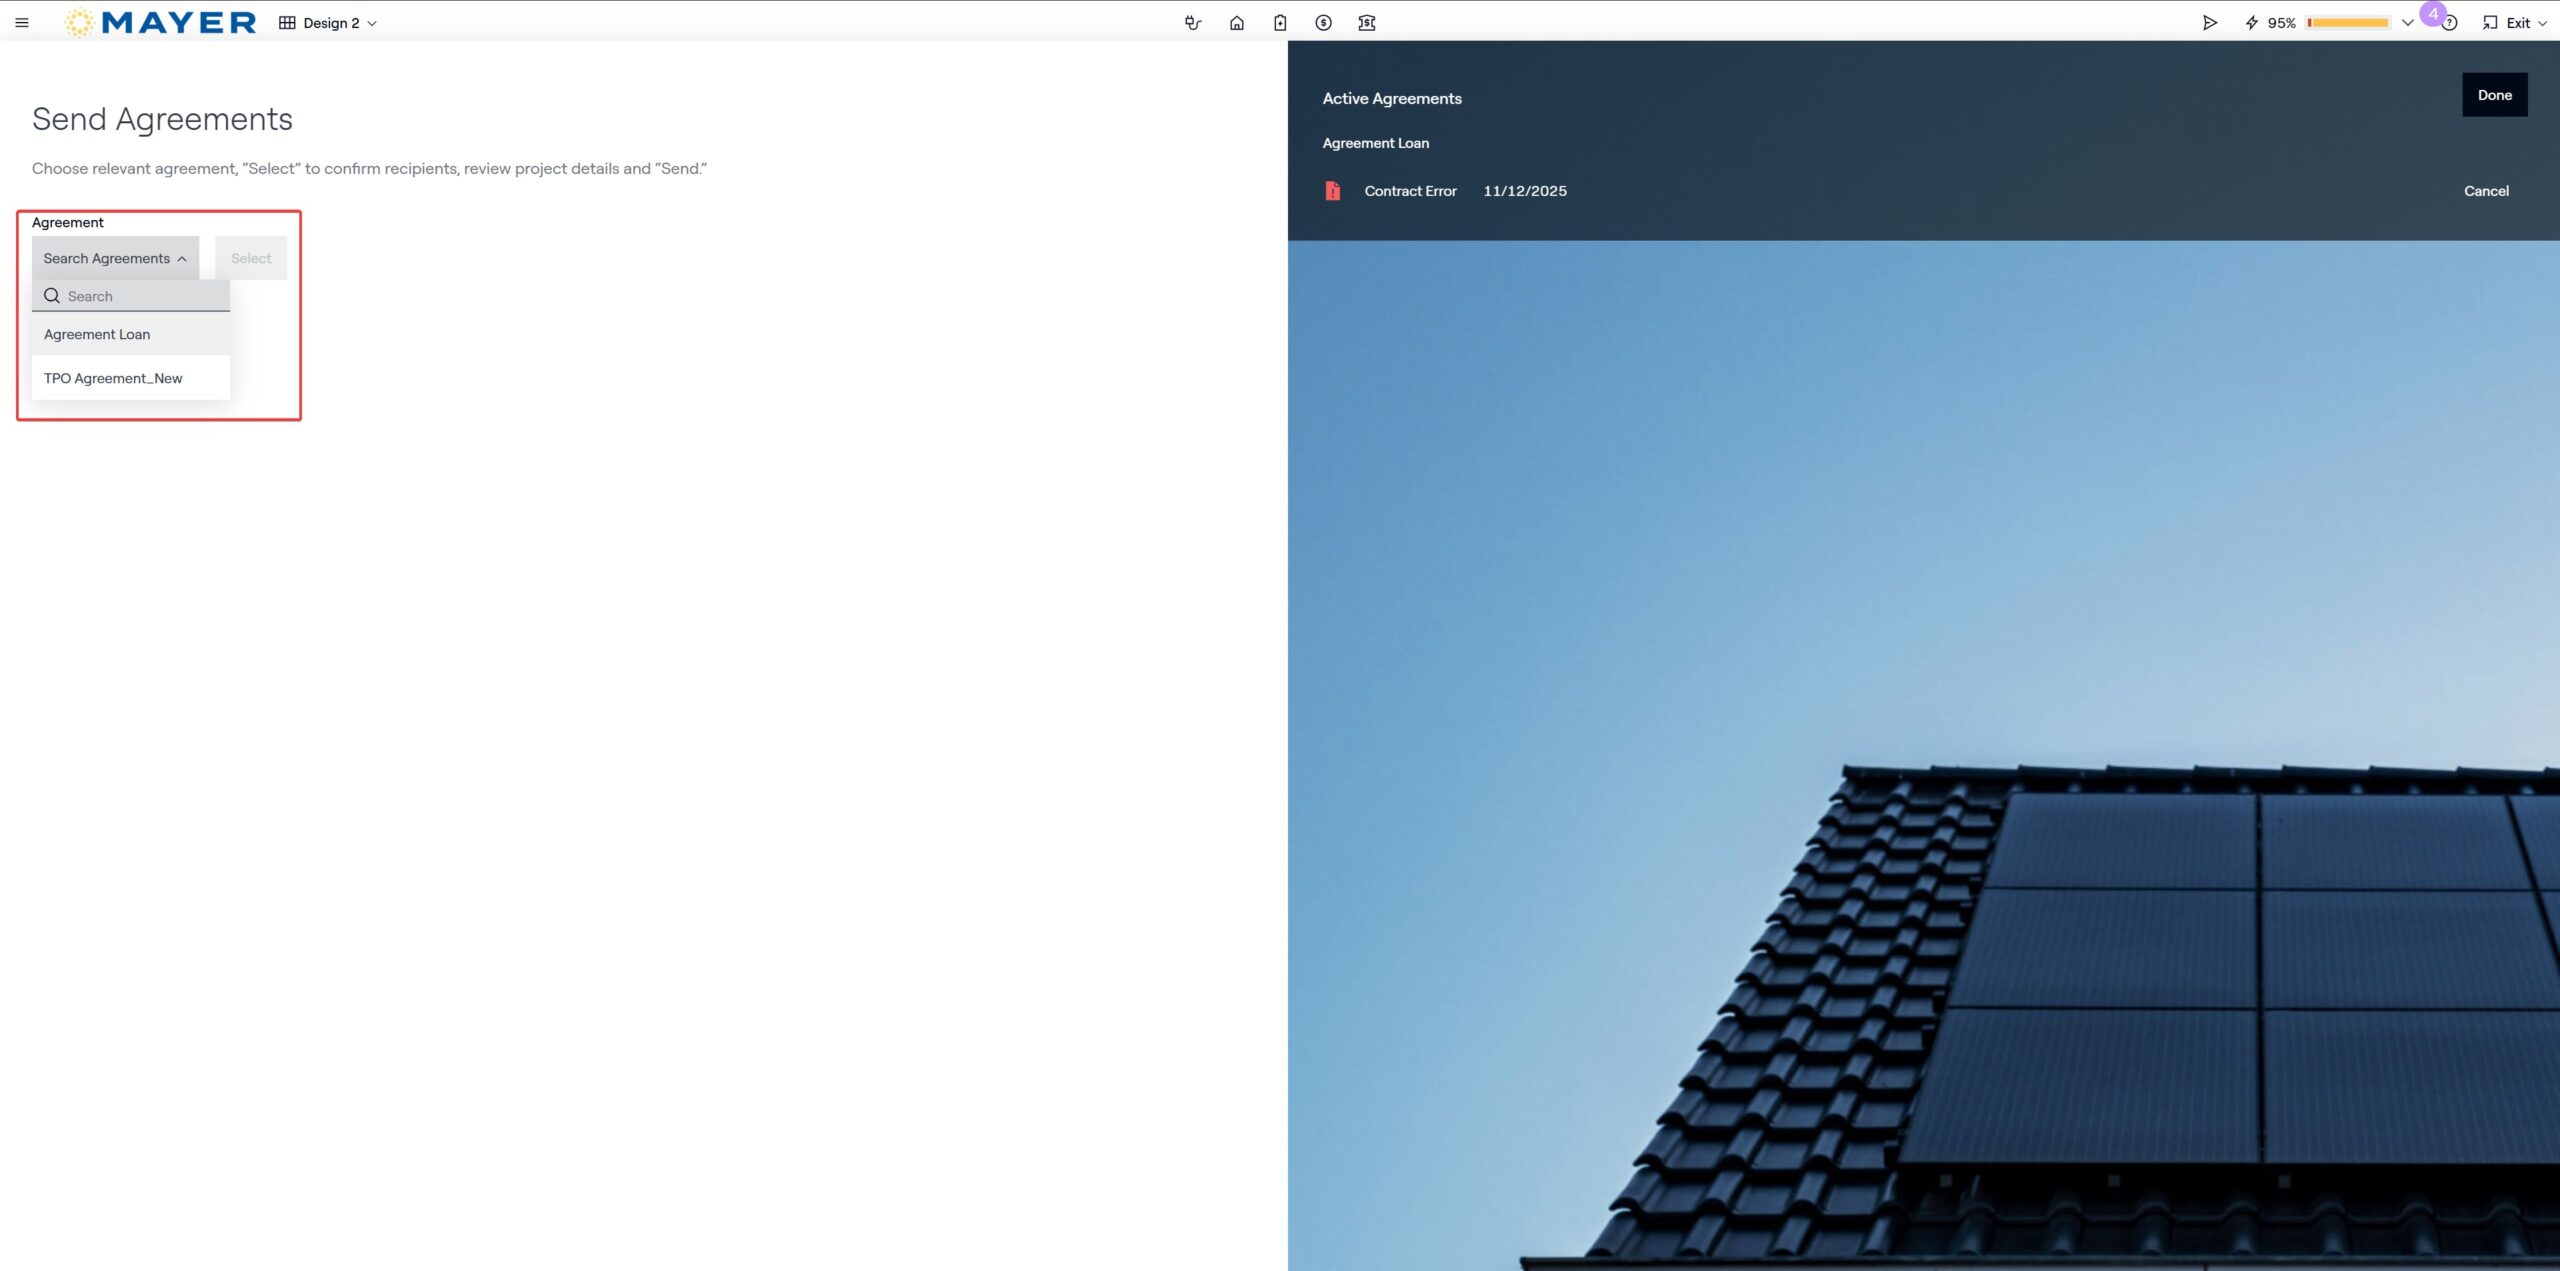
4 Choose Agreement Type
From the Agreement Type dropdown, select the appropriate option for the project.
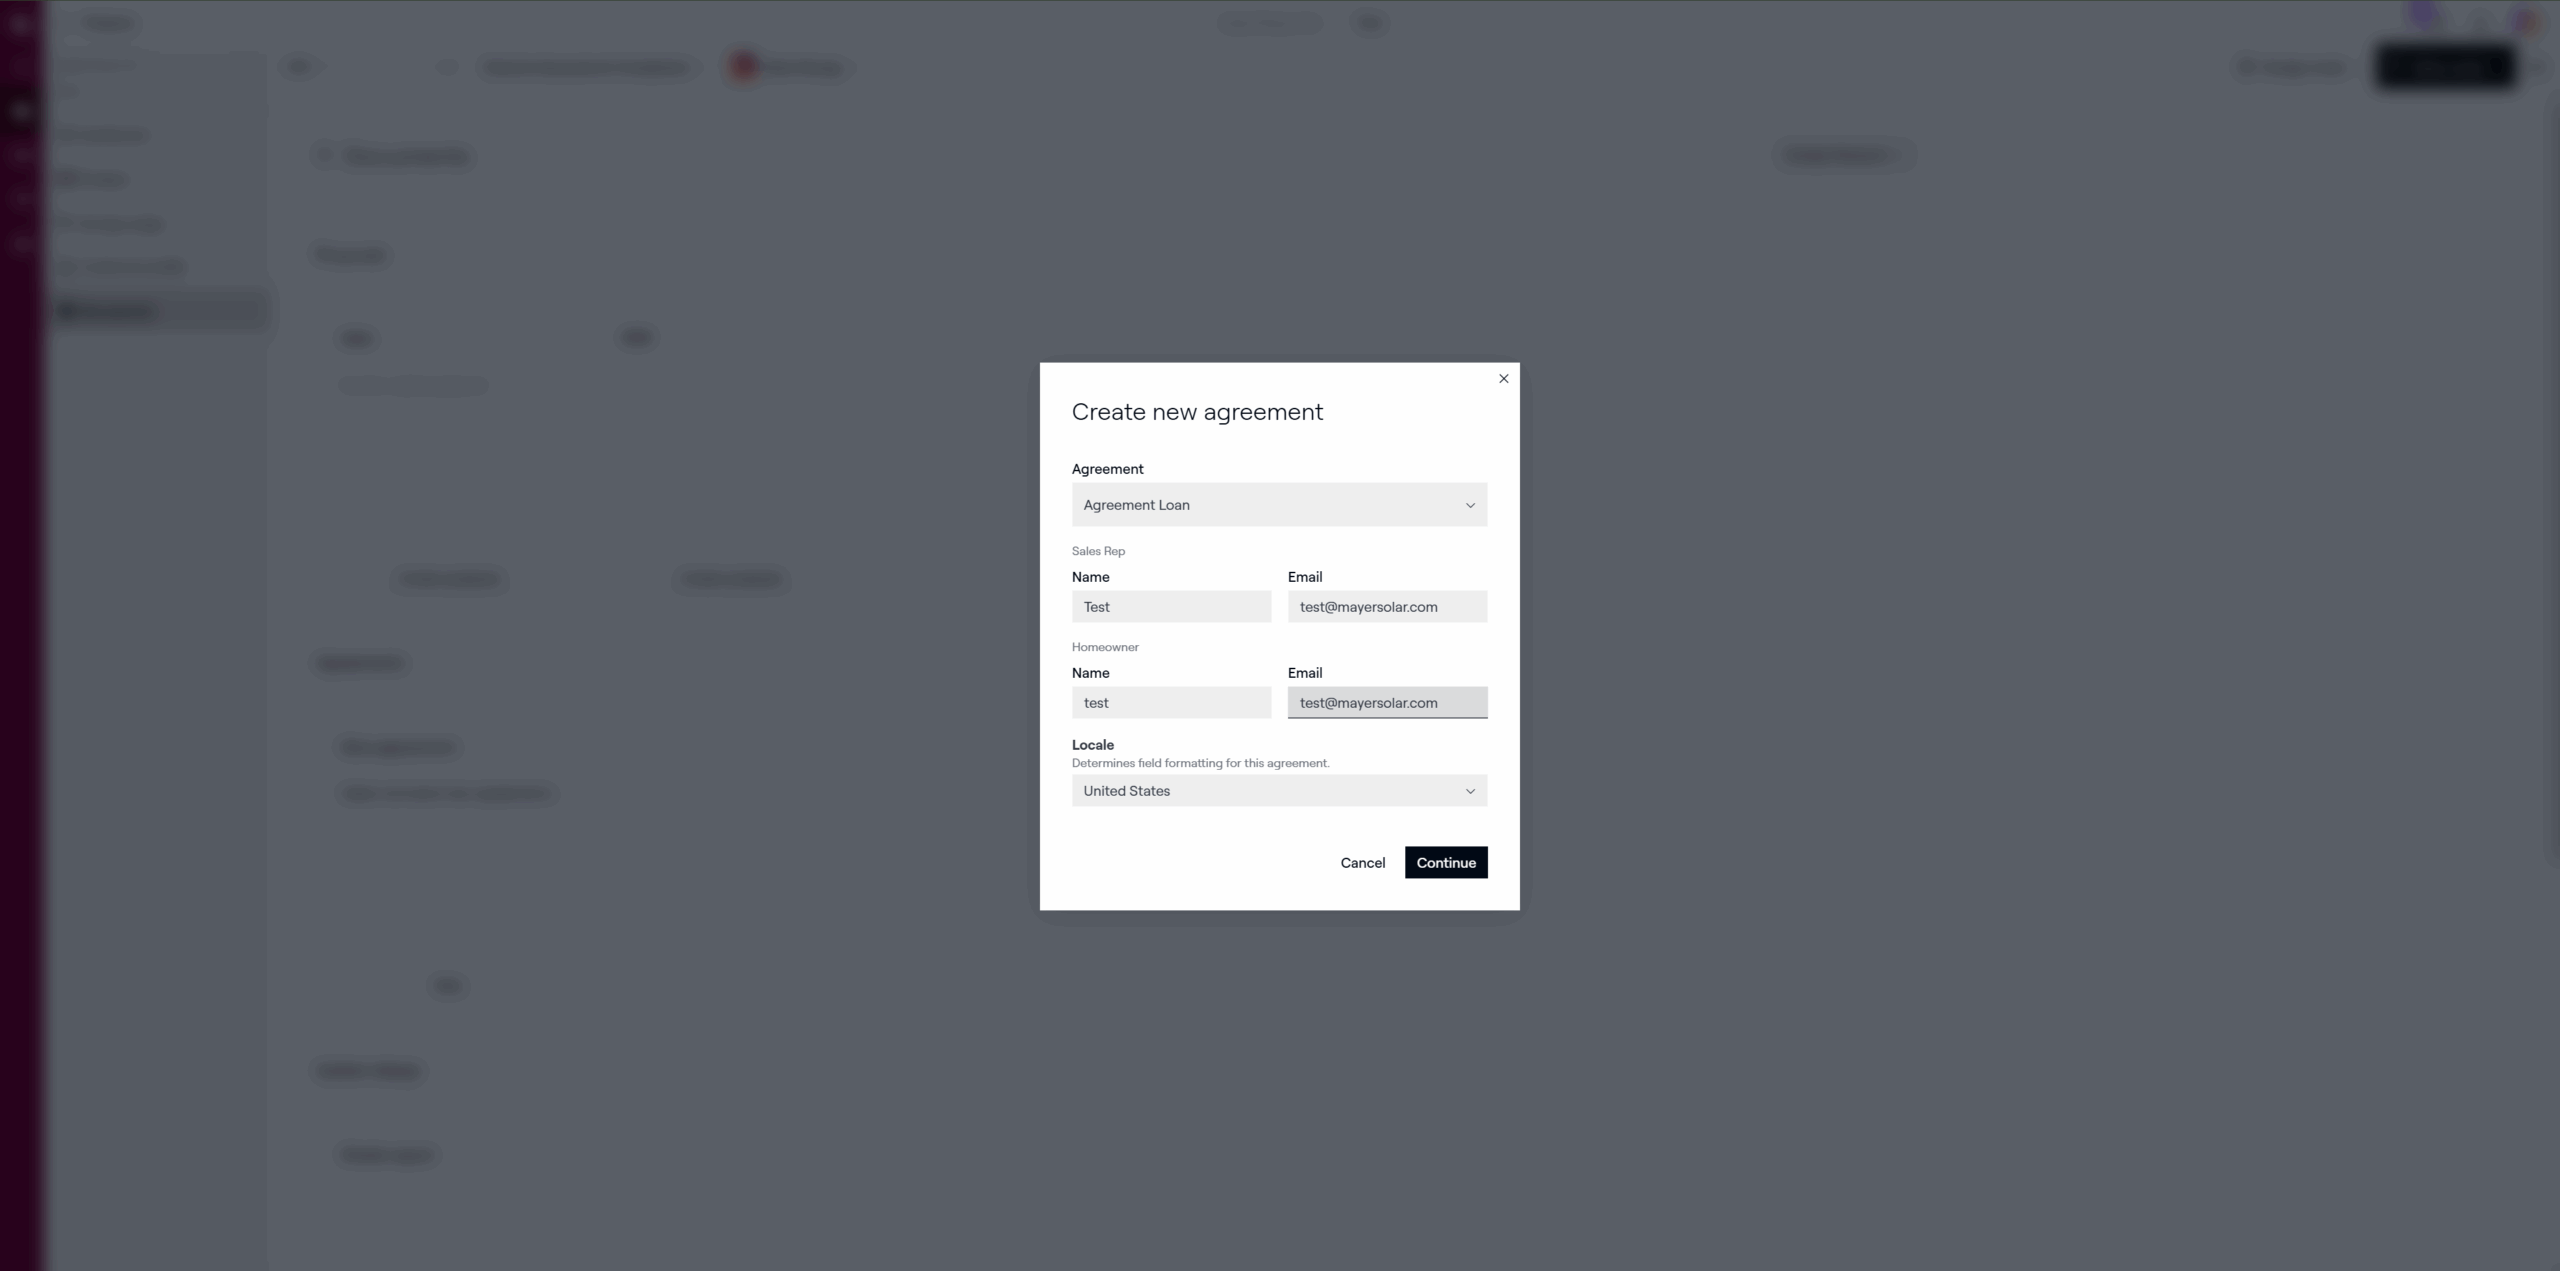
5 Enter Sales Rep Information
Fill out the following fields:
- Sales Rep Name & Email
- Homeowner Name & Email
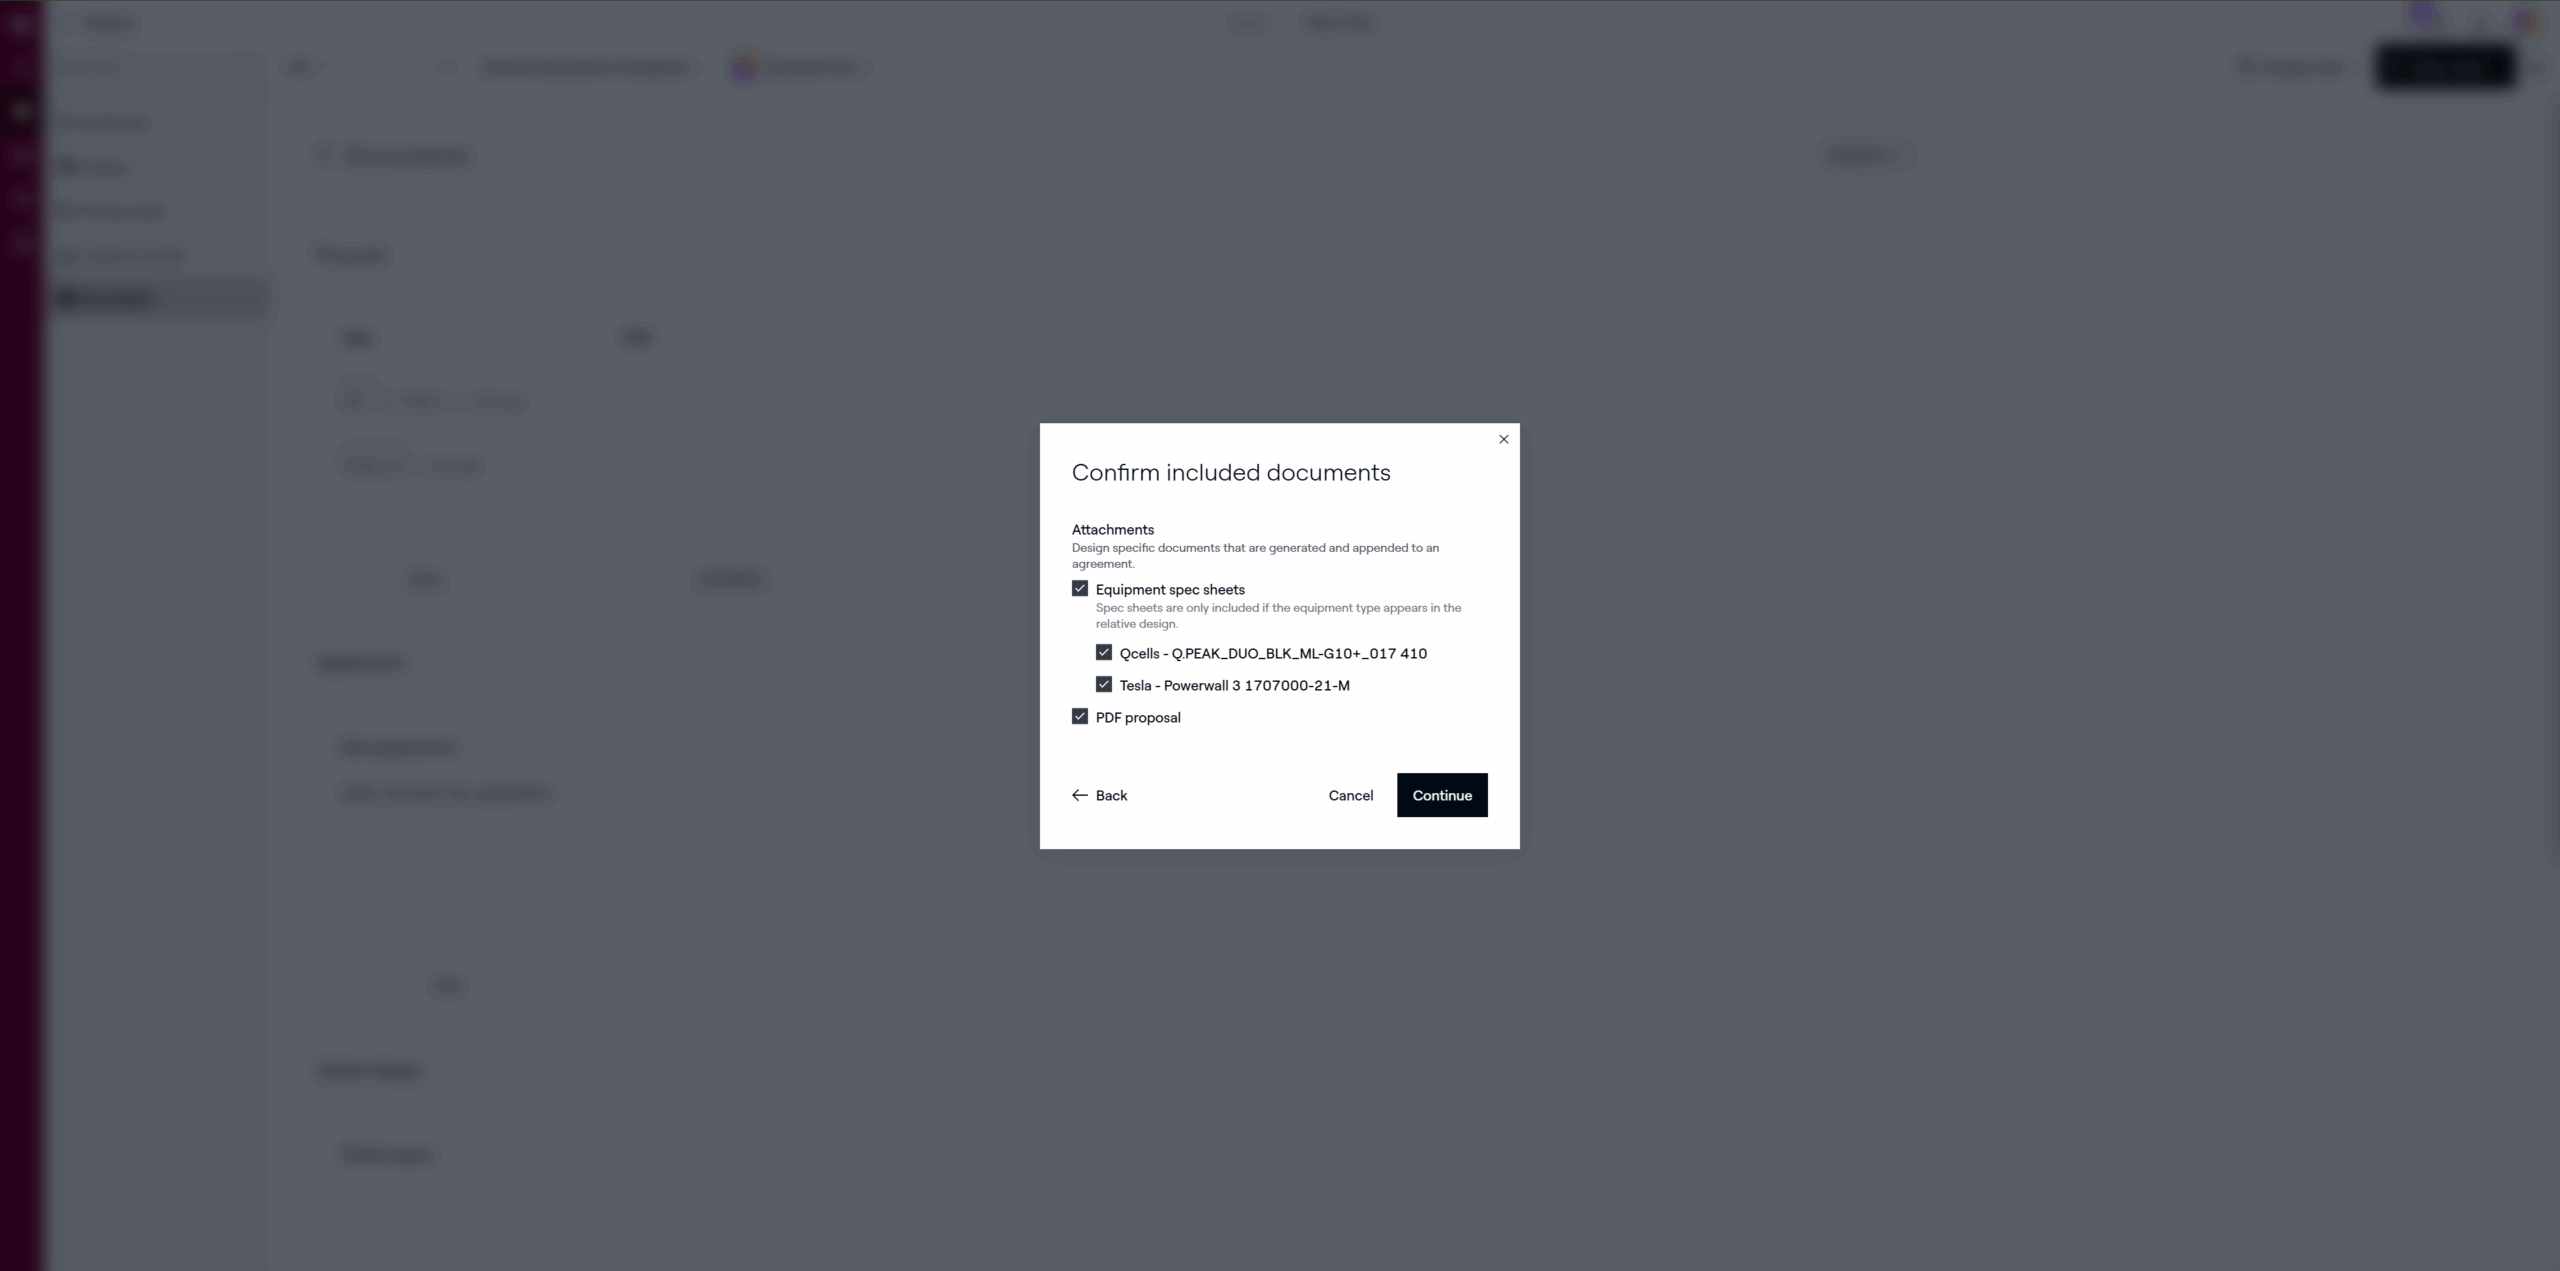
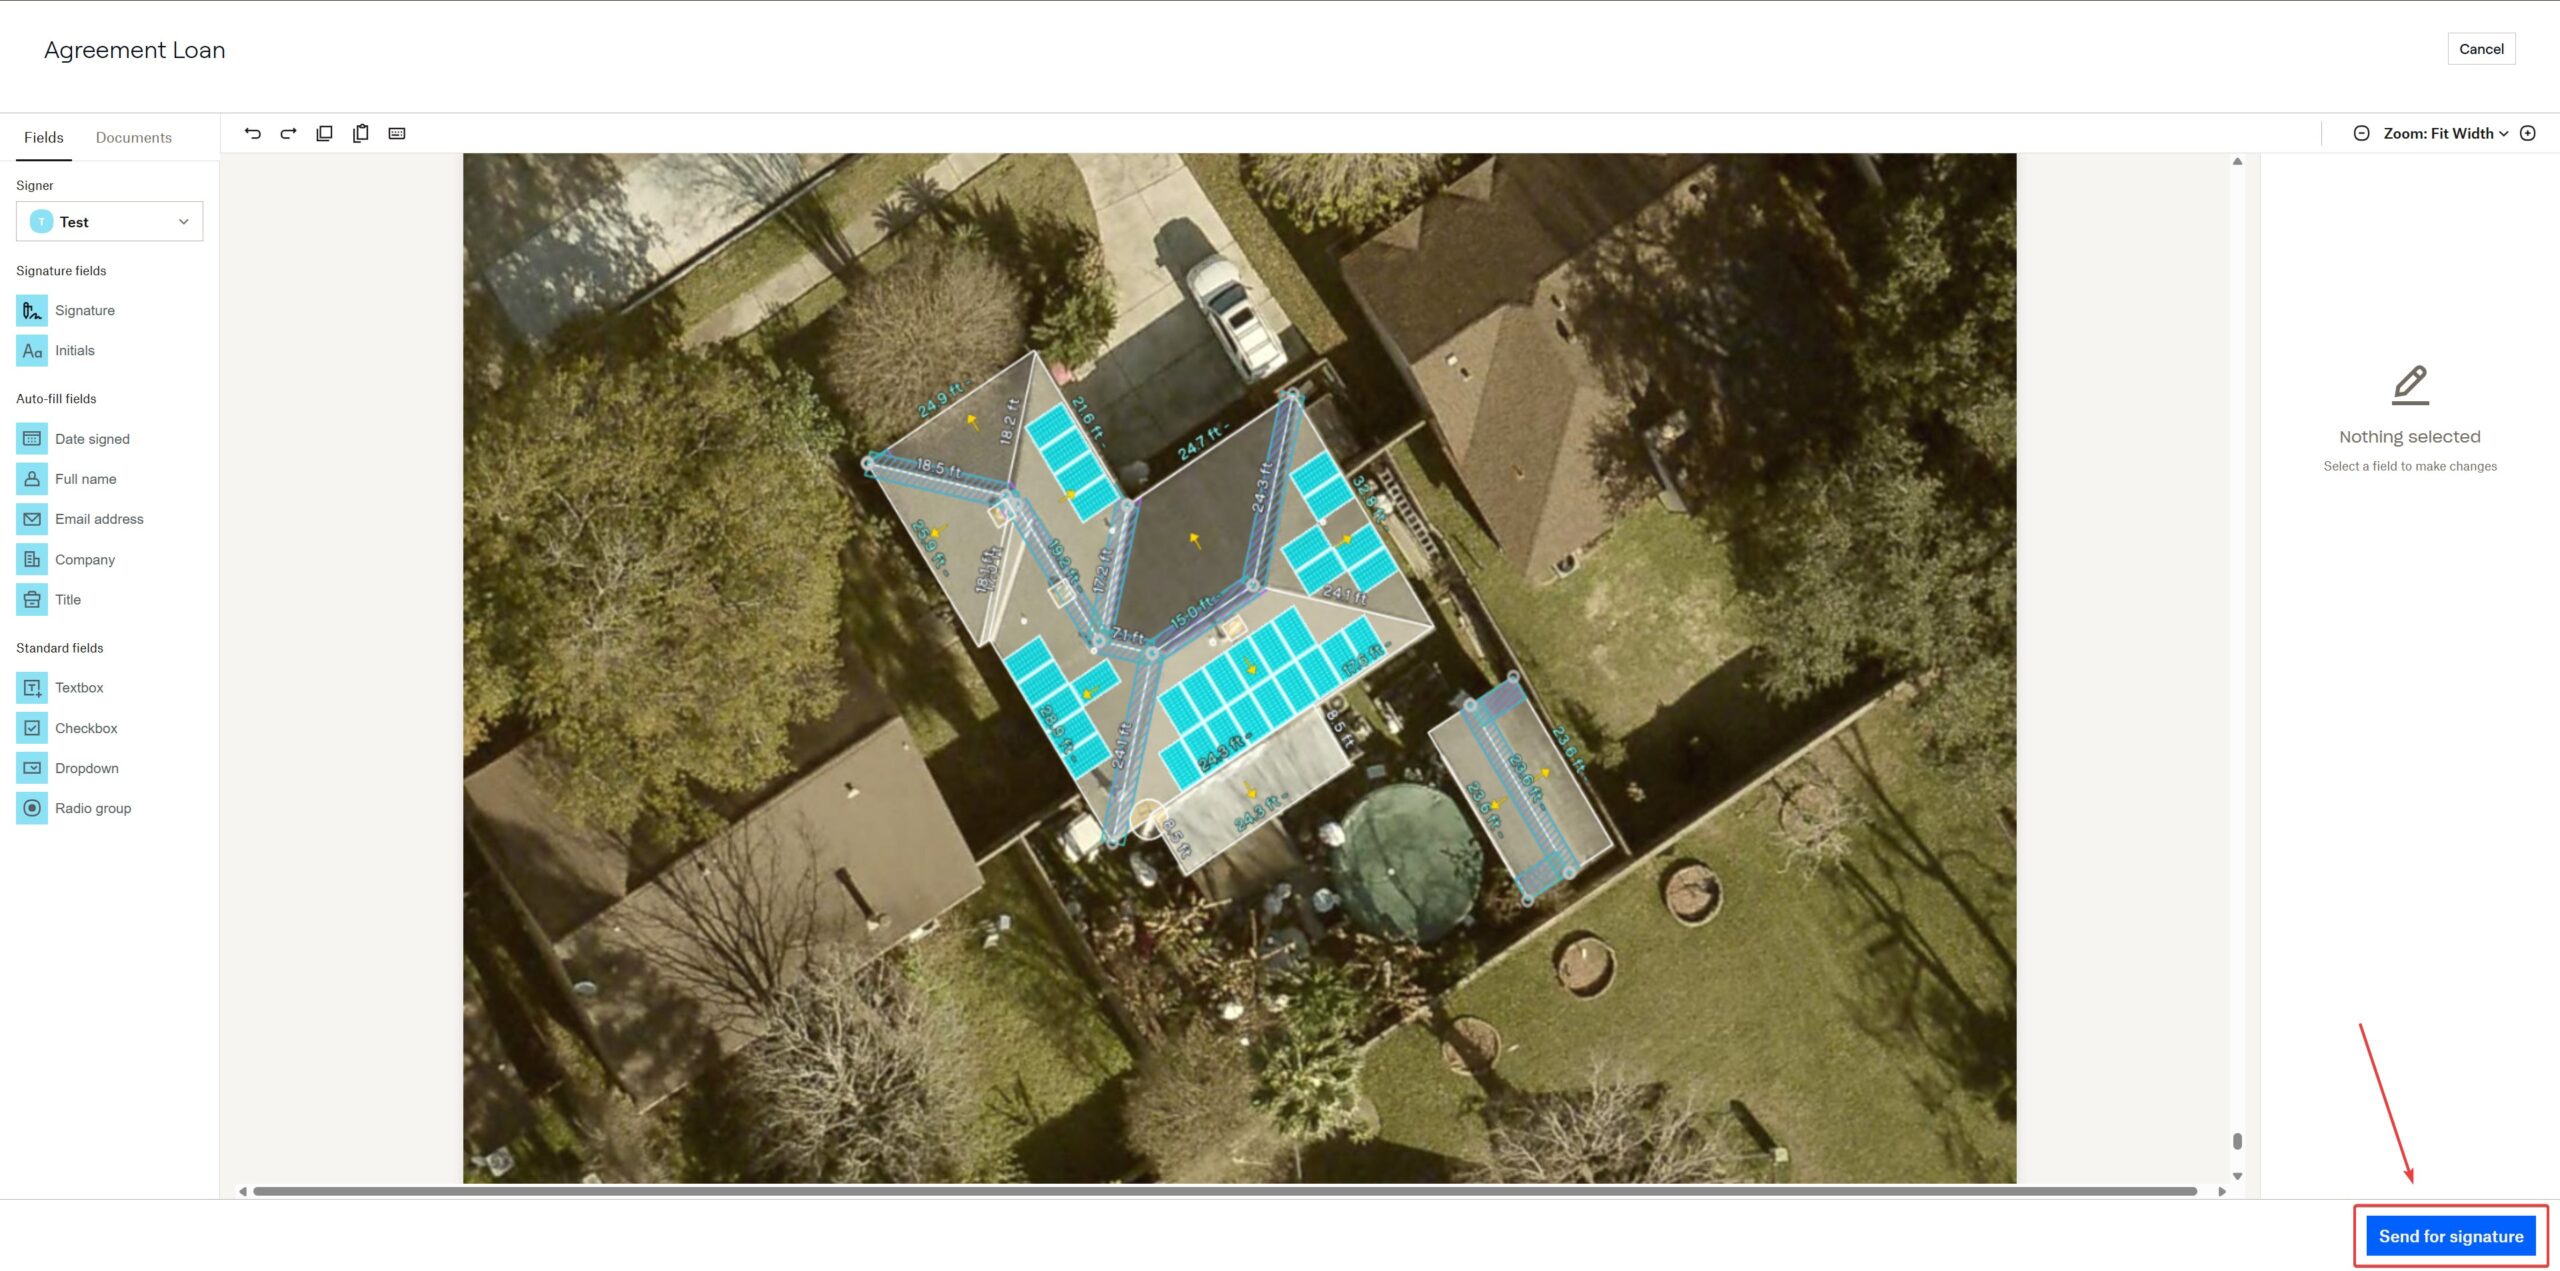
6 Complete and Send the Agreement
After filling in all required fields:
- Review the agreement summary for accuracy.
- Click Send for signature to dispatch the document to the homeowner.
Aurora will automatically email the document to the specified recipients and track its status (Sent, Viewed, Signed).
- Sent documents can be tracked under the Agreements section in the same deal record.
- If changes are required after sending, create a new version rather than editing the existing one.
- Always verify the homeowner's email address before sending to prevent delivery delays.
Submitting Change Orders
Formally submit design or financial updates after a project has been created.
Change Orders in Aurora are used to formally submit design or financial updates after a project has already been created.
1 Finalize All Design Changes
Before submitting, make sure all design adjustments are complete and saved in the most recent project version. This includes layout edits, component updates, or pricing adjustments.
2 Open the Most Recent Design
In the top right corner, click Sales Mode, then select the most up-to-date design or simulation to open the interactive proposal view.
3 Open the Agreements Menu
In the top left corner, click the Menu icon (☰) to expand additional options. Select Agreements towards the bottom of the list.
4 Choose Agreement Type
From the Agreement Type dropdown, select the appropriate option for the project.
5 Enter Sales Rep Information
Fill out the following fields:
- Sales Rep Name & Email
- Homeowner Name & Email
6 Complete and Send the Agreement
After filling in all required fields:
- Review the agreement summary for accuracy.
- Click Send for signature to dispatch the document to the homeowner.
Aurora will automatically email the document to the specified recipients and track its status (Sent, Viewed, Signed).
- Sent documents can be tracked under the Agreements section in the same deal record.
- If changes are required after sending, create a new version rather than editing the existing one.
- Always verify the homeowner's email address before sending to prevent delivery delays.
HubSpot
Managing deals, contacts, and project pipeline inside HubSpot's CRM.
Accessing Your Deals
View and manage your active projects from HubSpot's Deals dashboard.
Once you've logged into HubSpot, you can view and manage all of your active projects from the Deals section in the CRM.
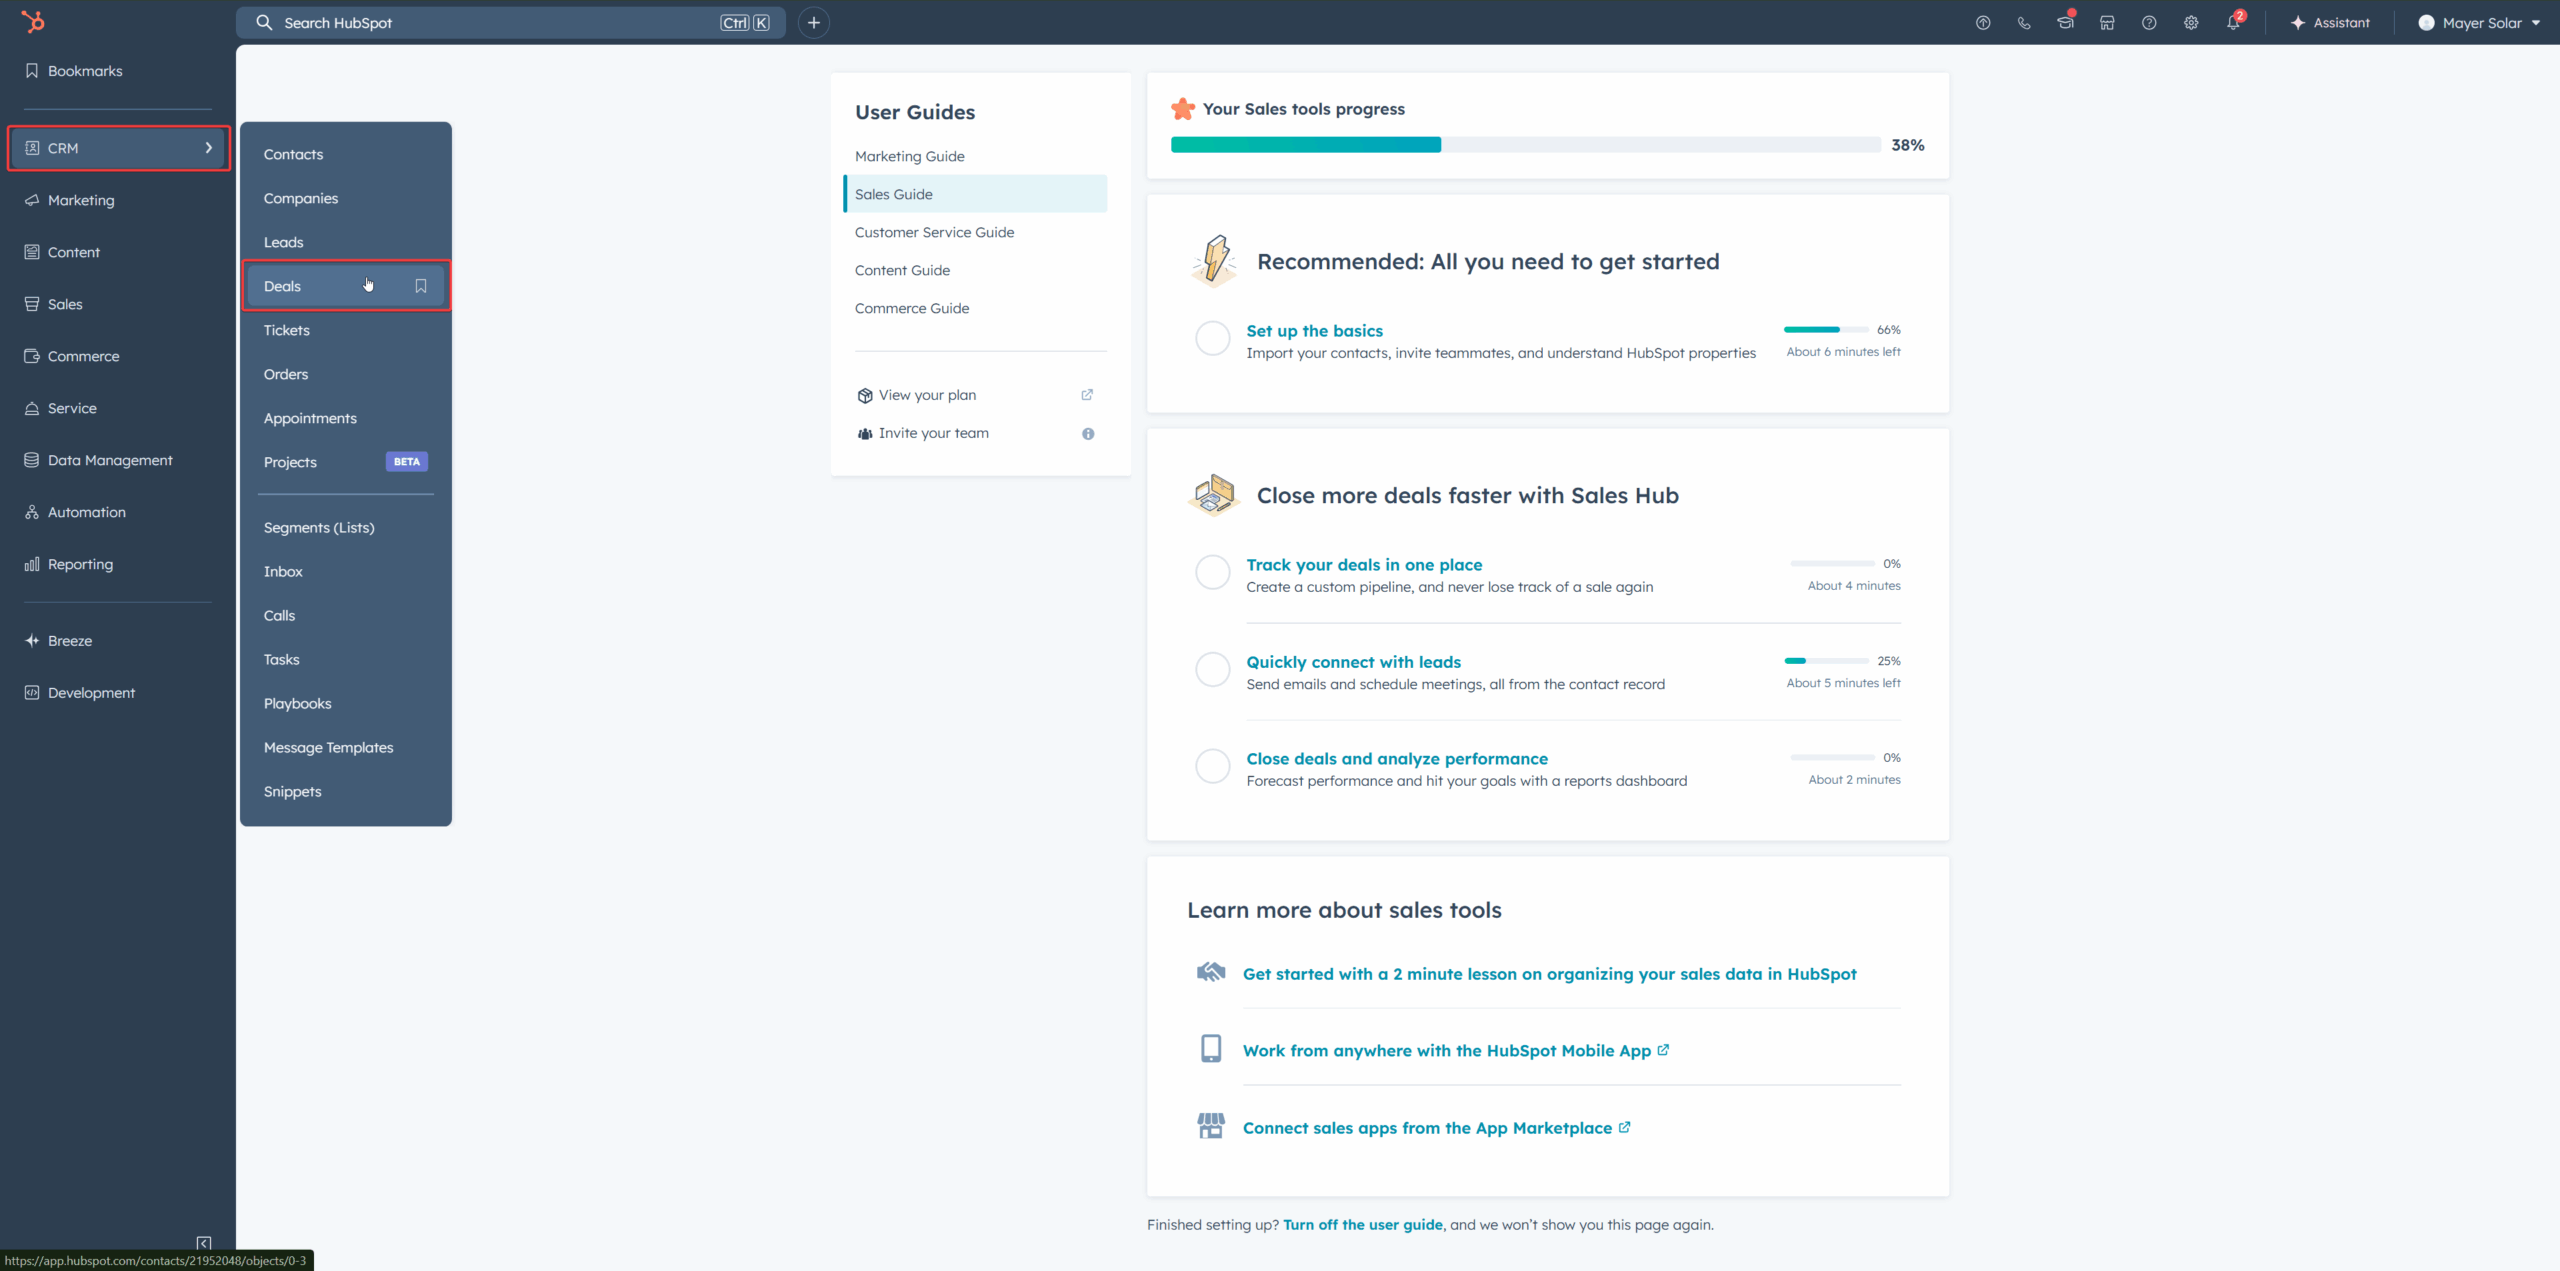
1 Open the Deals Dashboard
In the left sidebar, under CRM, click Deals.
This page displays all the projects currently in your pipeline, including homeowner names, project stages, and assigned owners.
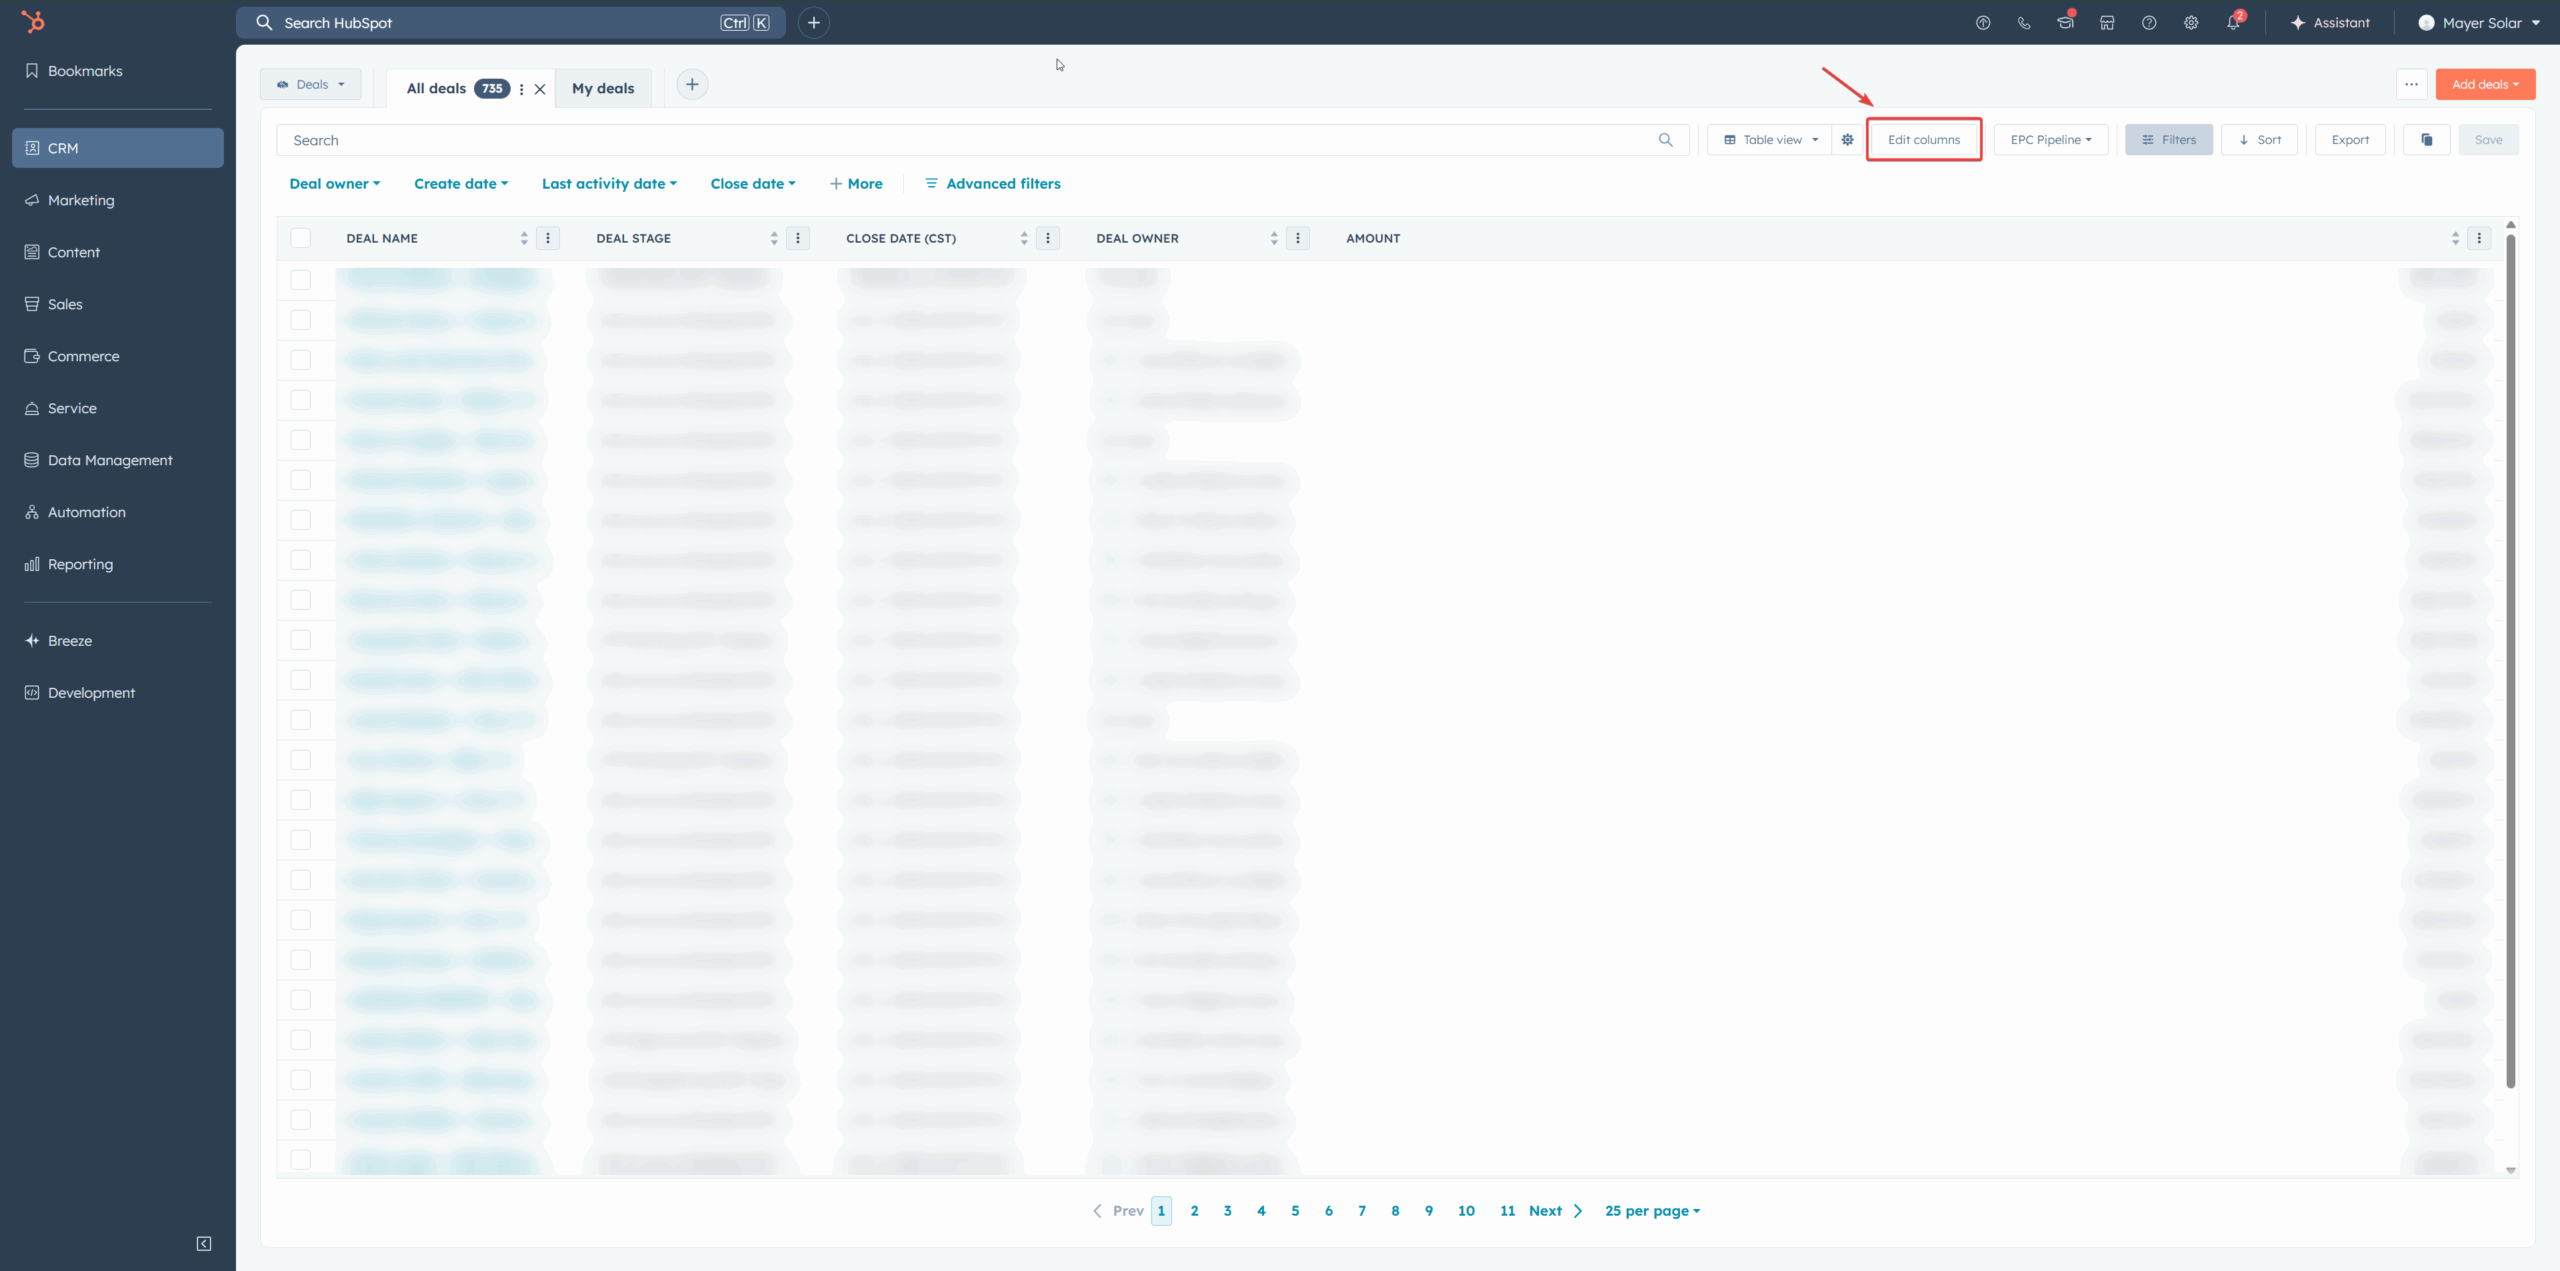
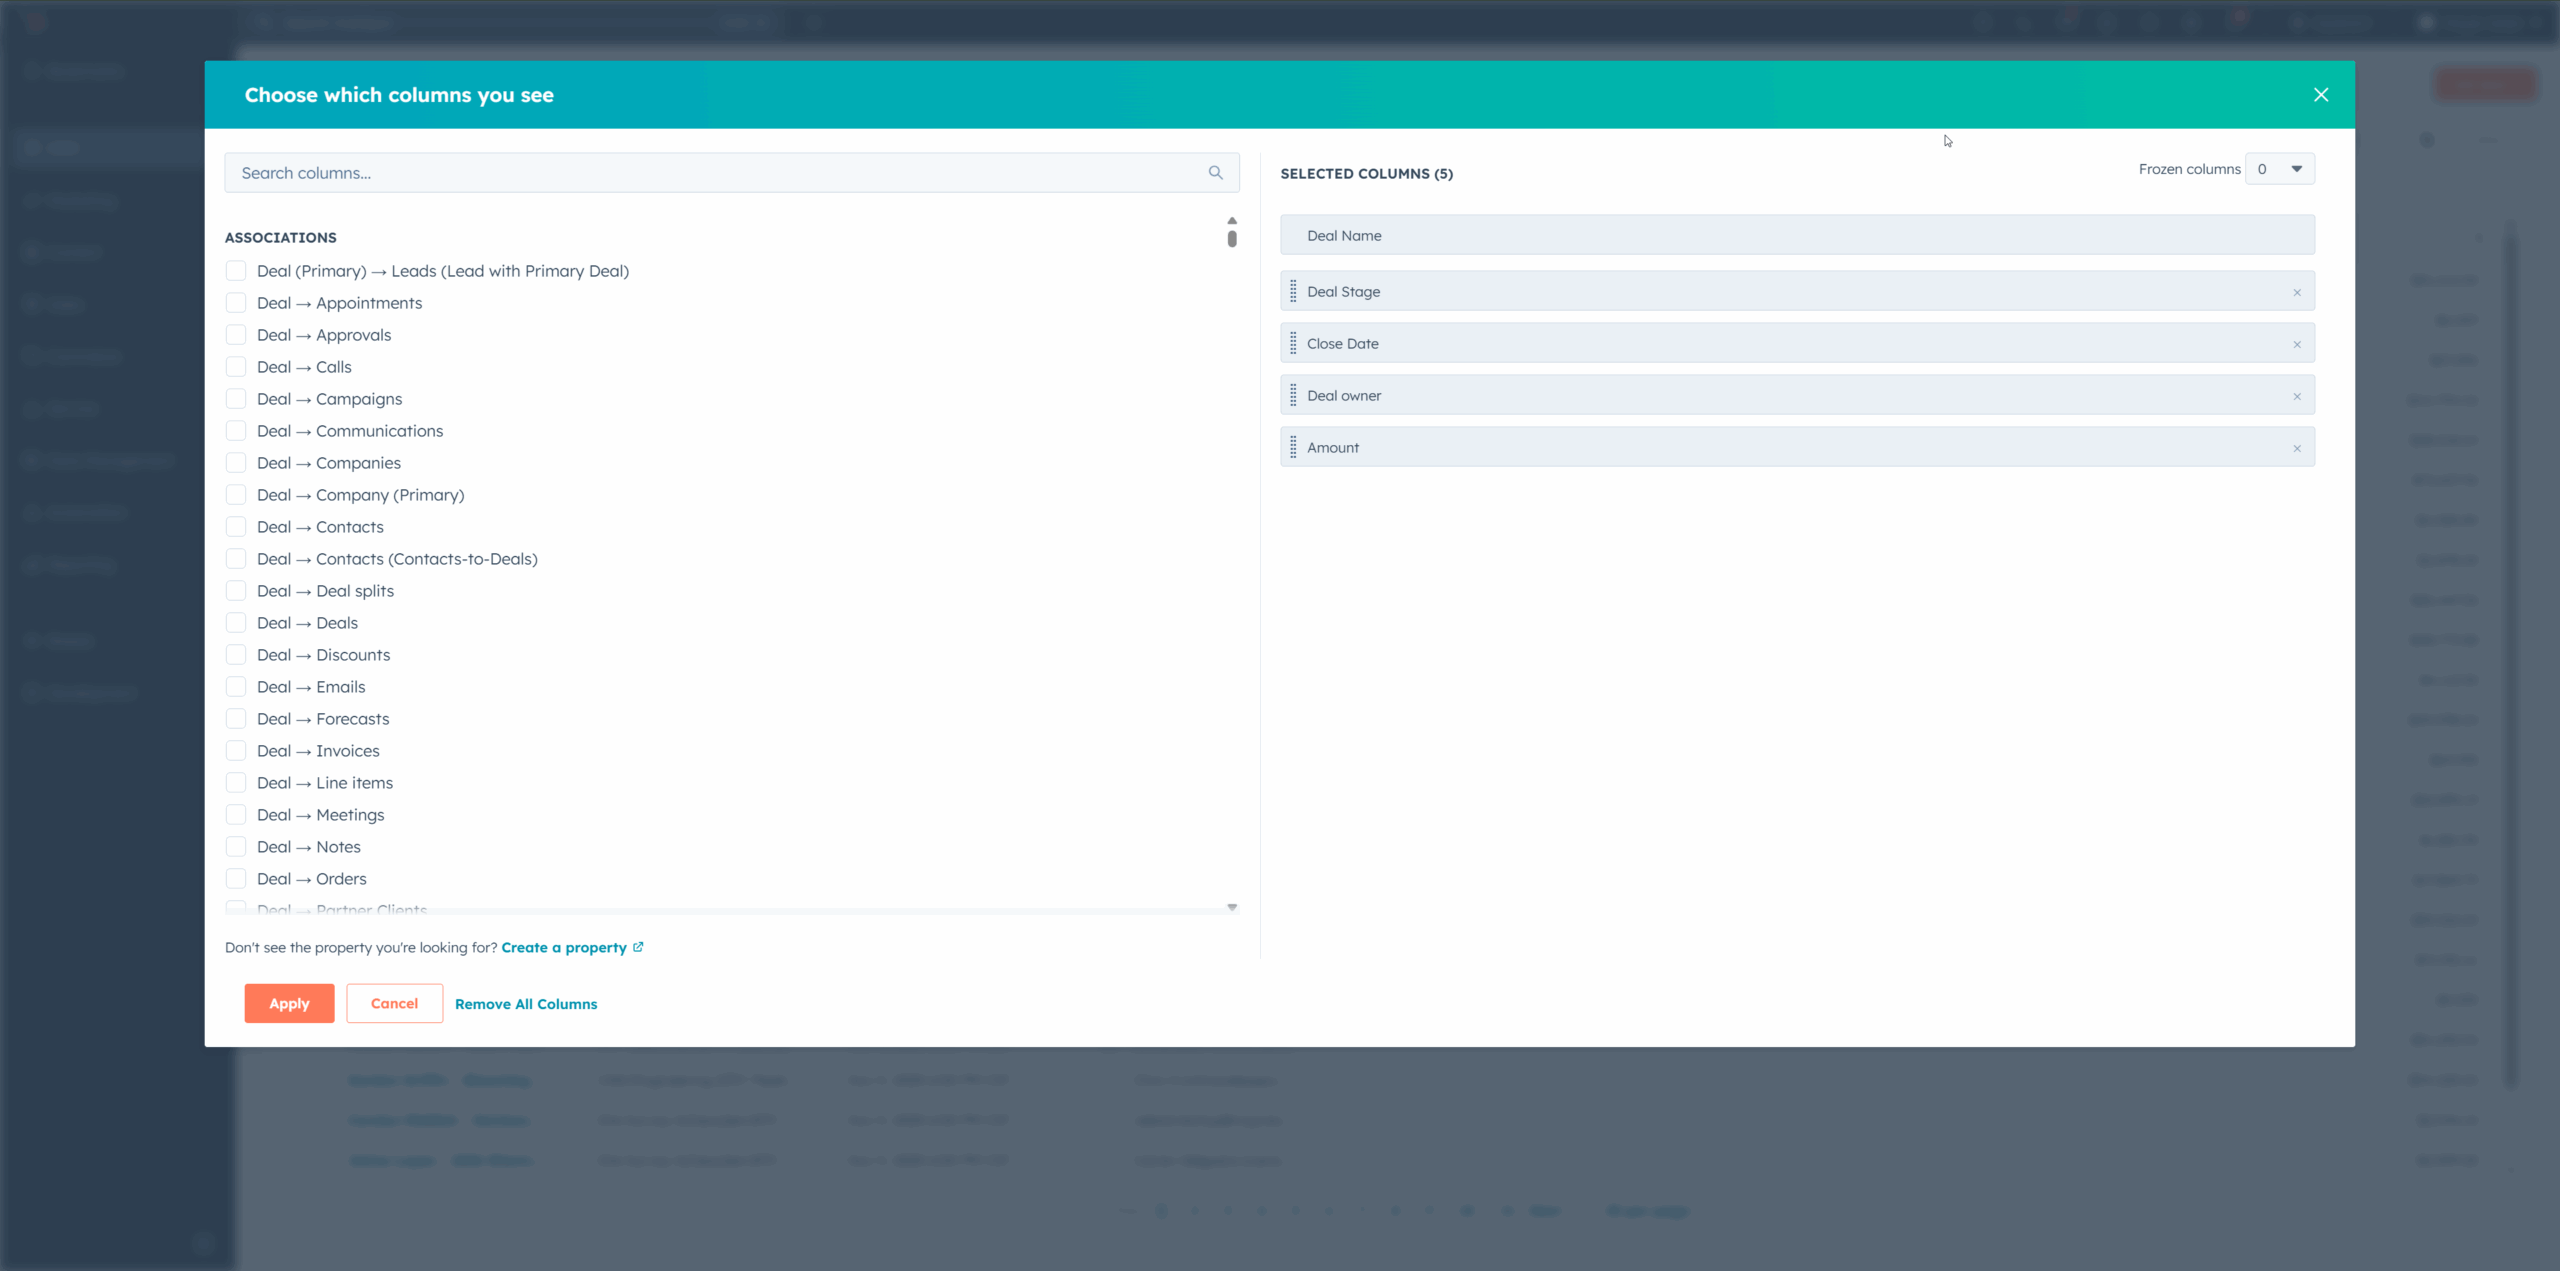
2 Customize Your Deal View
You can organize your dashboard to show only the most relevant information for your workflow.
Click Edit Columns in the upper-right corner to add or remove fields such as deal state, close date, or amount.
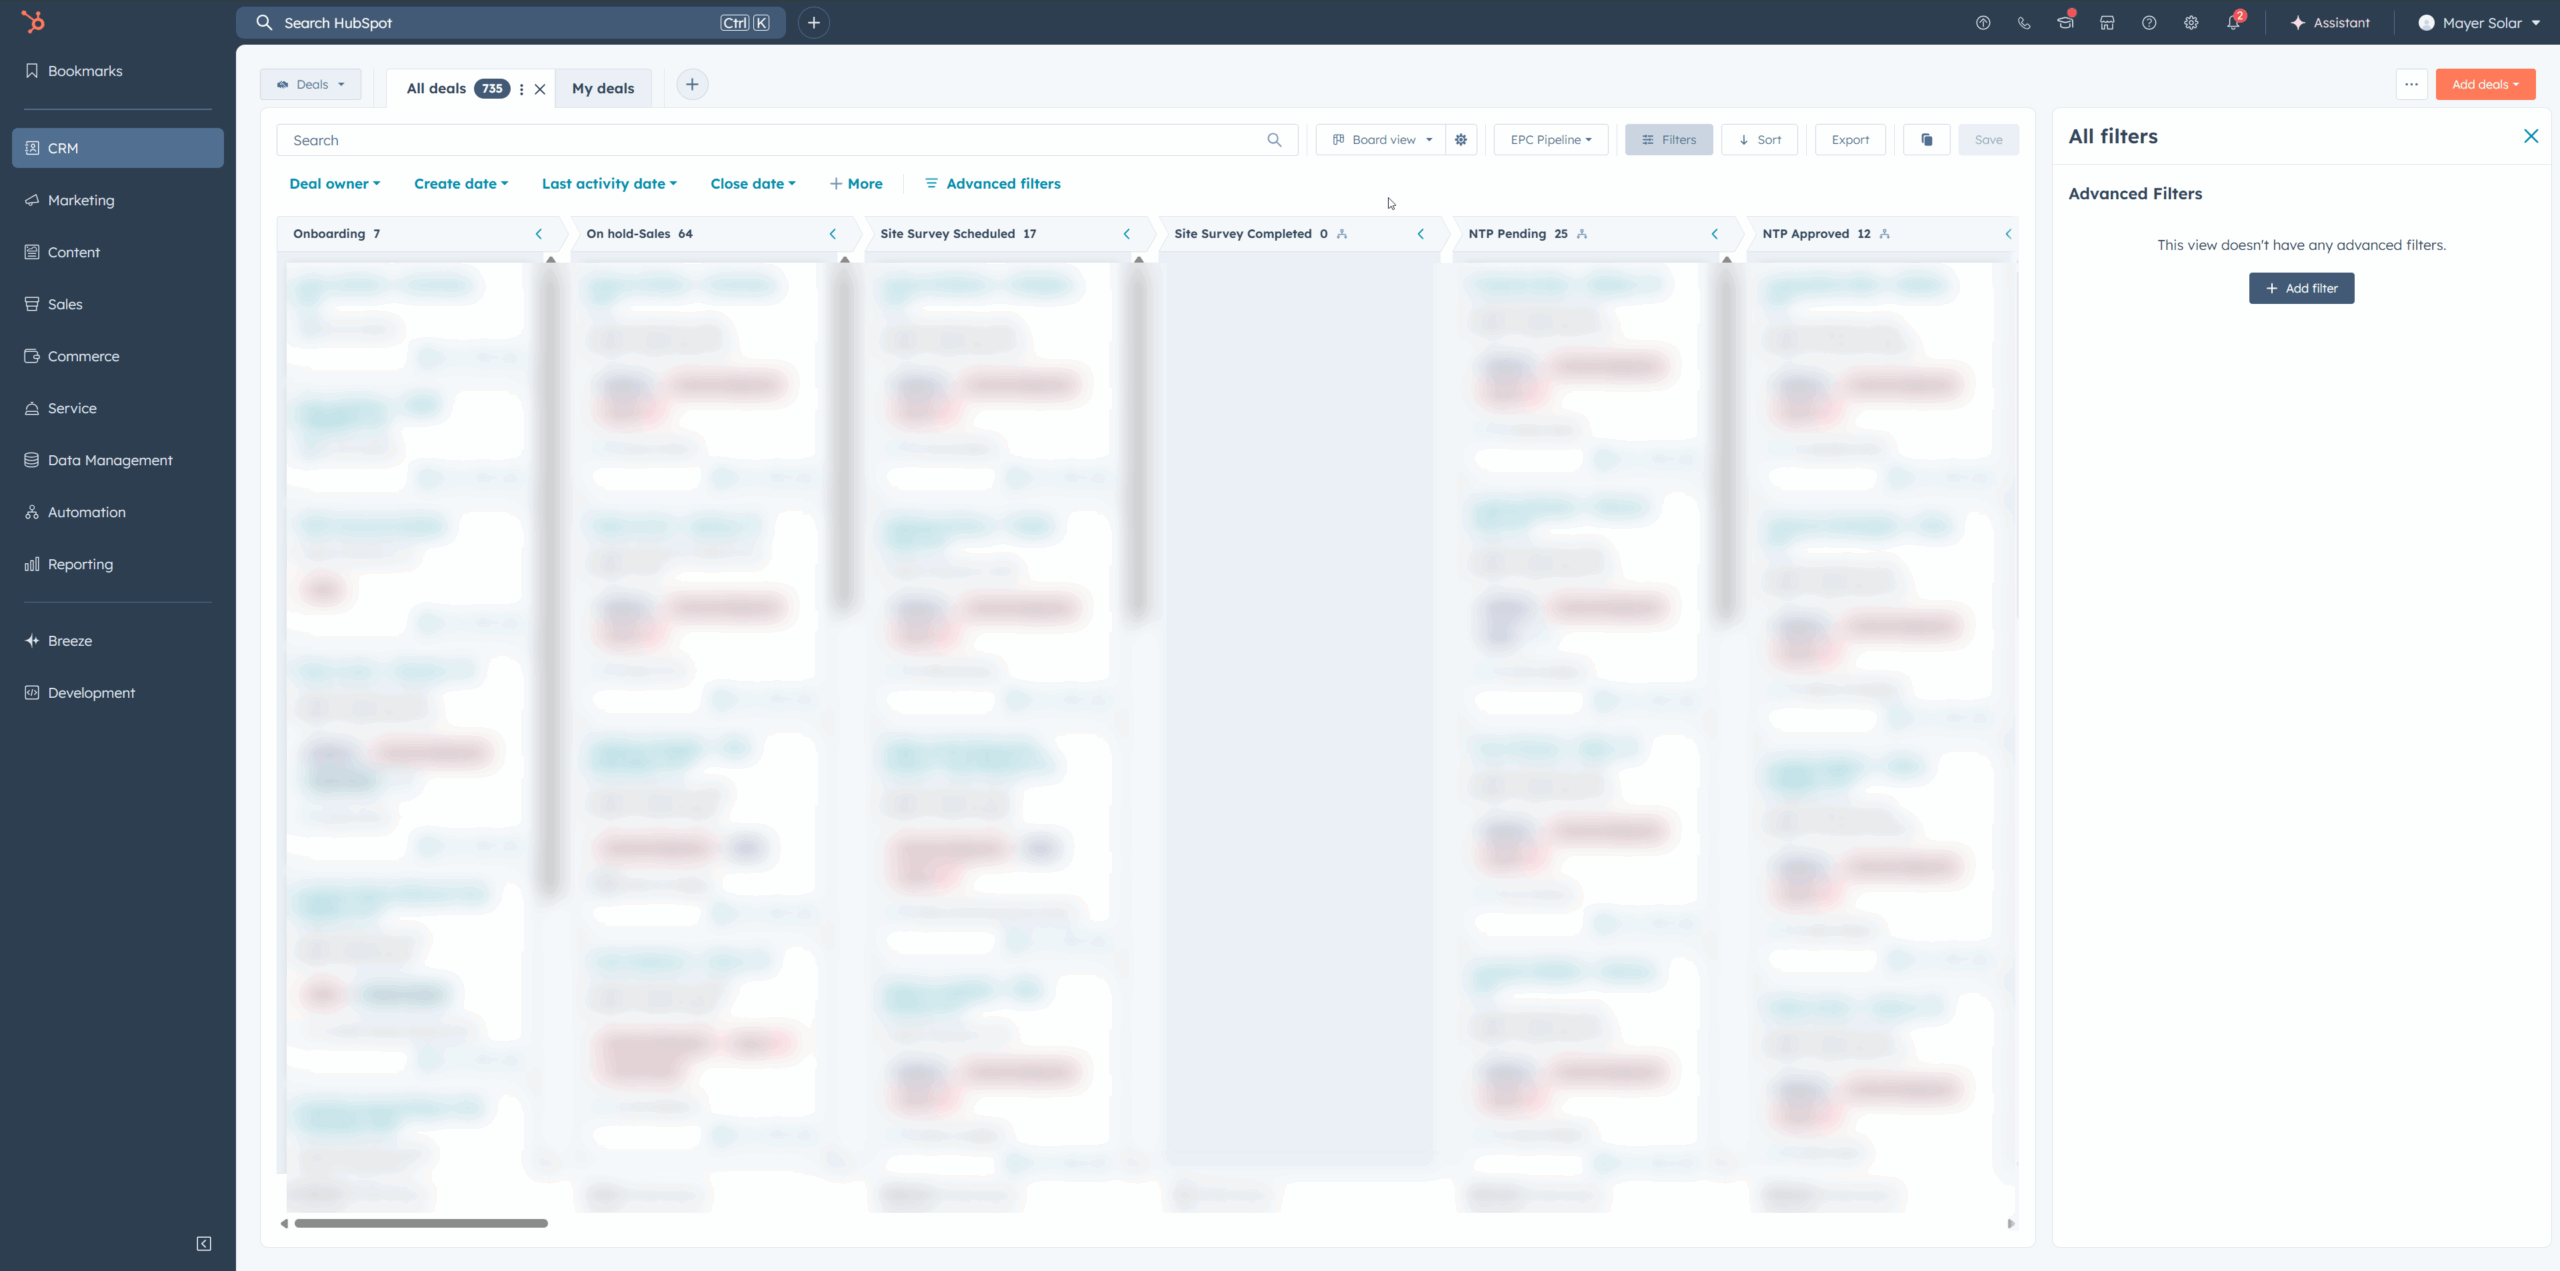
3 Switching Between List and Table View
HubSpot provides various layout options for viewing deals. The two main views we use are:
- Table View: best for a quick overview of many deals at once. Useful for high-volume tracking or team-wide summaries.

- Board View: best for a detailed look at each project's key details. Ideal when managing smaller deal sets or reviewing specific projects.
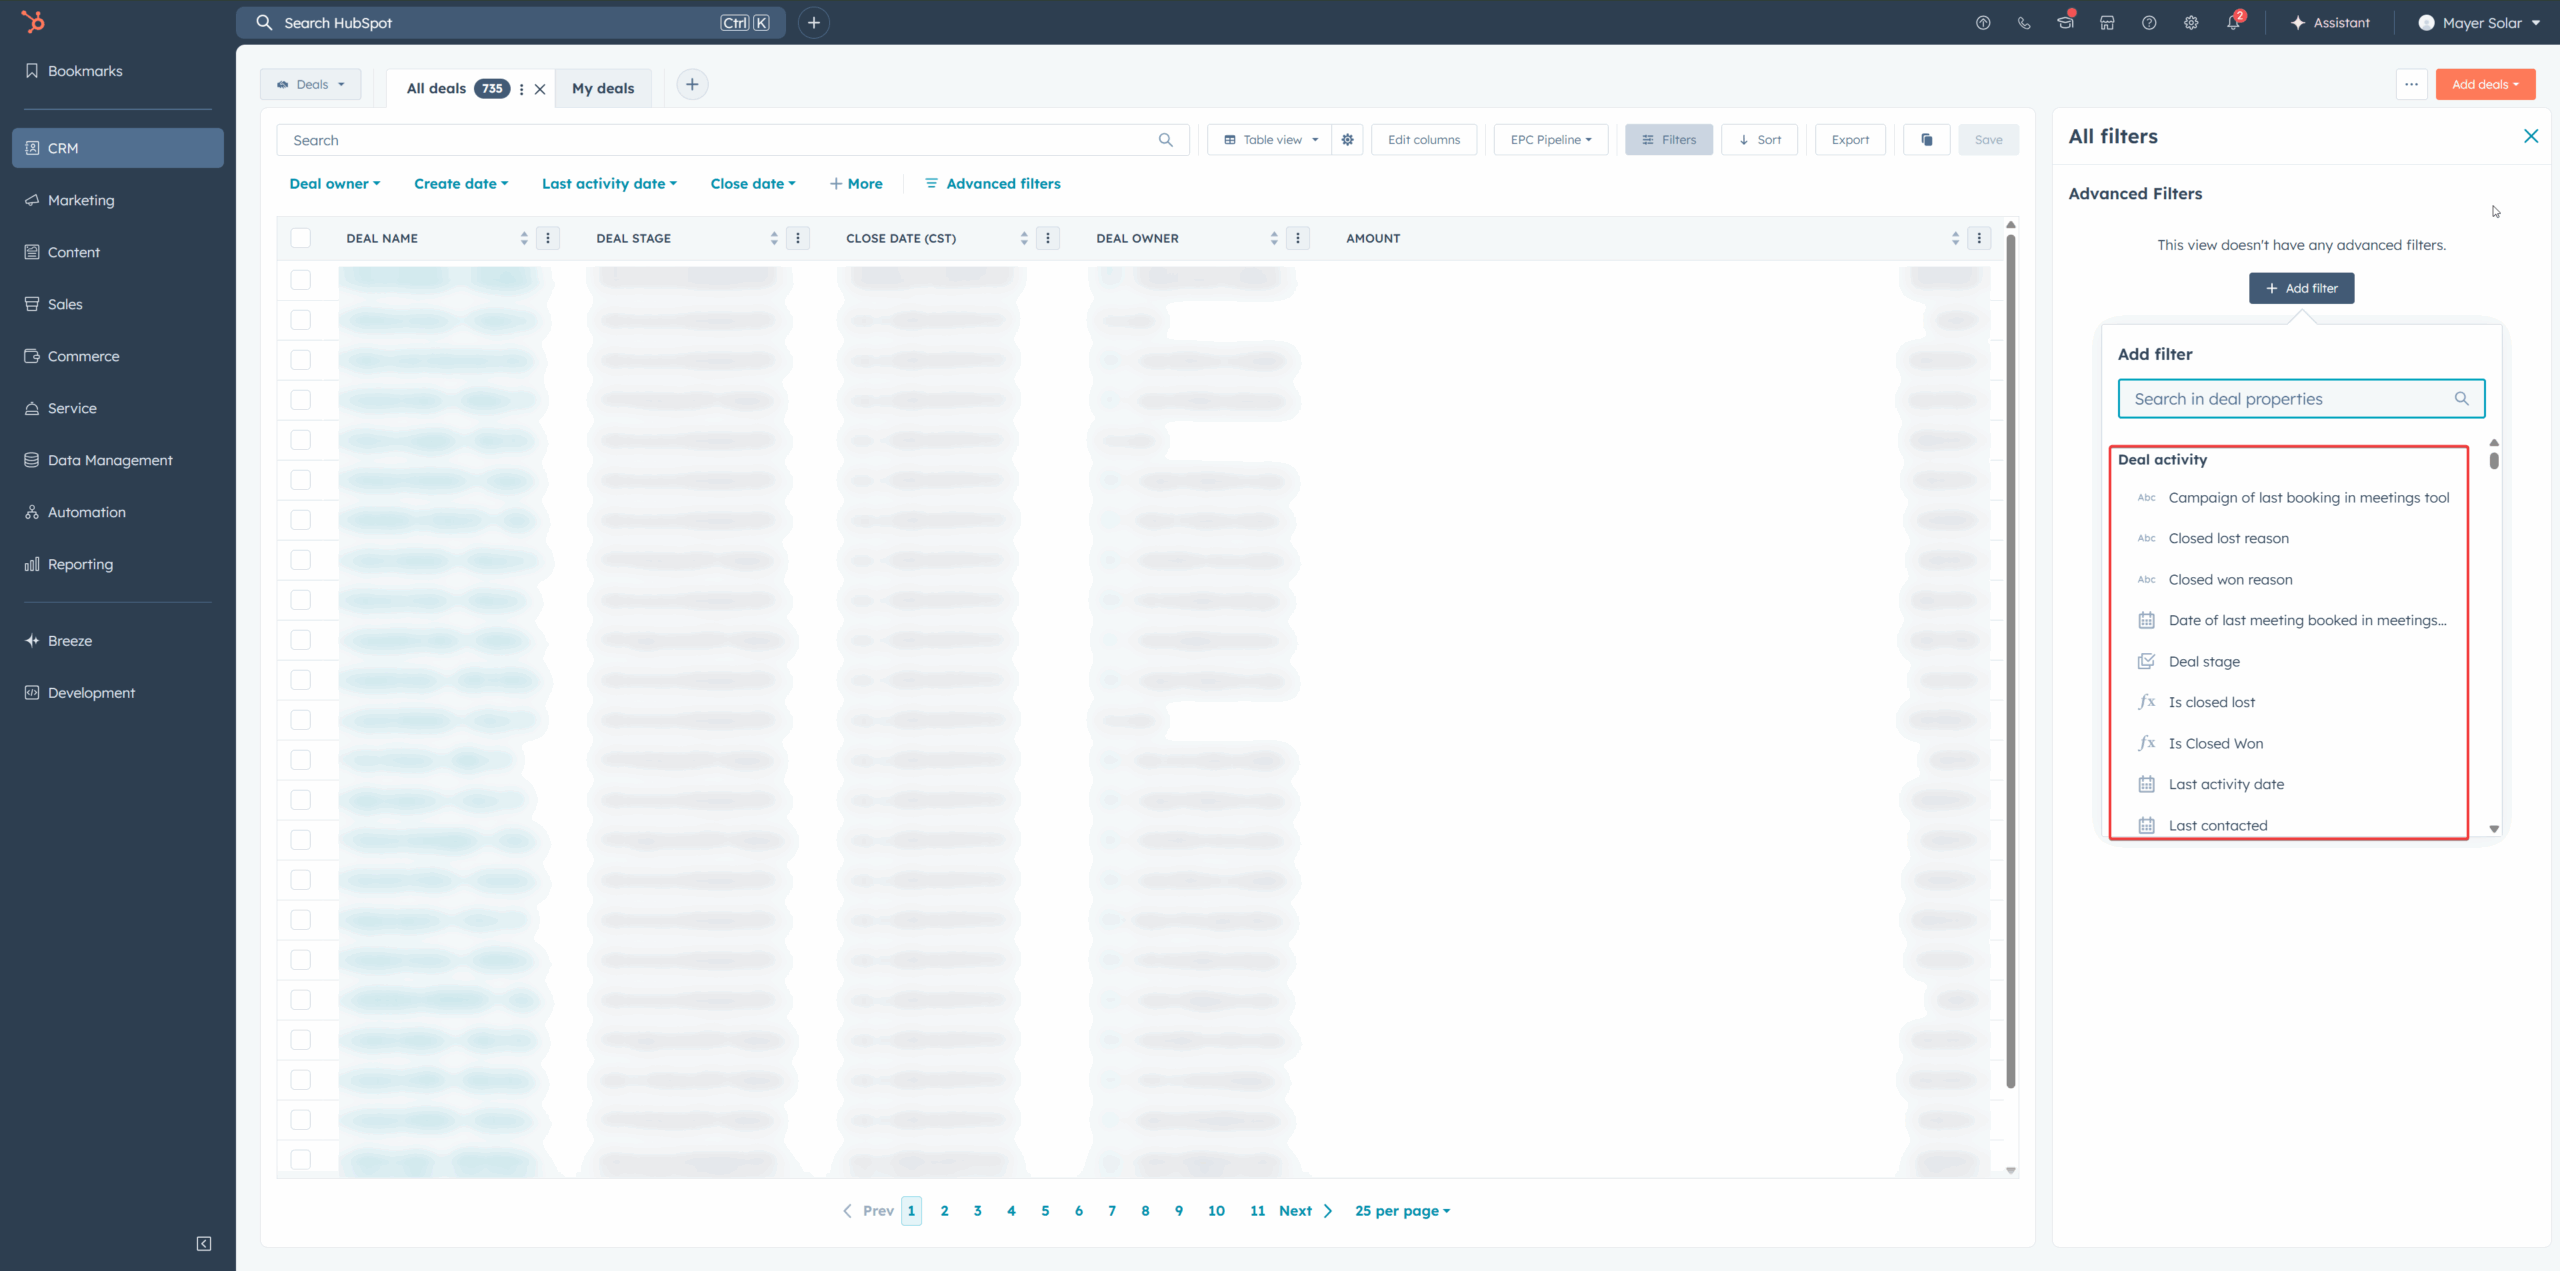
4 Using Advanced Filters
At the top of the deal list, click Advanced Filters.
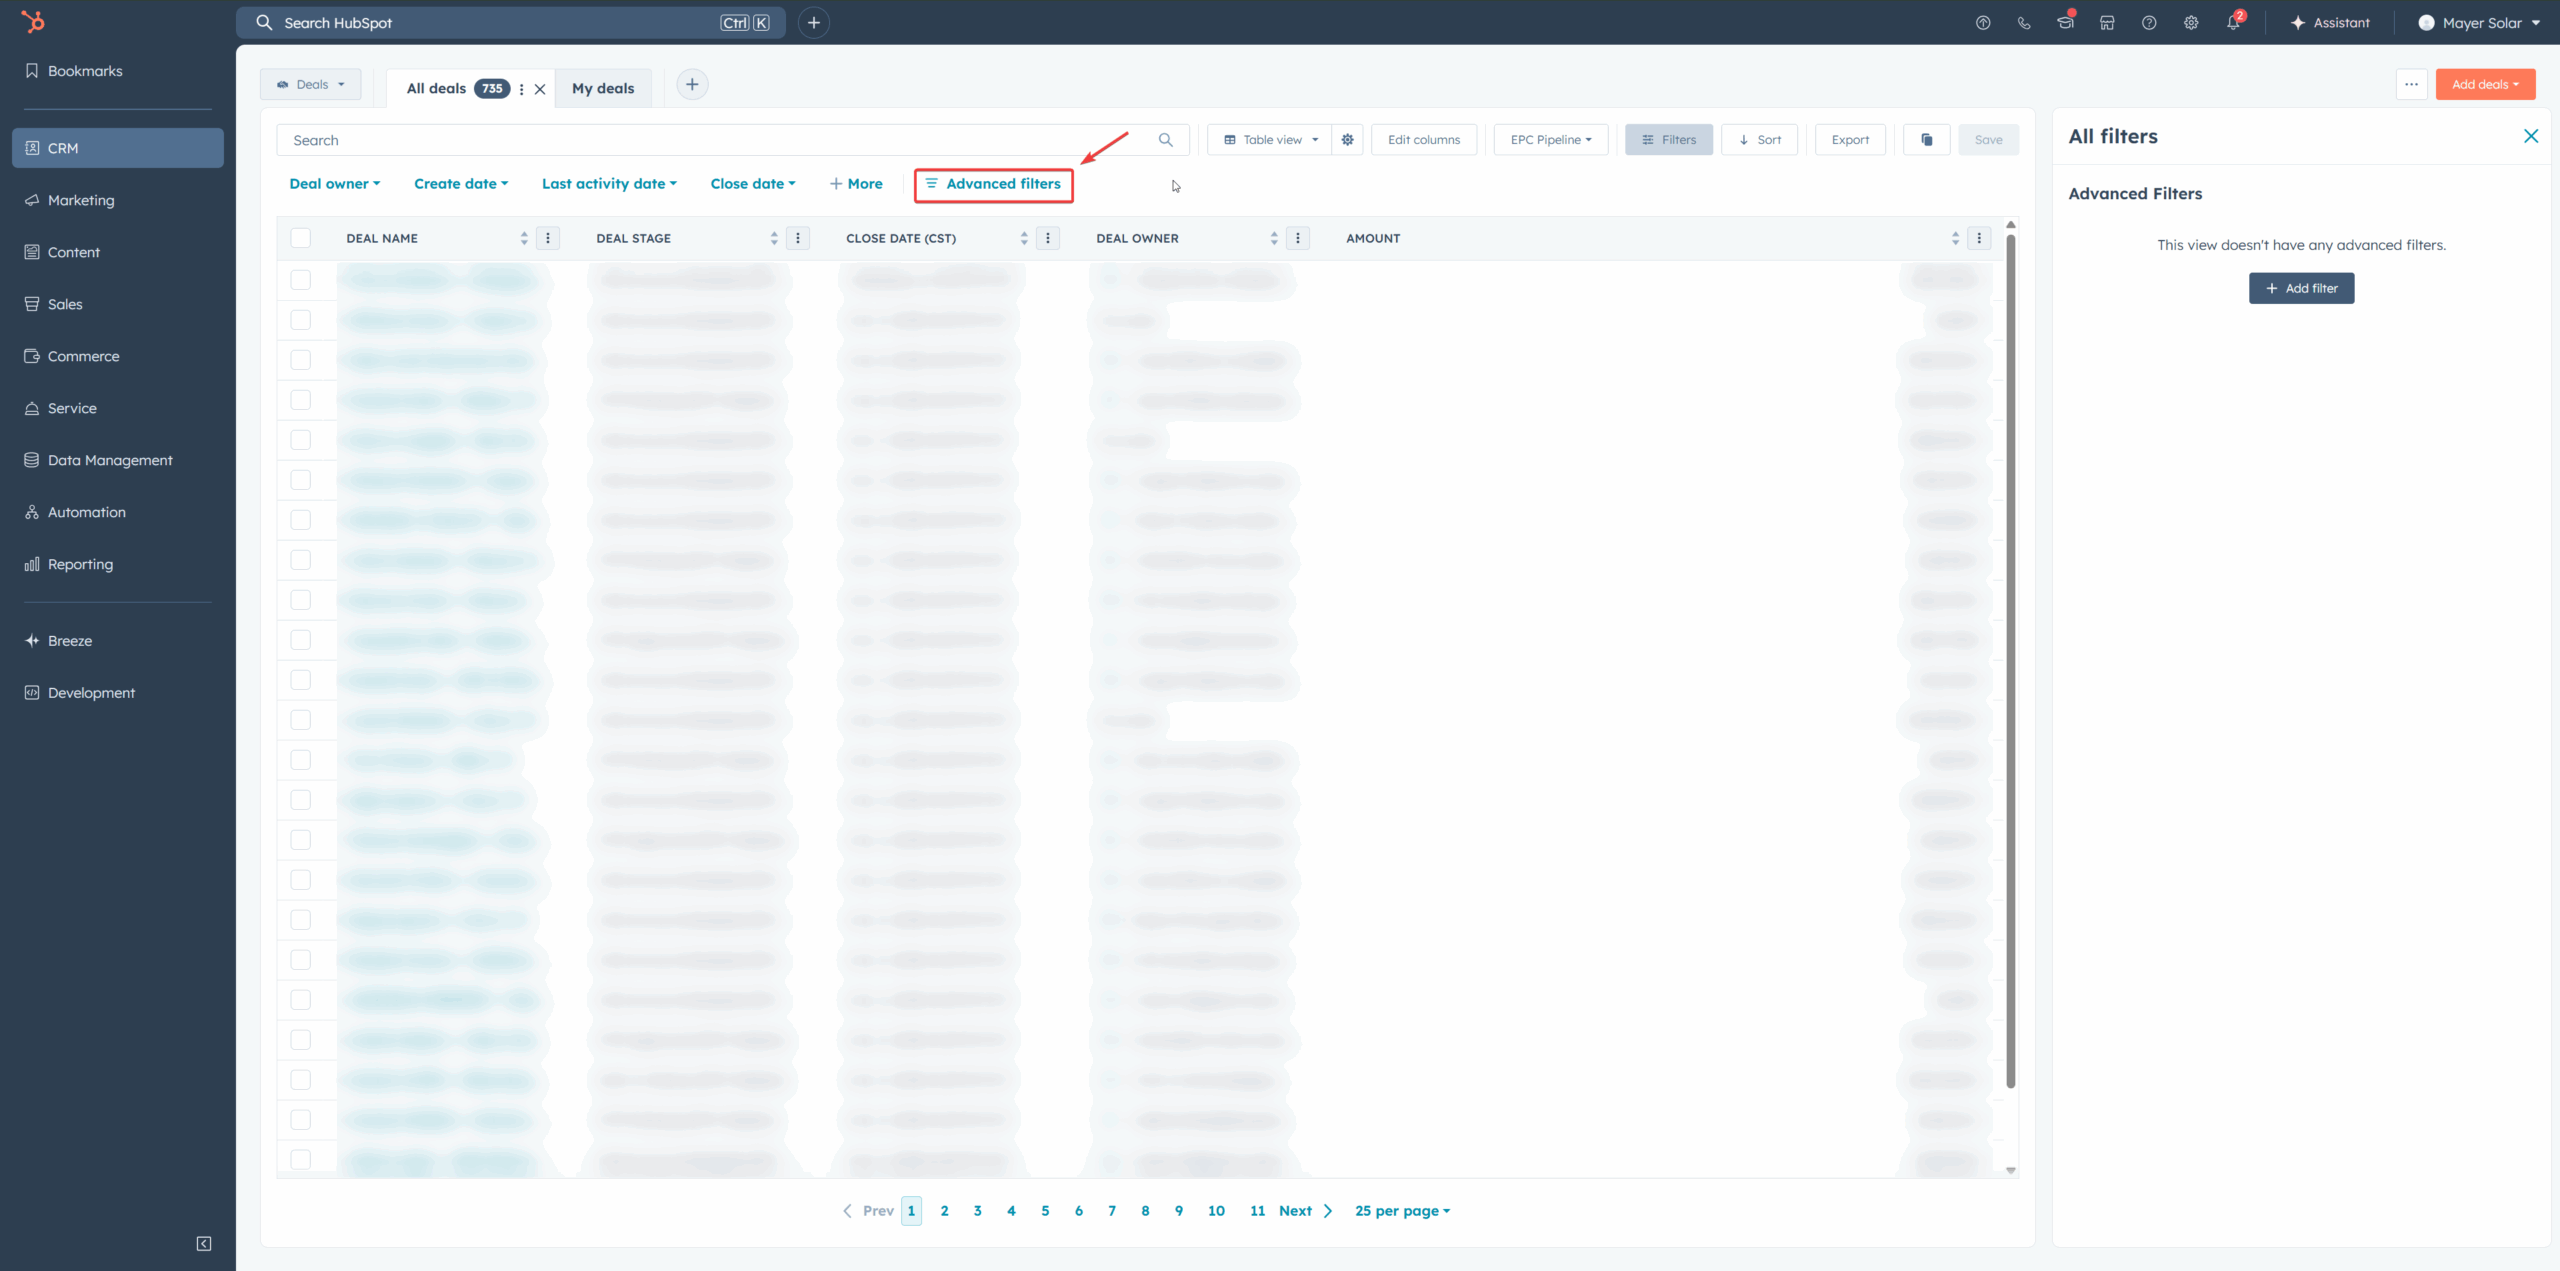
In the right sidebar, click Add Filters.
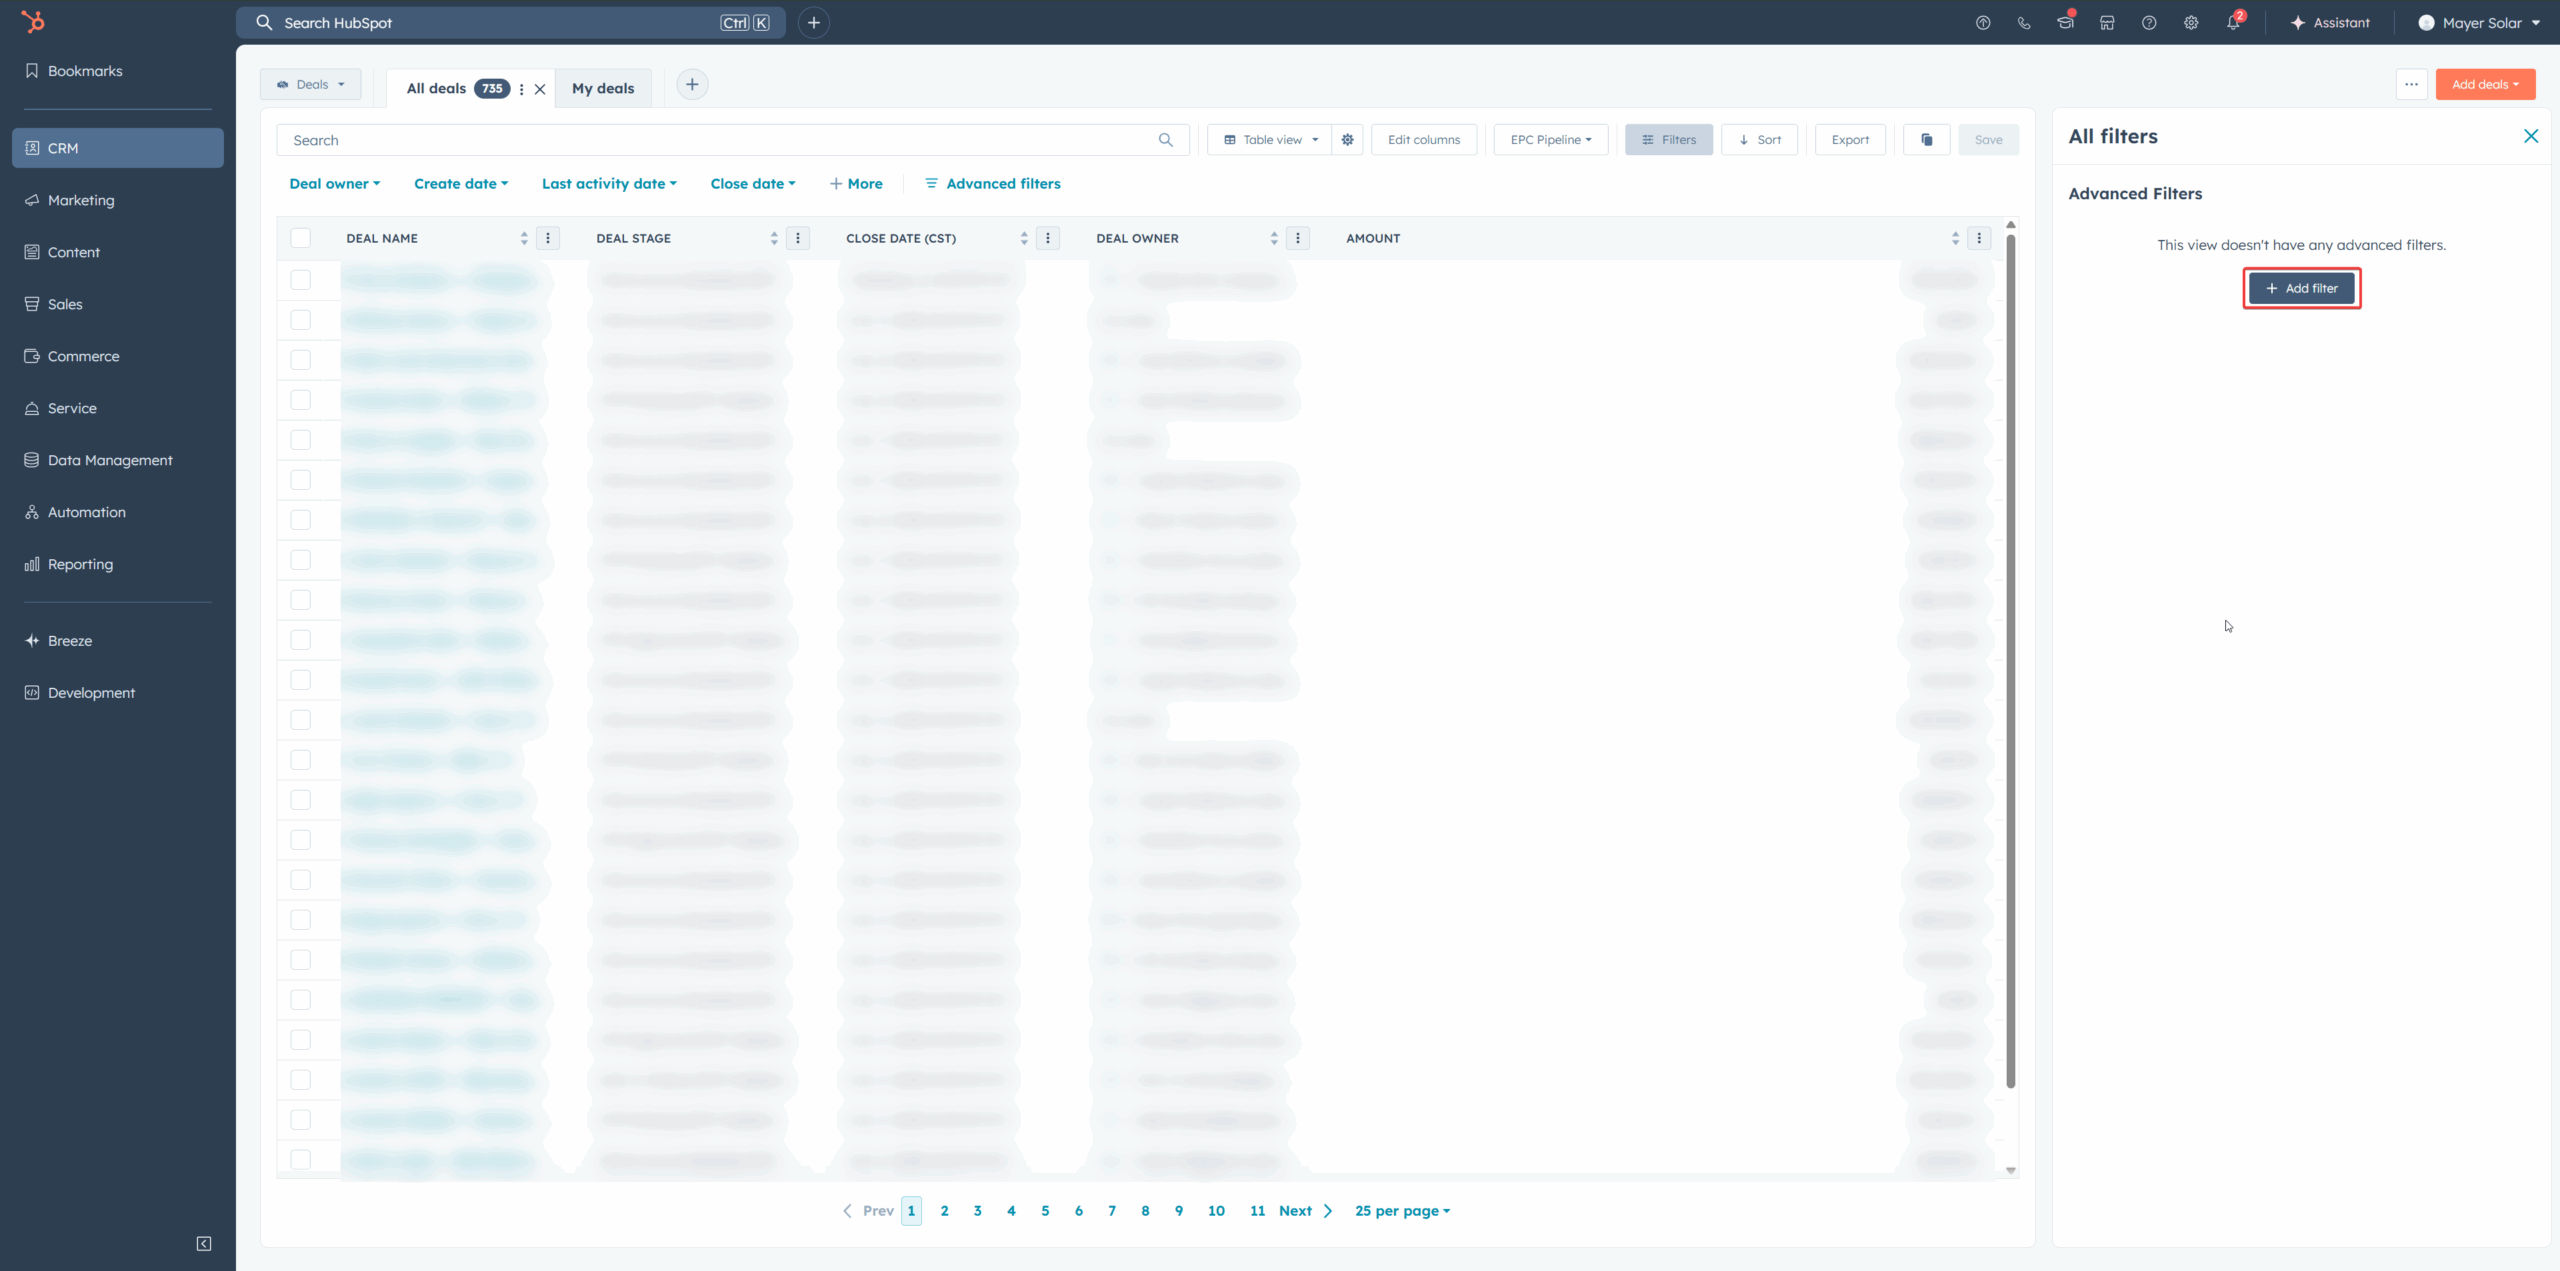
From the dropdown menu, choose the properties you want to filter by. For example:
- Loan Info
- NTP Date
- Install Schedule
Lender Cheat Sheet
Program availability, credit requirements, and proposal tools across all approved lenders.
Toggle between Loan and PPA, then switch sub-tabs for availability, key requirements, or proposal tools.
| State | Sungage Loan | Concert Finance | Climate First Bank | Almika |
|---|---|---|---|---|
| Texas | ✓ | ✓ | ✓ | ✓ |
| Oklahoma | ✓ | ✓ | ✓ | ✓ |
| Missouri | ✓ | ✓ | ✓ | ✕ |
| Lender | Credit | Max Loan | Max System | DTI | Property Value | Price Caps | Welcome Call | Add-on | Co-borrower | Ground Mount | Single Wide | Double Wide | Car Ports |
|---|---|---|---|---|---|---|---|---|---|---|---|---|---|
| Sungage Loan | 640 Experian | $150k | — | ✓ | ✕ | Per policy | ✓ | ✓ | ✓ | ✓ | ✓ | ✓ | ✓ |
| Concert Finance | 660+ | $135k | — | ✕ | ✕ | — | ✓ | — | ✓ | ✓ | ✓ | ✓ | — |
| Climate First Bank | 680+ | $350k | — | ✓ | ✕ | — | ✓ | ✓ | ✓ | ✓ | ✓ | ✓ | ✓ |
| Almika | 670+ Experian | $100k | N/A | ✓ (≤40%) | ✕ | $6.50 PPW | ✓ | ✓ | ✓ | ✕ | ✕ | ✕ | ✓ |
| Lender / Program | Proposal Tool |
|---|---|
| Sungage Loan | Aurora |
| Concert Finance | Concert Portal |
| Climate First Bank | OpenSolar |
| Almika | Aurora |
| State | Enfin TPO | Solrite | Propel (Concert) |
|---|---|---|---|
| Texas | ✓ | ✓ | ✓ |
| Oklahoma | ✕ | ✕ | ✕ |
| Missouri | ✕ | ✕ | ✕ |
| Lender | Credit | Max Loan | Max System | DTI | Property Value | Price Caps | Welcome Call | Add-on | Co-borrower | Ground Mount | Single Wide | Double Wide | Car Ports |
|---|---|---|---|---|---|---|---|---|---|---|---|---|---|
| Enfin TPO | 620+ Transunion | ✕ | 25 kW | ✕ | $200k | $0.08–$0.24/kWh | ✓ | ✓ | ✓ | ✕ | ✓ | ✓ | ✓ |
| Solrite | 600+ | ✕ | 26 kW | ✕ | ✕ | $0.12/kWh | ✓ | ✕ | ✕ | ✕ | ✓ | ✓ | ✓ |
| Propel (Concert) | 660+ Transunion | $135k | ✕ | ✕ | ✕ | — | ✓ | ✕ | ✓ | ✕ | ✓ | ✓ | ✕ |
| Lender / Program | Proposal Tool |
|---|---|
| Enfin TPO | Aurora |
| Solrite | Subcontractor Hub |
| Propel (Concert) | Concert Portal |
Notes
- Program eligibility may vary by state, property type, or loan product.
- Climate First Bank requires credit to be run through the Finance Portal. All other lenders allow credit checks directly through the proposal tool.
- Mobile home requirements: permanent foundation (block & strap not accepted), residential zoning, owner-occupied, and roof ownership.
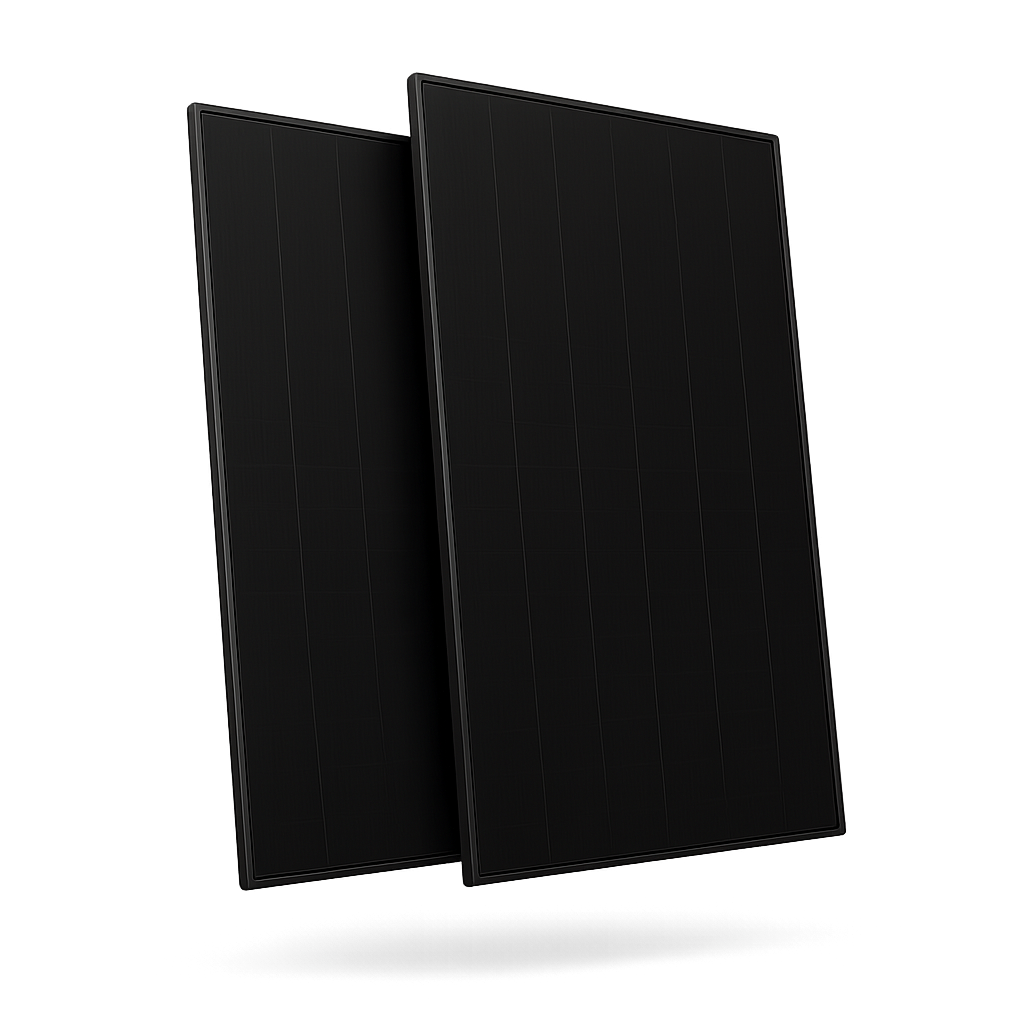
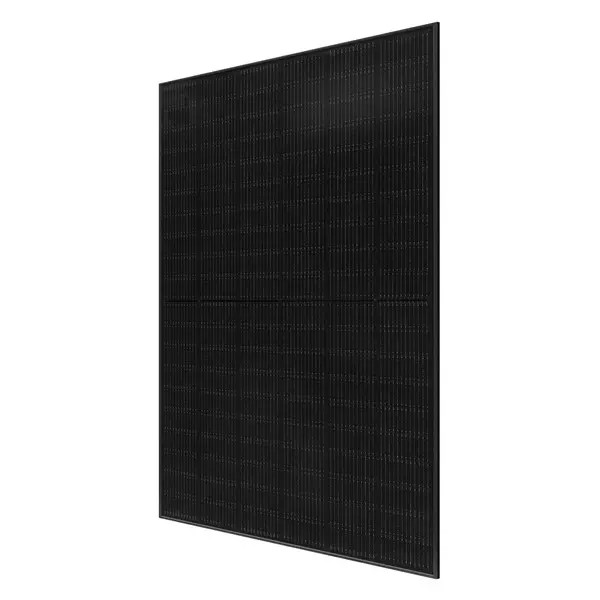
Product Offerings
Default panel, inverter, and battery packages by lender and financing type.
Mayer provides flexible programs to fit homeowner needs and financing preferences. Compare panels, inverters, and batteries across Loan and PPA options.
| Lender | Offering | Panel | Inverter | Battery |
|---|---|---|---|---|
| Enfin | Over 8 kW | Qcells 430 ACM | (Included) | Tesla |
| Enfin | Without Battery | Qcells 430 ACM | (Included) | — |
| Propel (Concert) | With Battery | Silfab 440 | IQ8HC | Enphase 10C |
| Propel (Concert) | Without Battery | Silfab 440 | IQ8HC | — |
| Lender | Offering | Panel | Inverter | Battery |
|---|---|---|---|---|
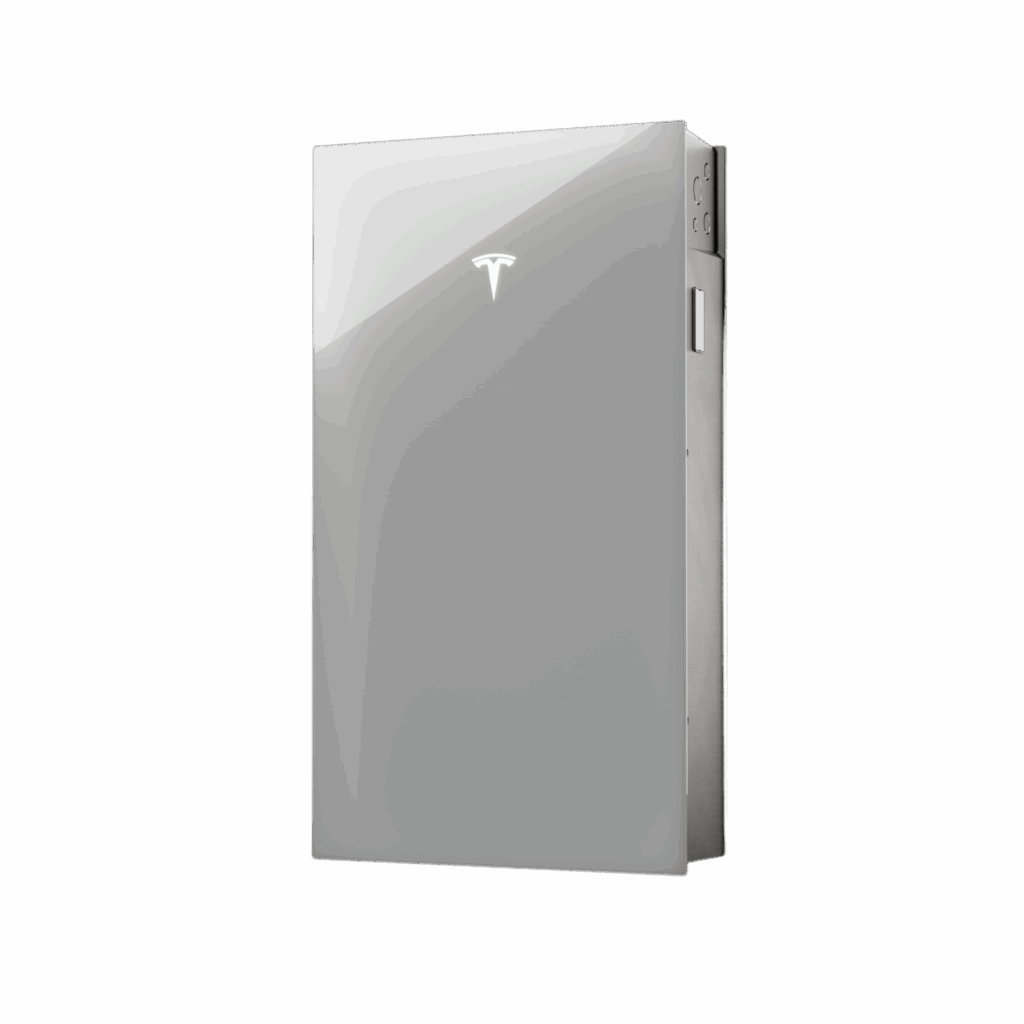
| Enfin | With Battery | Qcells 430 ACM | (Included) | Tesla / Qcell |
| Enfin | Without Battery | Qcells 430 ACM | (Included) | — |
| Sungage | With Battery | Meyer Burger 385 | Match w/ Battery | Tesla, Qcells, Enphase |
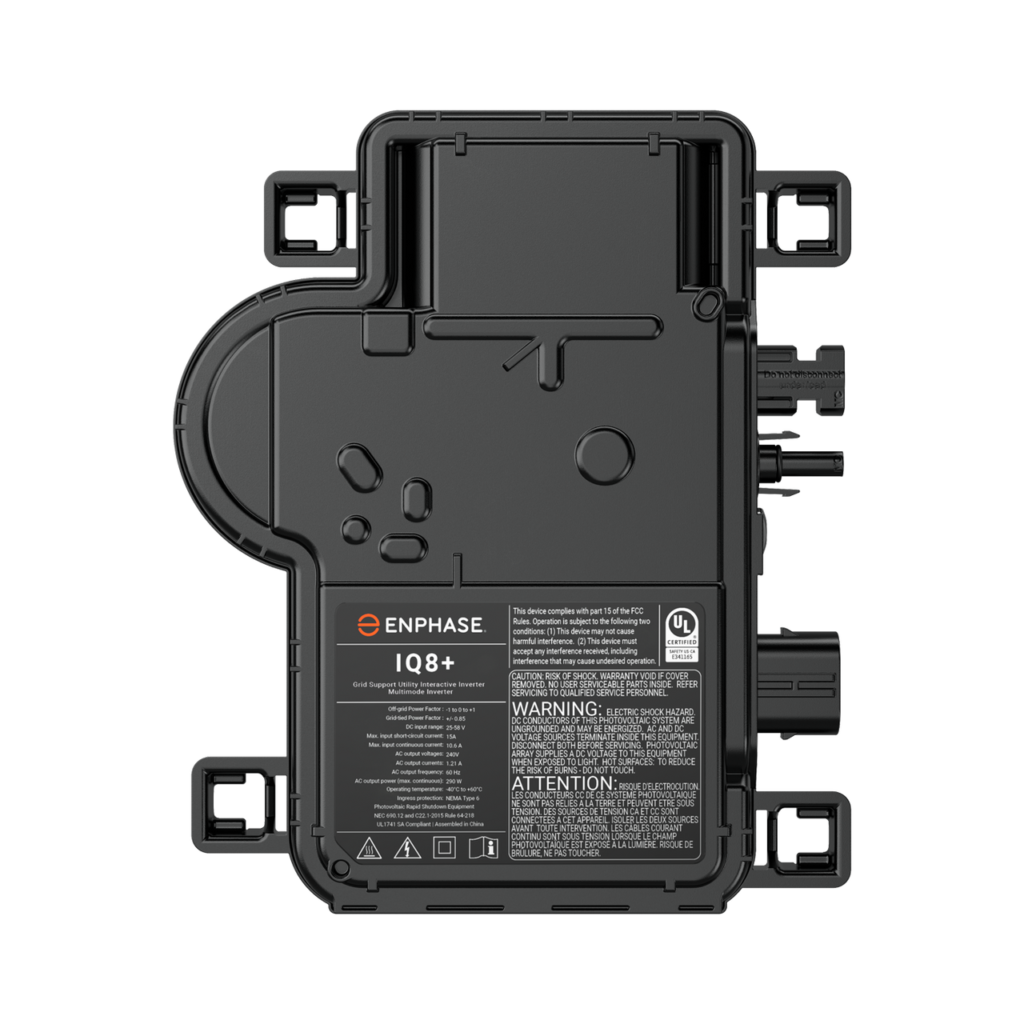
| Sungage | Without Battery | Meyer Burger 385 | Enphase IQ8+ | — |
| Concert Finance | With Battery | Silfab 440 | Enphase IQ8HC | Enphase 10C |
| Concert Finance | Without Battery | Silfab 440 | Enphase IQ8HC | — |
| Climate First Bank | With Battery | Qcells 430 ACM | (Included) | Tesla |
| Climate First Bank | Without Battery | Qcells 430 ACM | (Included) | — |
| Almika | With Battery | Qcells 430 ACM | (Included) | Tesla |
| Almika | Without Battery | Qcells 430 ACM | (Included) | — |
Building Accurate Designs
Design tolerance rules to prevent change orders and keep projects moving.
When building in Aurora, designs must reflect real site conditions and remain within Mayer's tolerance. Out-of-tolerance designs are placed on hold until corrected.
LIDAR Must Be Turned On
Enable LIDAR in Aurora — it simulates shading from nearby objects. If off, Aurora treats the roof as fully exposed, leading to inaccurate production estimates and rejections.
Fire Setback Regulations
Setbacks are clear spaces around roof ridges, hips, and edges for firefighter access. Panels too close to these boundaries need to be redesigned or shifted.
Trees and Obstructions
Avoid panels where trees, chimneys, or other obstructions cast significant shade. Even partial shading can push designs out of compliance.
Roof Height and Surroundings
Account for the height of the home and nearby structures. A single-story home next to a two-story neighbor may get blocked during peak hours — reposition panels to a better-exposed plane.
Site Survey Submission
Complete walkthrough of Mayer's site survey form — customer info through submission.
The site survey gives Mayer's design and engineering teams the details needed to prepare accurate plans.
1 Access your organization's site survey link
Open your org's custom form: 🔗 https://sitesurvey.mayersolar.com/yourcompany
(Replace "yourcompany" with your organization's assigned name.)
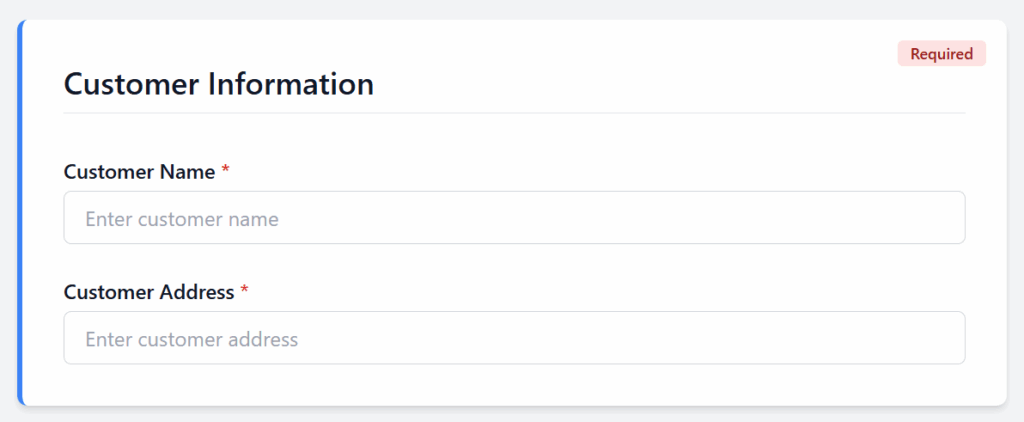
2 Enter customer information
Customer name and install address — exactly as listed on the signed agreement or proposal.
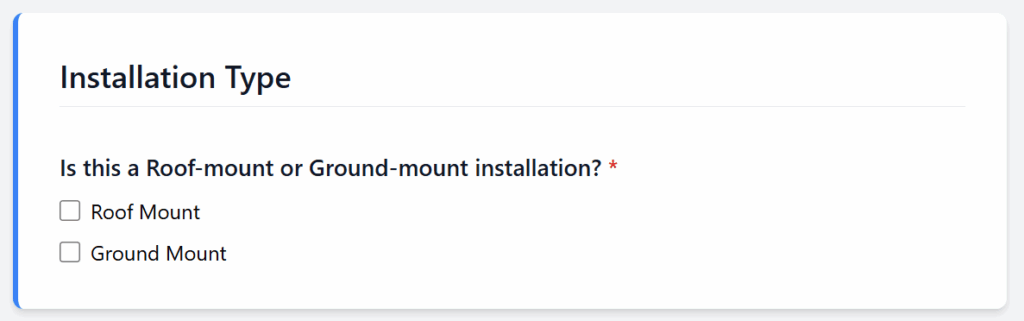
3 Select installation type
Choose Roof Mount or Ground Mount. This determines design parameters and racking specs.
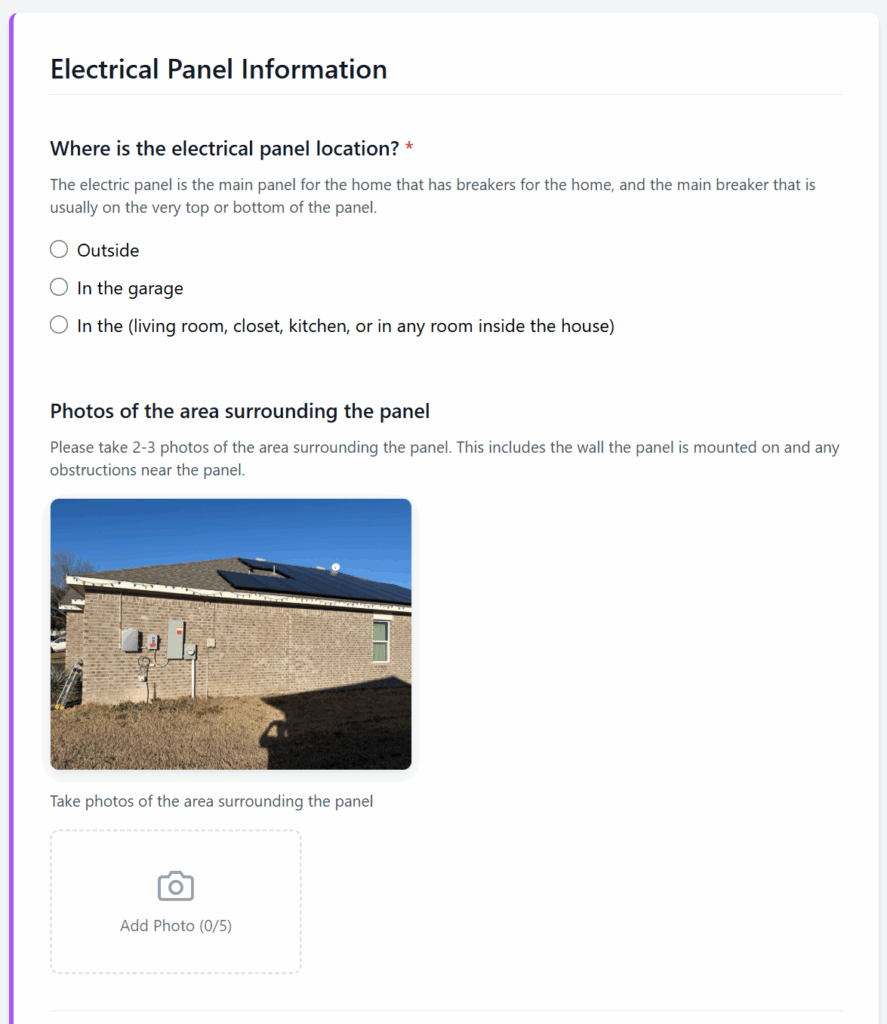
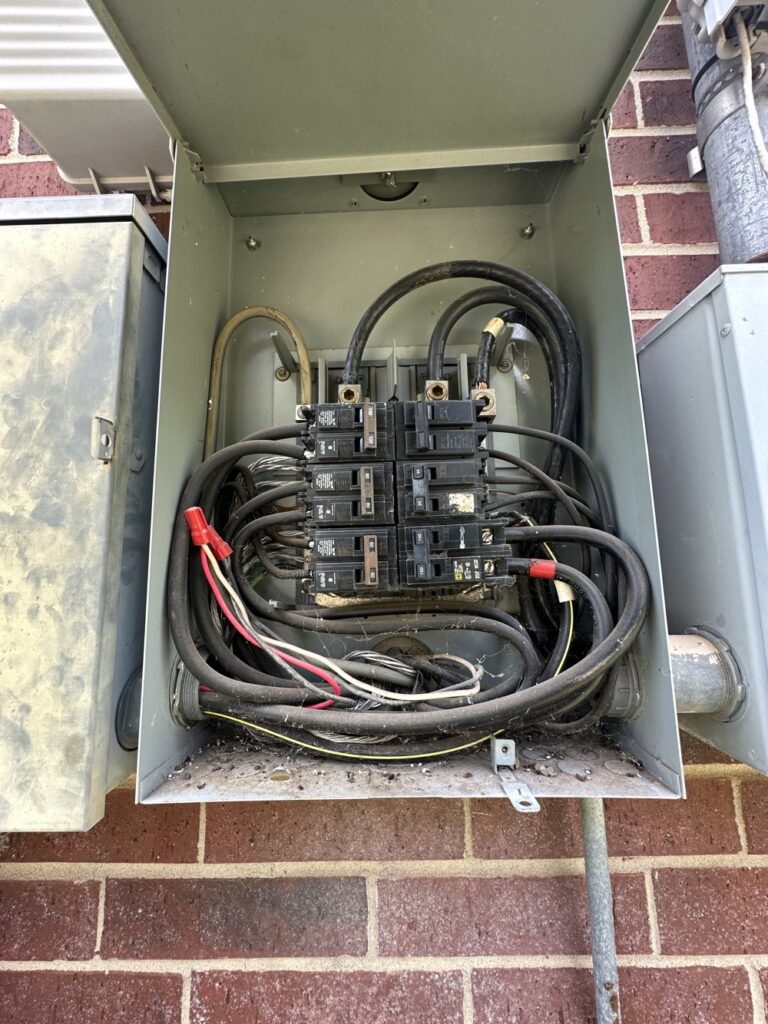
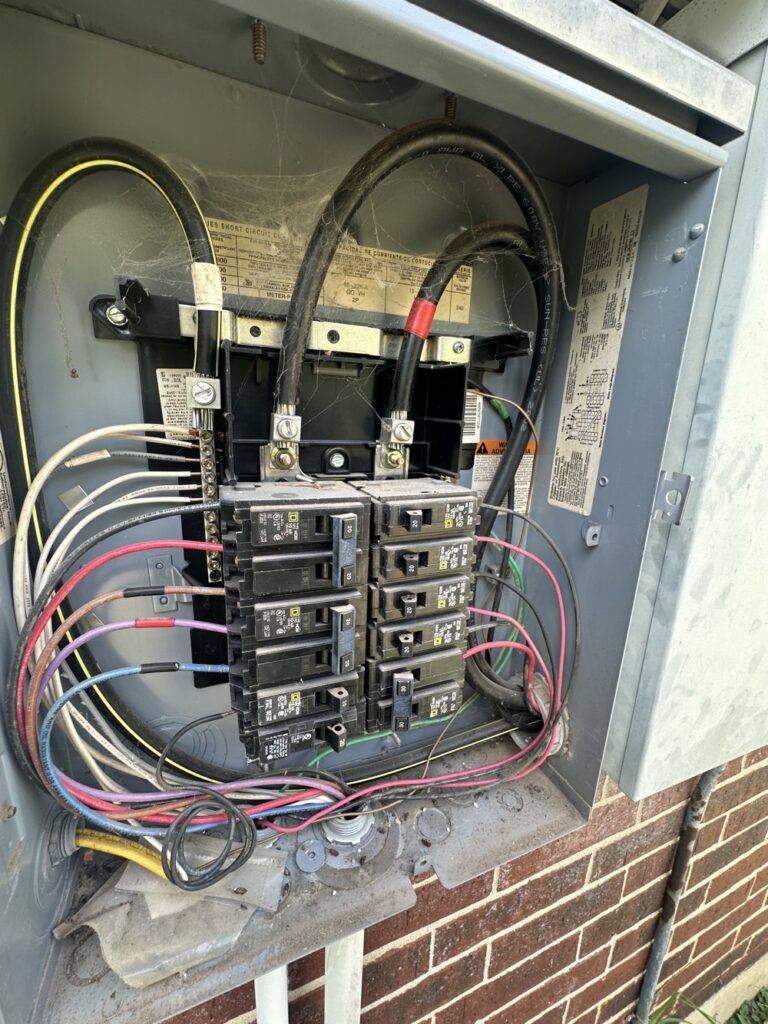
4 Complete electrical panel information
Answer all questions and upload required photos:
- Panel location (outside, garage, or inside)
- Surrounding area (2–3 wide shots)
- Inside breakers (cover open)
- Main panel label (inside door)
- Main breaker (cover on)
- Utility meter (close-up and pulled back)
- Indicate if the home has a sub panel, generator, or existing system
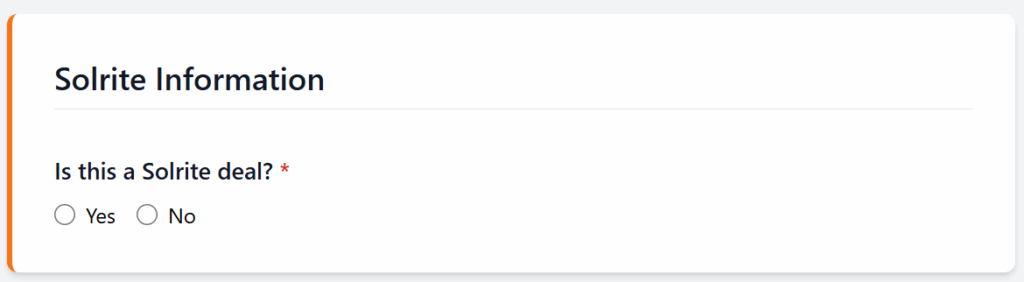
5 Fill out Solrite information
Mark Yes or No depending on whether this is a Solrite deal — directs the project to the correct internal workflow.
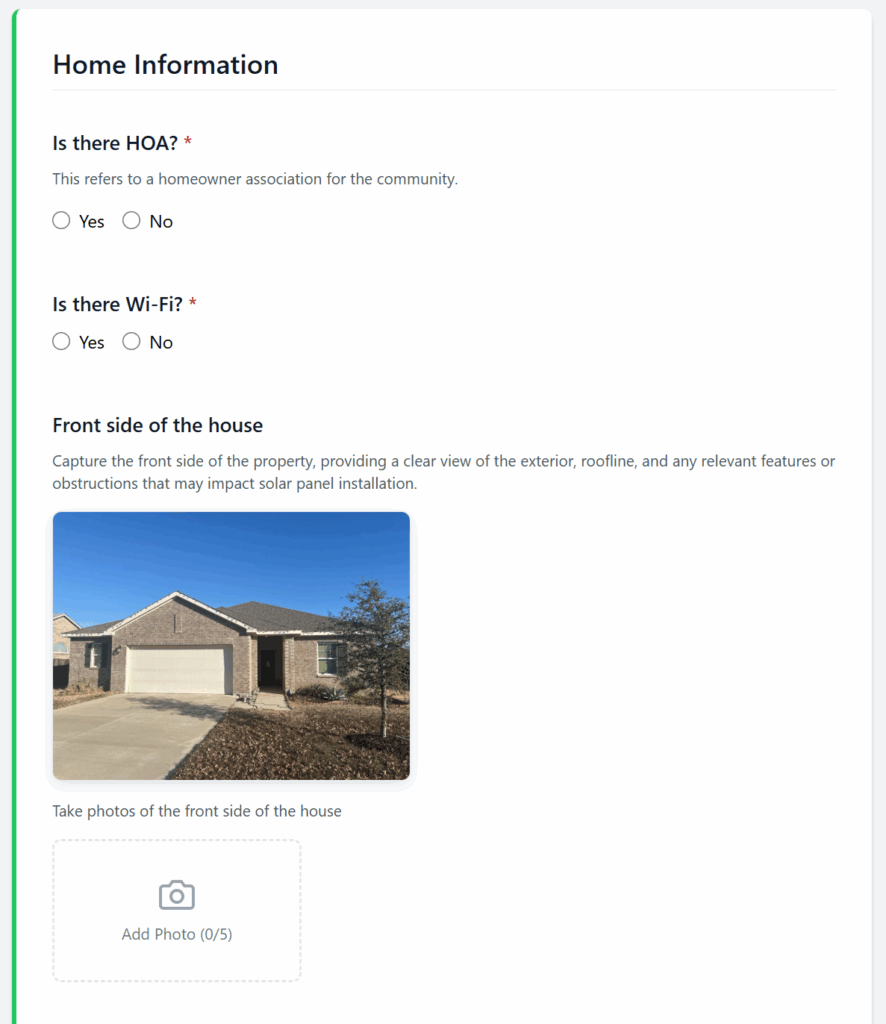
6 Complete home information
Upload photos of all sides of the home (front, back, left, right), the front mail number or address, and a clear photo of the utility bill. Note HOA status, Wi-Fi availability, and extra comments.
7 Submit the form
Review all entries and uploads, scroll to the bottom, and click Submit.
Main Panel Upgrades
When and why an electrical panel upgrade is required before install.
A Main Panel Upgrade (MPU) may be required when the home's panel can't support the additional load from solar or battery. Identify potential MPUs early to prevent delays.
What is an MPU?
Replacing or upgrading the home's main electrical service panel — typically increasing amperage (e.g., 100A → 200A) or updating outdated components to meet code and safety.
What to look out for
- Panel Amperage Rating — panels rated 100A or lower often need an upgrade.
- No Main Breaker Present — no visible main disconnect usually means MPU.
- Panel Location — closets, bedrooms, or interior spaces usually need relocation to a code-compliant exterior location.
- Full or Overcrowded Panel — no breaker spaces or double-tapped breakers means no room for solar backfeed.
- Age and Condition — rust, corrosion, obsolete brands (Zinsco, Federal Pacific), non-grounded wiring often warrant replacement.
Example scenario
Existing panel is 100A with no main breaker and no open breaker spaces. → This requires a 200A MPU before install.
Next steps
- Document the panel with clear photos in your site survey (full panel view, main breaker label, bus rating).
- Note "Possible MPU" in comments.
- Mayer's engineering team confirms during project review.
Product Spec Sheets
Manufacturer data sheets for modules, inverters, and storage. Click to download.
Commission Calculator
Estimate contract totals and projected commissions. Auto-updates as you type.
$0.00
PPA · Contract minus cost base
$0.00
Loan · Net after fee minus hard costs
Not found
That page doesn't exist yet. Head back to the home page or pick a topic from the sidebar.