
How can we help?
Help Topics
- Perfect Packet Guide
-
Perfect Packet Guide
A Perfect Packet means every part of your customer’s project is complete, accurate, and ready to move smoothly through the next stages. Each step ensures that your project can be processed without delays or follow-ups from the Mayer team.
Below is the checklist of everything that constitutes a Perfect Packet.
1. Signed Lender Document
All financing paperwork should be fully completed and signed by both the homeowner and the lender.
Notes:
Make sure all pages are signed and finalized.
The lender confirmation should reflect the approved loan terms and homeowner details.
2. Signed Install Agreement (IA)
The installation agreement must be signed by the homeowner and sales org, confirming the project scope and pricing.
Notes:
Double-check that the homeowner’s name and address match the lender docs.
Ensure the system size and price are consistent across all documents.
3. Lender Welcome Call
The homeowner must complete the lender’s welcome call before the project can move forward.
Notes:
This call verifies the homeowner’s understanding of loan terms.
Make sure the homeowner knows to expect this step early in the process.
4. Mayer Welcome Call
After the lender’s call, the homeowner will complete the Mayer welcome call to review project expectations.
Notes:
This helps confirm contact information and project understanding.
Remind homeowners to answer calls from the Mayer team to avoid scheduling delays.
5. Completed Site Survey Form
The site survey form must be filled out in full, including all required photos and answers to site-specific questions.
Notes:
Use the Mayer site survey link provided for each project.
Incomplete surveys can cause delays in design and permitting.
6. Utility Bill (All Pages)
Provide a clear image or PDF of the homeowner’s full utility bill — including all pages, front and back where applicable.
Notes:
The bill should show the homeowner’s name, address, and utility account number.
Make sure the document is legible and current (within the past 12 months).
Recommended Additions
These items aren’t mandatory, but including them helps ensure a smoother approval process:
Photo of Homeowner ID – Helps confirm identity and streamline financing verification.
Additional Notes or Relevant Info – Any details that may affect design, access, or scheduling (e.g., roof updates, preferred contact times, health considerations).
Final Check
Before submitting a project, review your packet using this list. A complete and accurate packet prevents back-and-forth communication and keeps your installs moving quickly through approval and scheduling.
- Login To Aurora Solar
-
Login To Aurora Solar
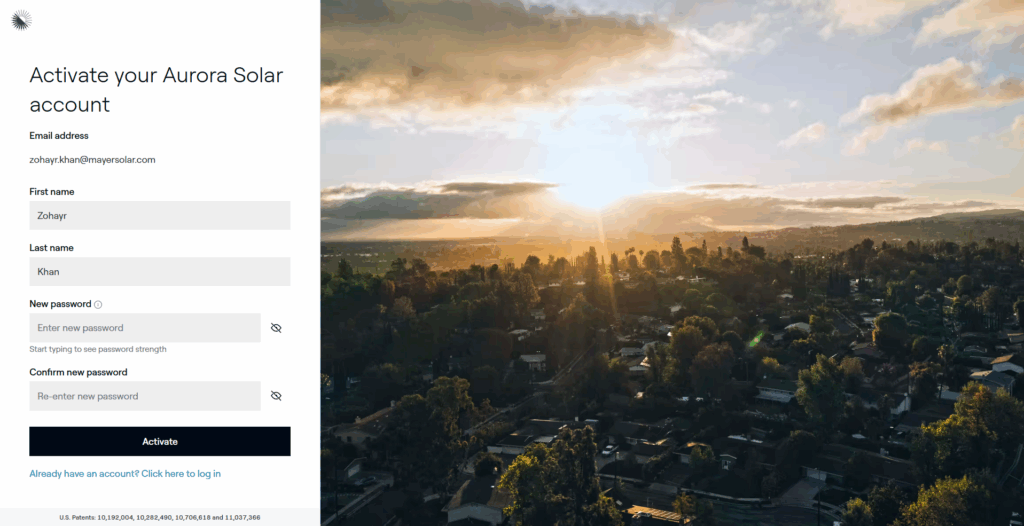
Once your organization has been onboarded, you’ll receive an invitation email from Aurora Solar to set up your account. Follow the steps below to activate your access and start creating projects under your organization.
Below is the checklist of everything that constitutes a Perfect Packet.
1. Check Your Email for the Aurora Invite
After onboarding, look for an email from Aurora Solar in your inbox. This message includes your invitation link to join your organization’s workspace.
Notes:
If you don’t see the email, check your spam or promotions folder.
The invite link may expire after a set period — request a new one from your Mayer contact if needed.

2. Activate Your Account
Click the activation link in the email to set up your Aurora account. You’ll be prompted to create a password and confirm your details.
3. Log In to Aurora
Once your account is activated, log in using your new credentials.

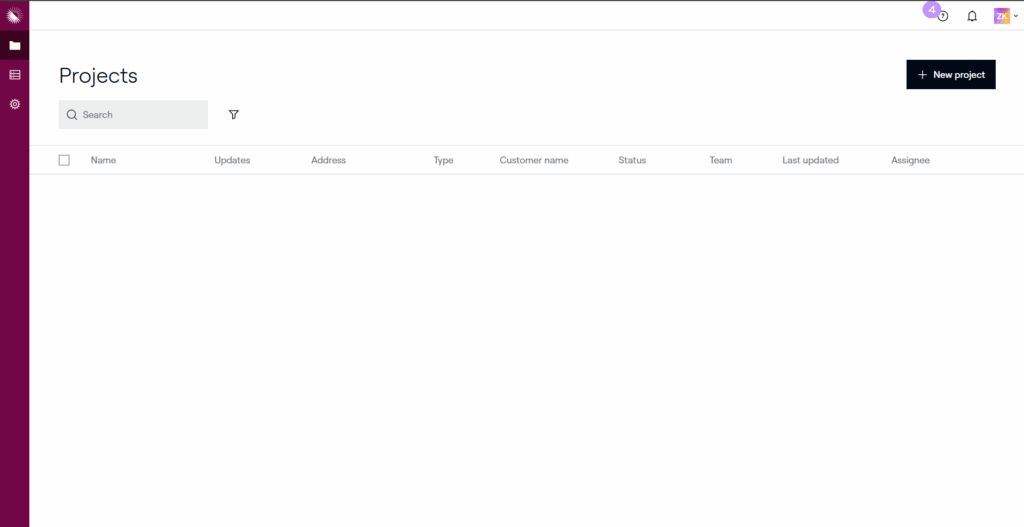
4. Access Your Organization’s Workspace
You’ll have access to your organization’s Aurora dashboard. From here, you can create new projects, edit existing ones, and collaborate with your team.
Quick Tip
Bookmark the Aurora login page for easy access in the future. You can also enable two-factor authentication for added security in your account settings.
- Lender Cheat Sheet
-
Lender Cheat Sheet
The Lender Cheat Sheet provides a complete overview of approved loan and TPO programs across all available lenders. Use this reference to confirm program availability by state, credit score requirements, system size limits, and other eligibility criteria before submitting your packet.
Lender & Program Reference
Toggle between Loan & PPA, then choose availability, key requirements, or proposal tools.
Lender Availability — Loan ProgramsState Sungage Loan Goodleap Loan Enfin Loan Concert Finance Climate First Bank Texas ✅ ✅ ✅ ✅ ✅ Oklahoma ✅ ✅ ✅ ✅ ✅ Louisiana ✅ ✅ ✅ ✅ ✅ Alabama ✅ ✅ ✅ ✅ ✅ Missouri ✅ ✅ ✅ ✅ ✅ Key Requirements — Loan ProgramsLender Credit Score Requirements Max Loan Limit Max System Size DTI factored in? Property Value Price Caps (PPW) Welcome Call Add-on System Co-borrower Ground Mount Single Wide Double Wide Car Ports Goodleap Loan 700+ any score $135k ❌ ✅ Min 100k $5 solar / $7.5 +HI (≤45% adders) ✅ ✅ ✅ ✅ ✅ ✅ ✅ Enfin Loan 650+ Transunion 125k ❌ ❌ $6.5 solar / $12 +roof / $10 +battery (≤25% adders) ✅ ✅ ✅ ✅ ❌ ❌ ❌ Sungage Loan 640 Experian 150k ✅ ❌ PPW per lender policy ✅ ✅ ✅ ✅ ✅ ✅ ✅ Concert Finance 660+ 135k ❌ ❌ ✅ ✅ ✅ ✅ ✅ Climate First Bank 680+ 350k ✅ ❌ ✅ ✅ ✅ ✅ ✅ ✅ ✅ Proposal Tools — Loan ProgramsLender / Program Proposal Tool Goodleap Loan OpenSolar Enfin Loan OpenSolar Sungage Loan Aurora Concert Finance OpenSolar Climate First Bank OpenSolar Lender Availability — PPA ProgramsState Goodleap TPO Enfin TPO Lightreach Everbright Solrite Texas ✅ ✅ ✅ ✅ ✅ Oklahoma ✅ ❌ ✅ ❌ ❌ Louisiana ❌ ❌ ❌ ❌ ❌ Alabama ❌ ❌ ❌ ❌ ❌ Missouri ✅ ❌ ❌ ❌ ❌ Key Requirements — PPA ProgramsLender Credit Score Requirements Max Loan Limit Max System Size DTI factored in? Property Value Price Caps (PPW) Welcome Call Add-on System Co-borrower Ground Mount Single Wide Double Wide Car Ports Goodleap TPO 650+ any score ❌ 25KW ❌ Min 100k $0.08–$0.24/kWh solar + battery ✅ ❌ ✅ ✅ ✅ ✅ ❌ Enfin TPO 620+ Transunion ❌ 25kW ❌ 200k $0.08–$0.24/kWh solar + battery ✅ ✅ ✅ ❌ ✅ ✅ ✅ Lightreach 660 Transunion or Equifax ❌ 25kW ❌ ❌ $0.11–$0.175/kWh solar (0.21 add cap) ❌ ✅ ✅ ✅ ❌ ❌ ❌ Everbright 650+ 150k 30K ✅ ❌ $6–$9 PPW solar + battery ✅ ✅ ✅ ❌ ❌ ❌ ✅ Solrite 600+ ❌ 26KW ❌ ❌ 0.12c ✅ ❌ ❌ ❌ ✅ ✅ ✅ Proposal Tools — PPA ProgramsLender / Program Proposal Tool Goodleap TPO Aurora Enfin TPO Aurora Lightreach Aurora or OpenSolar Everbright Everbright Portal Solrite Subcontractor Hub Notes
- Program eligibility may vary by state, property type, or loan product.
- For Climate First Bank, credit must be run through the Finance Portal — all other lenders allow credit checks directly through the proposal tool.
Contact your Mayer representative if you have questions about lender availability or terms.
- Lenders that allow mobile homes typically require:
Permanent foundation (block and strap not accepted)
Residential zoning
- Owner-occupied and roof ownership
- Product Offerings
-
Product Offerings
Mayer provides flexible solar programs designed to fit a wide range of homeowner needs and financing preferences. Compare Panels, Inverters, and Batteries across different loan and PPA options to select the best setup for your customer. Each program below includes a compact table for quick reference.
Notes
PPA options may vary depending on whether the system size is above or below 8 kW.
Specific panels, inverters, and batteries may differ by region and stock.
Offerings By Lender
Switch between Loan & PPA to see default panel, inverter, and battery packages.
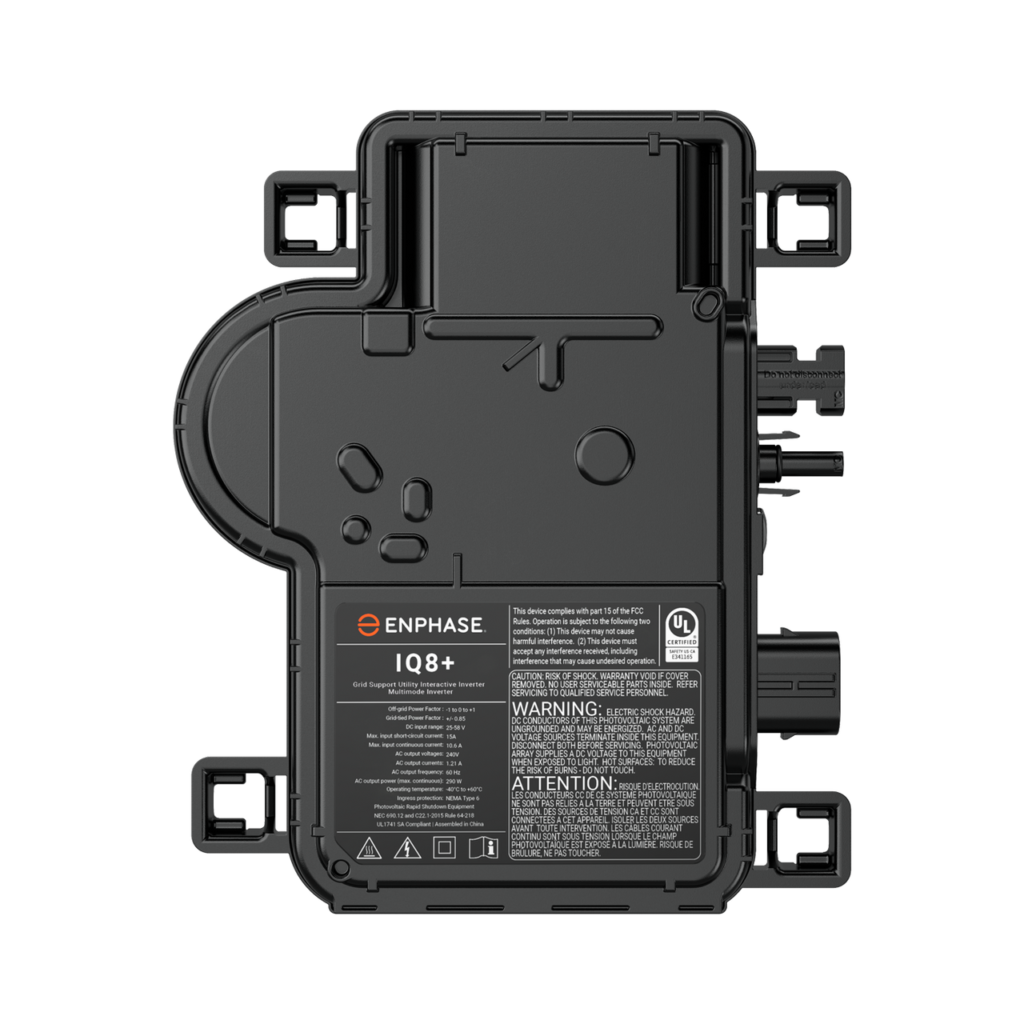
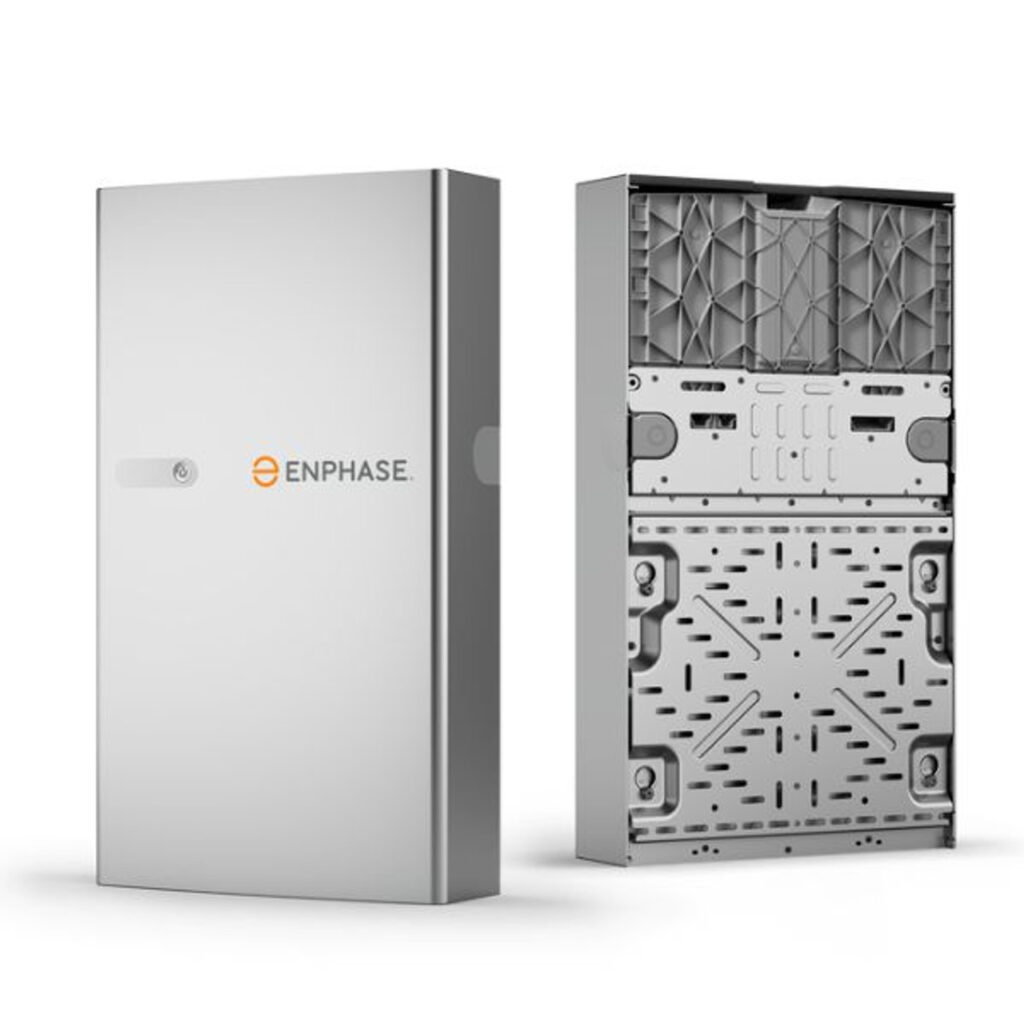
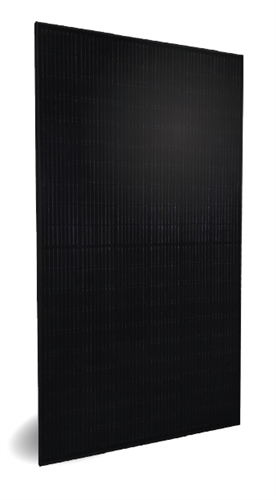
Loan Product OfferingsLender Offering Panel Inverter Battery Enfin With Battery Qcells 430 (Included) Tesla / Qcell Enfin Without Battery Qcells 430 (Included) — Sungage With Battery Trina 445 Match w/ Battery Tesla, Qcells, Enphase Sungage Without Battery Trina 445 Enphase IQ8+ — Goodleap With Battery Trina 445 Match w/ Battery Tesla, Qcells, Enphase Goodleap Without Battery Trina 445 Enphase IQ8+ — Concert Finance With Battery Trina 445 Match w/ Battery Tesla, Qcells, Enphase Concert Finance Without Battery Trina 445 Enphase IQ8+ — Climate First Bank With Battery Trina 445 Match w/ Battery Tesla, Qcells, Enphase Climate First Bank Without Battery Trina 445 Enphase IQ8+ — PPA Product OfferingsLender Offering Panel Inverter Battery Enfin Over 8kW Qcells 430 (Included) Tesla Enfin Without Battery Qcells 430 (Included) — Goodleap With Battery Qcell 430 Tesla Tesla Goodleap Without Battery Sirius PV 415 Enphase IQ8HC — Everbright With Battery Qcells 405 Tesla MCI Tesla Everbright Without Battery Trina 445 Enphase IQ8+ — Lightreach Option #1 Qcell 430 (Included) Tesla Lightreach Option #2 Sirius PV 415 Enphase IQ8HC Enphase - building accurate designs
-
Building Accurate Designs
When building your system in Aurora, it’s essential that the design accurately reflects real site conditions and remains within Mayer’s design tolerance.
If your design falls outside tolerance, the project will be placed on hold until the necessary corrections are made.The goal is to prevent change orders and keep your project moving smoothly through design, engineering, and permitting.
LIDAR Must Be Turned On
Make sure LIDAR (Light Detection and Ranging) is enabled in Aurora.
LIDAR creates a 3D surface map that simulates shading from nearby objects. If it’s turned off, Aurora will treat the roof as fully exposed to sunlight — which can lead to inaccurate production estimates and design rejections.
Fire Setback Regulations
Setbacks are clear spaces around roof ridges, hips, and edges that allow safe firefighter access. Panels placed too close to these boundaries will need to be redesigned or shifted, delaying approval.
Trees and Obstructions
Avoid placing panels where trees, chimneys, or other obstructions will cast significant shading throughout the day. Even partial shading can reduce system performance and push the design out of compliance.
Roof Height and Surroundings
Take into account the height of the home and nearby structures.
For example, if a single-story home is next to a taller, two-story house, that neighboring structure may block sunlight during peak hours.
In such cases, reposition panels to a roof plane with better solar exposure.⚠️ Out-of-Tolerance Designs
Your project may be flagged as out of tolerance if:
Panels are placed in shaded or obstructed areas
Fire setbacks are violated
LIDAR is turned off or shading is inaccurate
Design significantly differs from actual site conditions
When this occurs, the project will be paused until updated, compliant designs are submitted.
- Site Survey Submission
-
Site Survey Submission
The site survey ensures Mayer’s design and engineering teams have all the details needed to prepare accurate plans and move your project forward.
1. Access Your Organization’s Site Survey Link
Open your organization’s custom site survey form using the link provided by your Mayer contact:
🔗 https://sitesurvey.mayersolar.com/yourcompany
(Replace “yourcompany” with your organization’s assigned name in the URL.)
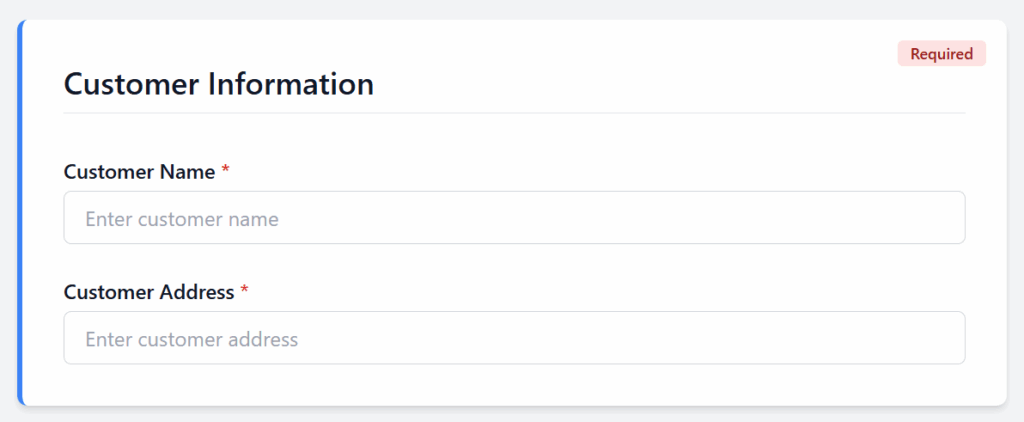
2. Enter Customer Information
Provide the customer’s name and installation address exactly as listed on the signed agreement or proposal.
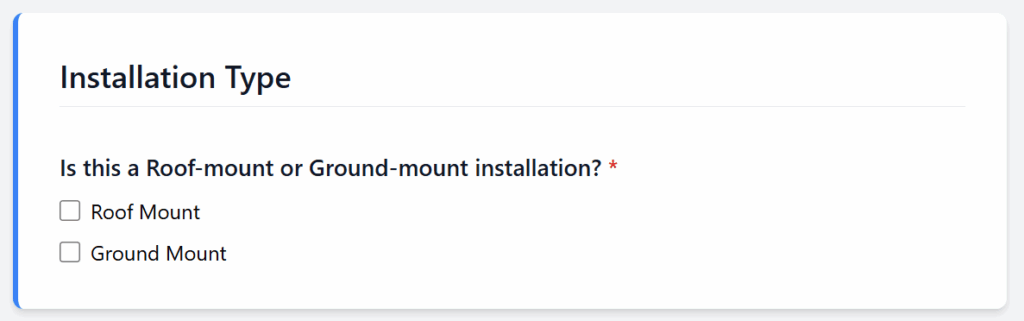
3. Select Installation Type
Choose whether the system is Roof Mount or Ground Mount.
This determines design parameters and racking specifications.
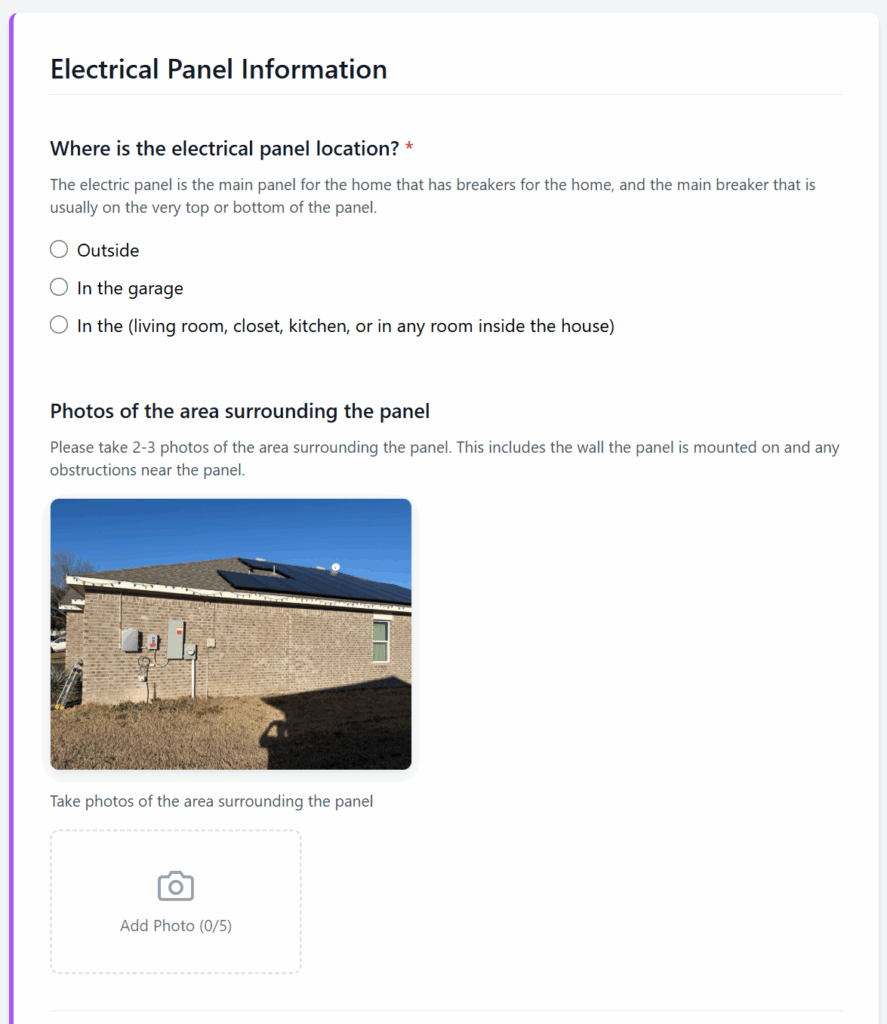
4. Complete Electrical Panel Information
Fill out all questions and upload required photos:
Panel location (outside, garage, or inside)
Surrounding area (2–3 wide shots)
Inside breakers (cover open)
Main panel label (inside door)
Main breaker (cover on)
Utility meter (close-up and pulled back)
Also indicate if the home has a sub panel, generator, or existing system
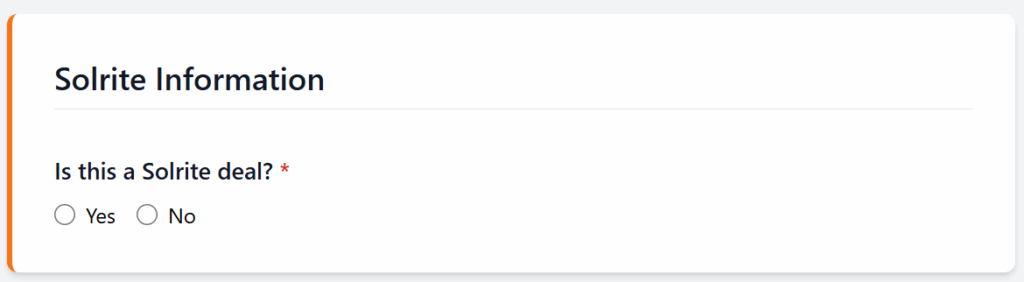
5. Fill Out Solrite Information
Mark Yes or No depending on whether this is a Solrite deal. This directs the project to the correct internal workflow.
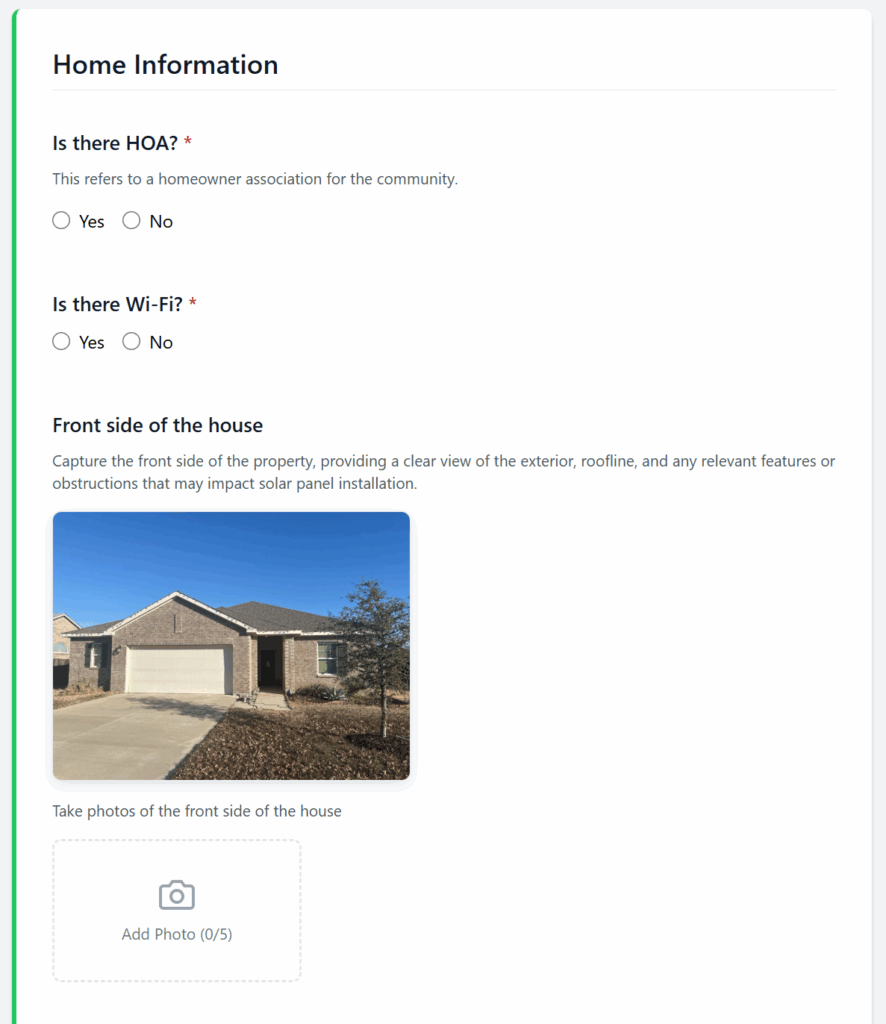
6. Complete Home Information
Upload photos showing all sides of the home:
Front, back, left, and right sides
Front mail number or address
Clear photo of the utility bill
Also note whether there’s an HOA, if Wi-Fi is available, and add any extra comments relevant to the installation.
7. Submit the Form
After reviewing all entries and uploads, scroll to the bottom and click the Submit button.
Notes
Only submit one form per project.
Missing or unclear photos can delay design and permitting.
If you encounter issues accessing your link, contact your Mayer representative for support.
- Main Panel Upgrade
-
Main Panel Upgrade
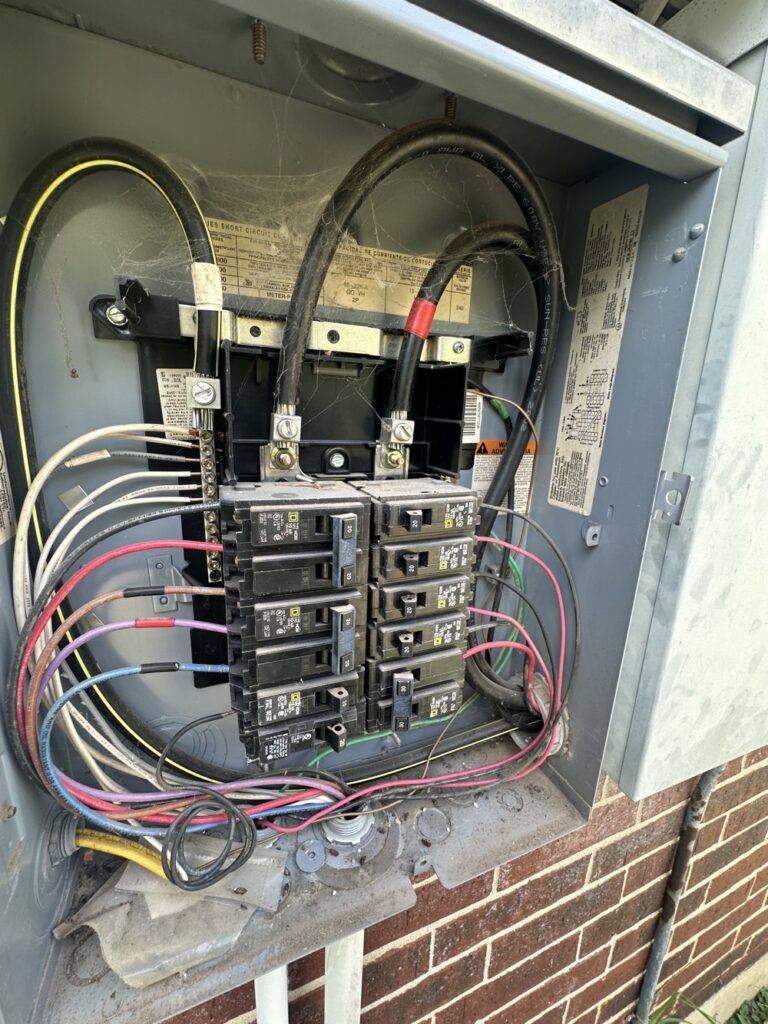
A Main Panel Upgrade (MPU) may be required when a home’s existing electrical panel isn’t capable of supporting the additional load from a solar system or battery. Identifying a potential MPU early helps prevent delays during design, permitting, or installation.
⚡ What Is an MPU?
An MPU involves replacing or upgrading the home’s main electrical service panel — typically increasing its amperage capacity (for example, from 100A to 200A) or updating outdated components to meet code and safety requirements.
This ensures the solar system can safely integrate with the home’s electrical infrastructure.
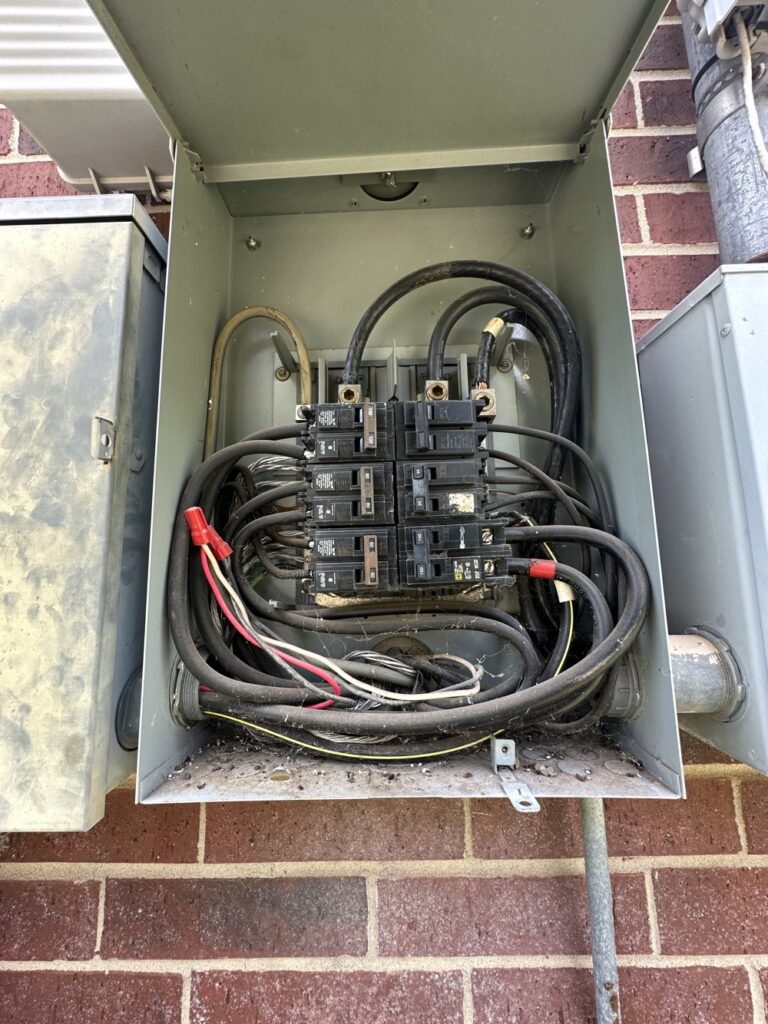
What to Look Out For
Check the following during the site survey or walkthrough:
Panel Amperage Rating – Panels rated at 100 amps or lower often require an upgrade.
No Main Breaker Present – If the main panel doesn’t have a visible main disconnect breaker, an MPU is typically required.
Panel Location – Panels located in closets, bedrooms, or interior spaces usually need to be relocated to an exterior, code-compliant location.
Full or Overcrowded Panel – If there are no available breaker spaces, or double-tapped breakers, the system may not have room for solar backfeed.
Age and Condition – Panels showing rust, corrosion, obsolete brands (e.g., Zinsco, Federal Pacific), or non-grounded wiring often warrant replacement.
Example Scenario
The existing panel is a 100A main panel with no main breaker and no open breaker spaces.
👉 This setup would require a 200A Main Panel Upgrade (MPU) before proceeding with installation.
Next Steps
If you identify potential MPU conditions:
Document the panel with clear photos in your site survey form (full panel view, main breaker label, and bus rating).
Note “Possible MPU” in the comments section.
Mayer’s engineering team will confirm if an MPU is required during project review.
Notes
- MPU requirements can affect project pricing and timeline.
If in doubt, consult your Mayer contact before submitting the site survey.
- Product Spec Sheets
-
Product Spec Sheets
- Commission Calculator
-
Commission Calculator
The Commission Calculator allows sales reps to quickly estimate contract totals and projected commissions based on system size, adders, and pricing inputs. Use this tool before sending a proposal to ensure the deal meets your target margins.
Enter Deal Details
Switch between PPA & Loan · Auto-updates as you type
PPA Deal InputsCommission$0.00Loan Deal InputsCommission$0.00System Size (kW) – total AC or DC size used for pricing calculations
Adders Cost ($) – total dollar amount of adders (roof work, MPU, etc.)
Adders Cost (Per Watt) – adders billed on a per-watt basis
Install PPW – the installation price per watt
Redline PPW – your assigned base pricing threshold
Notes
Make sure all numbers are accurate before calculating. Even small changes in system size or adders can significantly affect the contract amount.
This calculator is for internal sales guidance only and does not replace lender-approved pricing tools.
Perfect Packet Guide
A Perfect Packet means every part of your customer’s project is complete, accurate, and ready to move smoothly through the next stages. Each step ensures that your project can be processed without delays or follow-ups from the Mayer team.
Below is the checklist of everything that constitutes a Perfect Packet.
1. Signed Lender Document
All financing paperwork should be fully completed and signed by both the homeowner and the lender.
Notes:
Make sure all pages are signed and finalized.
The lender confirmation should reflect the approved loan terms and homeowner details.
2. Signed Install Agreement (IA)
The installation agreement must be signed by the homeowner and sales org, confirming the project scope and pricing.
Notes:
Double-check that the homeowner’s name and address match the lender docs.
Ensure the system size and price are consistent across all documents.
3. Lender Welcome Call
The homeowner must complete the lender’s welcome call before the project can move forward.
Notes:
This call verifies the homeowner’s understanding of loan terms.
Make sure the homeowner knows to expect this step early in the process.
4. Mayer Welcome Call
After the lender’s call, the homeowner will complete the Mayer welcome call to review project expectations.
Notes:
This helps confirm contact information and project understanding.
Remind homeowners to answer calls from the Mayer team to avoid scheduling delays.
5. Completed Site Survey Form
The site survey form must be filled out in full, including all required photos and answers to site-specific questions.
Notes:
Use the Mayer site survey link provided for each project.
Incomplete surveys can cause delays in design and permitting.
6. Utility Bill (All Pages)
Provide a clear image or PDF of the homeowner’s full utility bill — including all pages, front and back where applicable.
Notes:
The bill should show the homeowner’s name, address, and utility account number.
Make sure the document is legible and current (within the past 12 months).
Recommended Additions
These items aren’t mandatory, but including them helps ensure a smoother approval process:
Photo of Homeowner ID – Helps confirm identity and streamline financing verification.
Additional Notes or Relevant Info – Any details that may affect design, access, or scheduling (e.g., roof updates, preferred contact times, health considerations).
Final Check
Before submitting a project, review your packet using this list. A complete and accurate packet prevents back-and-forth communication and keeps your installs moving quickly through approval and scheduling.
Login To Aurora Solar
Once your organization has been onboarded, you’ll receive an invitation email from Aurora Solar to set up your account. Follow the steps below to activate your access and start creating projects under your organization.
Below is the checklist of everything that constitutes a Perfect Packet.
1. Check Your Email for the Aurora Invite
After onboarding, look for an email from Aurora Solar in your inbox. This message includes your invitation link to join your organization’s workspace.
Notes:
If you don’t see the email, check your spam or promotions folder.
The invite link may expire after a set period — request a new one from your Mayer contact if needed.
2. Activate Your Account
Click the activation link in the email to set up your Aurora account. You’ll be prompted to create a password and confirm your details.
3. Log In to Aurora
Once your account is activated, log in using your new credentials.
4. Access Your Organization’s Workspace
You’ll have access to your organization’s Aurora dashboard. From here, you can create new projects, edit existing ones, and collaborate with your team.
Quick Tip
Bookmark the Aurora login page for easy access in the future. You can also enable two-factor authentication for added security in your account settings.
Lender Cheat Sheet
The Lender Cheat Sheet provides a complete overview of approved loan and TPO programs across all available lenders. Use this reference to confirm program availability by state, credit score requirements, system size limits, and other eligibility criteria before submitting your packet.
Lender & Program Reference
Toggle between Loan & PPA, then choose availability, key requirements, or proposal tools.
| State | Sungage Loan | Goodleap Loan | Enfin Loan | Concert Finance | Climate First Bank |
|---|---|---|---|---|---|
| Texas | ✅ | ✅ | ✅ | ✅ | ✅ |
| Oklahoma | ✅ | ✅ | ✅ | ✅ | ✅ |
| Louisiana | ✅ | ✅ | ✅ | ✅ | ✅ |
| Alabama | ✅ | ✅ | ✅ | ✅ | ✅ |
| Missouri | ✅ | ✅ | ✅ | ✅ | ✅ |
| Lender | Credit Score Requirements | Max Loan Limit | Max System Size | DTI factored in? | Property Value | Price Caps (PPW) | Welcome Call | Add-on System | Co-borrower | Ground Mount | Single Wide | Double Wide | Car Ports |
|---|---|---|---|---|---|---|---|---|---|---|---|---|---|
| Goodleap Loan | 700+ any score | $135k | ❌ | ✅ | Min 100k | $5 solar / $7.5 +HI (≤45% adders) | ✅ | ✅ | ✅ | ✅ | ✅ | ✅ | ✅ |
| Enfin Loan | 650+ Transunion | 125k | ❌ | ❌ | $6.5 solar / $12 +roof / $10 +battery (≤25% adders) | ✅ | ✅ | ✅ | ✅ | ❌ | ❌ | ❌ | |
| Sungage Loan | 640 Experian | 150k | ✅ | ❌ | PPW per lender policy | ✅ | ✅ | ✅ | ✅ | ✅ | ✅ | ✅ | |
| Concert Finance | 660+ | 135k | ❌ | ❌ | ✅ | ✅ | ✅ | ✅ | ✅ | ||||
| Climate First Bank | 680+ | 350k | ✅ | ❌ | ✅ | ✅ | ✅ | ✅ | ✅ | ✅ | ✅ |
| Lender / Program | Proposal Tool |
|---|---|
| Goodleap Loan | OpenSolar |
| Enfin Loan | OpenSolar |
| Sungage Loan | Aurora |
| Concert Finance | OpenSolar |
| Climate First Bank | OpenSolar |
| State | Goodleap TPO | Enfin TPO | Lightreach | Everbright | Solrite |
|---|---|---|---|---|---|
| Texas | ✅ | ✅ | ✅ | ✅ | ✅ |
| Oklahoma | ✅ | ❌ | ✅ | ❌ | ❌ |
| Louisiana | ❌ | ❌ | ❌ | ❌ | ❌ |
| Alabama | ❌ | ❌ | ❌ | ❌ | ❌ |
| Missouri | ✅ | ❌ | ❌ | ❌ | ❌ |
| Lender | Credit Score Requirements | Max Loan Limit | Max System Size | DTI factored in? | Property Value | Price Caps (PPW) | Welcome Call | Add-on System | Co-borrower | Ground Mount | Single Wide | Double Wide | Car Ports |
|---|---|---|---|---|---|---|---|---|---|---|---|---|---|
| Goodleap TPO | 650+ any score | ❌ | 25KW | ❌ | Min 100k | $0.08–$0.24/kWh solar + battery | ✅ | ❌ | ✅ | ✅ | ✅ | ✅ | ❌ |
| Enfin TPO | 620+ Transunion | ❌ | 25kW | ❌ | 200k | $0.08–$0.24/kWh solar + battery | ✅ | ✅ | ✅ | ❌ | ✅ | ✅ | ✅ |
| Lightreach | 660 Transunion or Equifax | ❌ | 25kW | ❌ | ❌ | $0.11–$0.175/kWh solar (0.21 add cap) | ❌ | ✅ | ✅ | ✅ | ❌ | ❌ | ❌ |
| Everbright | 650+ | 150k | 30K | ✅ | ❌ | $6–$9 PPW solar + battery | ✅ | ✅ | ✅ | ❌ | ❌ | ❌ | ✅ |
| Solrite | 600+ | ❌ | 26KW | ❌ | ❌ | 0.12c | ✅ | ❌ | ❌ | ❌ | ✅ | ✅ | ✅ |
| Lender / Program | Proposal Tool |
|---|---|
| Goodleap TPO | Aurora |
| Enfin TPO | Aurora |
| Lightreach | Aurora or OpenSolar |
| Everbright | Everbright Portal |
| Solrite | Subcontractor Hub |
Notes
- Program eligibility may vary by state, property type, or loan product.
- For Climate First Bank, credit must be run through the Finance Portal — all other lenders allow credit checks directly through the proposal tool.
Contact your Mayer representative if you have questions about lender availability or terms.
- Lenders that allow mobile homes typically require:
Permanent foundation (block and strap not accepted)
Residential zoning
- Owner-occupied and roof ownership
Product Offerings
Mayer provides flexible solar programs designed to fit a wide range of homeowner needs and financing preferences. Compare Panels, Inverters, and Batteries across different loan and PPA options to select the best setup for your customer. Each program below includes a compact table for quick reference.
Notes
PPA options may vary depending on whether the system size is above or below 8 kW.
Specific panels, inverters, and batteries may differ by region and stock.
Offerings By Lender
Switch between Loan & PPA to see default panel, inverter, and battery packages.
| Lender | Offering | Panel | Inverter | Battery |
|---|---|---|---|---|
| Enfin | With Battery | Qcells 430 | (Included) | Tesla / Qcell |
| Enfin | Without Battery | Qcells 430 | (Included) | — |
| Sungage | With Battery | Trina 445 | Match w/ Battery | Tesla, Qcells, Enphase |
| Sungage | Without Battery | Trina 445 | Enphase IQ8+ | — |
| Goodleap | With Battery | Trina 445 | Match w/ Battery | Tesla, Qcells, Enphase |
| Goodleap | Without Battery | Trina 445 | Enphase IQ8+ | — |
| Concert Finance | With Battery | Trina 445 | Match w/ Battery | Tesla, Qcells, Enphase |
| Concert Finance | Without Battery | Trina 445 | Enphase IQ8+ | — |
| Climate First Bank | With Battery | Trina 445 | Match w/ Battery | Tesla, Qcells, Enphase |
| Climate First Bank | Without Battery | Trina 445 | Enphase IQ8+ | — |
| Lender | Offering | Panel | Inverter | Battery |
|---|---|---|---|---|
| Enfin | Over 8kW | Qcells 430 | (Included) | Tesla |
| Enfin | Without Battery | Qcells 430 | (Included) | — |
| Goodleap | With Battery | Qcell 430 | Tesla | Tesla |
| Goodleap | Without Battery | Sirius PV 415 | Enphase IQ8HC | — |
| Everbright | With Battery | Qcells 405 | Tesla MCI | Tesla |
| Everbright | Without Battery | Trina 445 | Enphase IQ8+ | — |
| Lightreach | Option #1 | Qcell 430 | (Included) | Tesla |
| Lightreach | Option #2 | Sirius PV 415 | Enphase IQ8HC | Enphase |
Building Accurate Designs
When building your system in Aurora, it’s essential that the design accurately reflects real site conditions and remains within Mayer’s design tolerance.
If your design falls outside tolerance, the project will be placed on hold until the necessary corrections are made.
The goal is to prevent change orders and keep your project moving smoothly through design, engineering, and permitting.
LIDAR Must Be Turned On
Make sure LIDAR (Light Detection and Ranging) is enabled in Aurora.
LIDAR creates a 3D surface map that simulates shading from nearby objects. If it’s turned off, Aurora will treat the roof as fully exposed to sunlight — which can lead to inaccurate production estimates and design rejections.
Fire Setback Regulations
Setbacks are clear spaces around roof ridges, hips, and edges that allow safe firefighter access. Panels placed too close to these boundaries will need to be redesigned or shifted, delaying approval.
Trees and Obstructions
Avoid placing panels where trees, chimneys, or other obstructions will cast significant shading throughout the day. Even partial shading can reduce system performance and push the design out of compliance.
Roof Height and Surroundings
Take into account the height of the home and nearby structures.
For example, if a single-story home is next to a taller, two-story house, that neighboring structure may block sunlight during peak hours.
In such cases, reposition panels to a roof plane with better solar exposure.
⚠️ Out-of-Tolerance Designs
Your project may be flagged as out of tolerance if:
Panels are placed in shaded or obstructed areas
Fire setbacks are violated
LIDAR is turned off or shading is inaccurate
Design significantly differs from actual site conditions
When this occurs, the project will be paused until updated, compliant designs are submitted.
Site Survey Submission
The site survey ensures Mayer’s design and engineering teams have all the details needed to prepare accurate plans and move your project forward.
1. Access Your Organization’s Site Survey Link
Open your organization’s custom site survey form using the link provided by your Mayer contact:
🔗 https://sitesurvey.mayersolar.com/yourcompany
(Replace “yourcompany” with your organization’s assigned name in the URL.)
2. Enter Customer Information
Provide the customer’s name and installation address exactly as listed on the signed agreement or proposal.
3. Select Installation Type
Choose whether the system is Roof Mount or Ground Mount.
This determines design parameters and racking specifications.
4. Complete Electrical Panel Information
Fill out all questions and upload required photos:
Panel location (outside, garage, or inside)
Surrounding area (2–3 wide shots)
Inside breakers (cover open)
Main panel label (inside door)
Main breaker (cover on)
Utility meter (close-up and pulled back)
Also indicate if the home has a sub panel, generator, or existing system
5. Fill Out Solrite Information
Mark Yes or No depending on whether this is a Solrite deal. This directs the project to the correct internal workflow.
6. Complete Home Information
Upload photos showing all sides of the home:
Front, back, left, and right sides
Front mail number or address
Clear photo of the utility bill
Also note whether there’s an HOA, if Wi-Fi is available, and add any extra comments relevant to the installation.
7. Submit the Form
After reviewing all entries and uploads, scroll to the bottom and click the Submit button.
Notes
Only submit one form per project.
Missing or unclear photos can delay design and permitting.
If you encounter issues accessing your link, contact your Mayer representative for support.
Main Panel Upgrade
A Main Panel Upgrade (MPU) may be required when a home’s existing electrical panel isn’t capable of supporting the additional load from a solar system or battery. Identifying a potential MPU early helps prevent delays during design, permitting, or installation.
⚡ What Is an MPU?
An MPU involves replacing or upgrading the home’s main electrical service panel — typically increasing its amperage capacity (for example, from 100A to 200A) or updating outdated components to meet code and safety requirements.
This ensures the solar system can safely integrate with the home’s electrical infrastructure.
What to Look Out For
Check the following during the site survey or walkthrough:
Panel Amperage Rating – Panels rated at 100 amps or lower often require an upgrade.
No Main Breaker Present – If the main panel doesn’t have a visible main disconnect breaker, an MPU is typically required.
Panel Location – Panels located in closets, bedrooms, or interior spaces usually need to be relocated to an exterior, code-compliant location.
Full or Overcrowded Panel – If there are no available breaker spaces, or double-tapped breakers, the system may not have room for solar backfeed.
Age and Condition – Panels showing rust, corrosion, obsolete brands (e.g., Zinsco, Federal Pacific), or non-grounded wiring often warrant replacement.
Example Scenario
The existing panel is a 100A main panel with no main breaker and no open breaker spaces.
👉 This setup would require a 200A Main Panel Upgrade (MPU) before proceeding with installation.
Next Steps
If you identify potential MPU conditions:
Document the panel with clear photos in your site survey form (full panel view, main breaker label, and bus rating).
Note “Possible MPU” in the comments section.
Mayer’s engineering team will confirm if an MPU is required during project review.
Notes
- MPU requirements can affect project pricing and timeline.
If in doubt, consult your Mayer contact before submitting the site survey.
Product Spec Sheets
Commission Calculator
The Commission Calculator allows sales reps to quickly estimate contract totals and projected commissions based on system size, adders, and pricing inputs. Use this tool before sending a proposal to ensure the deal meets your target margins.
Enter Deal Details
Switch between PPA & Loan · Auto-updates as you type
System Size (kW) – total AC or DC size used for pricing calculations
Adders Cost ($) – total dollar amount of adders (roof work, MPU, etc.)
Adders Cost (Per Watt) – adders billed on a per-watt basis
Install PPW – the installation price per watt
Redline PPW – your assigned base pricing threshold
Notes
Make sure all numbers are accurate before calculating. Even small changes in system size or adders can significantly affect the contract amount.
This calculator is for internal sales guidance only and does not replace lender-approved pricing tools.
© 2025 Mayer Solar LLC. All Rights Reserved.